GraFx Genie Smart Crop
The Full Picture
Smart Crop begins in GraFx Media and can then be utilized within GraFx Studio.
Smart Crop metadata can also be set within your external asset provider.
Steps in GraFx Studio
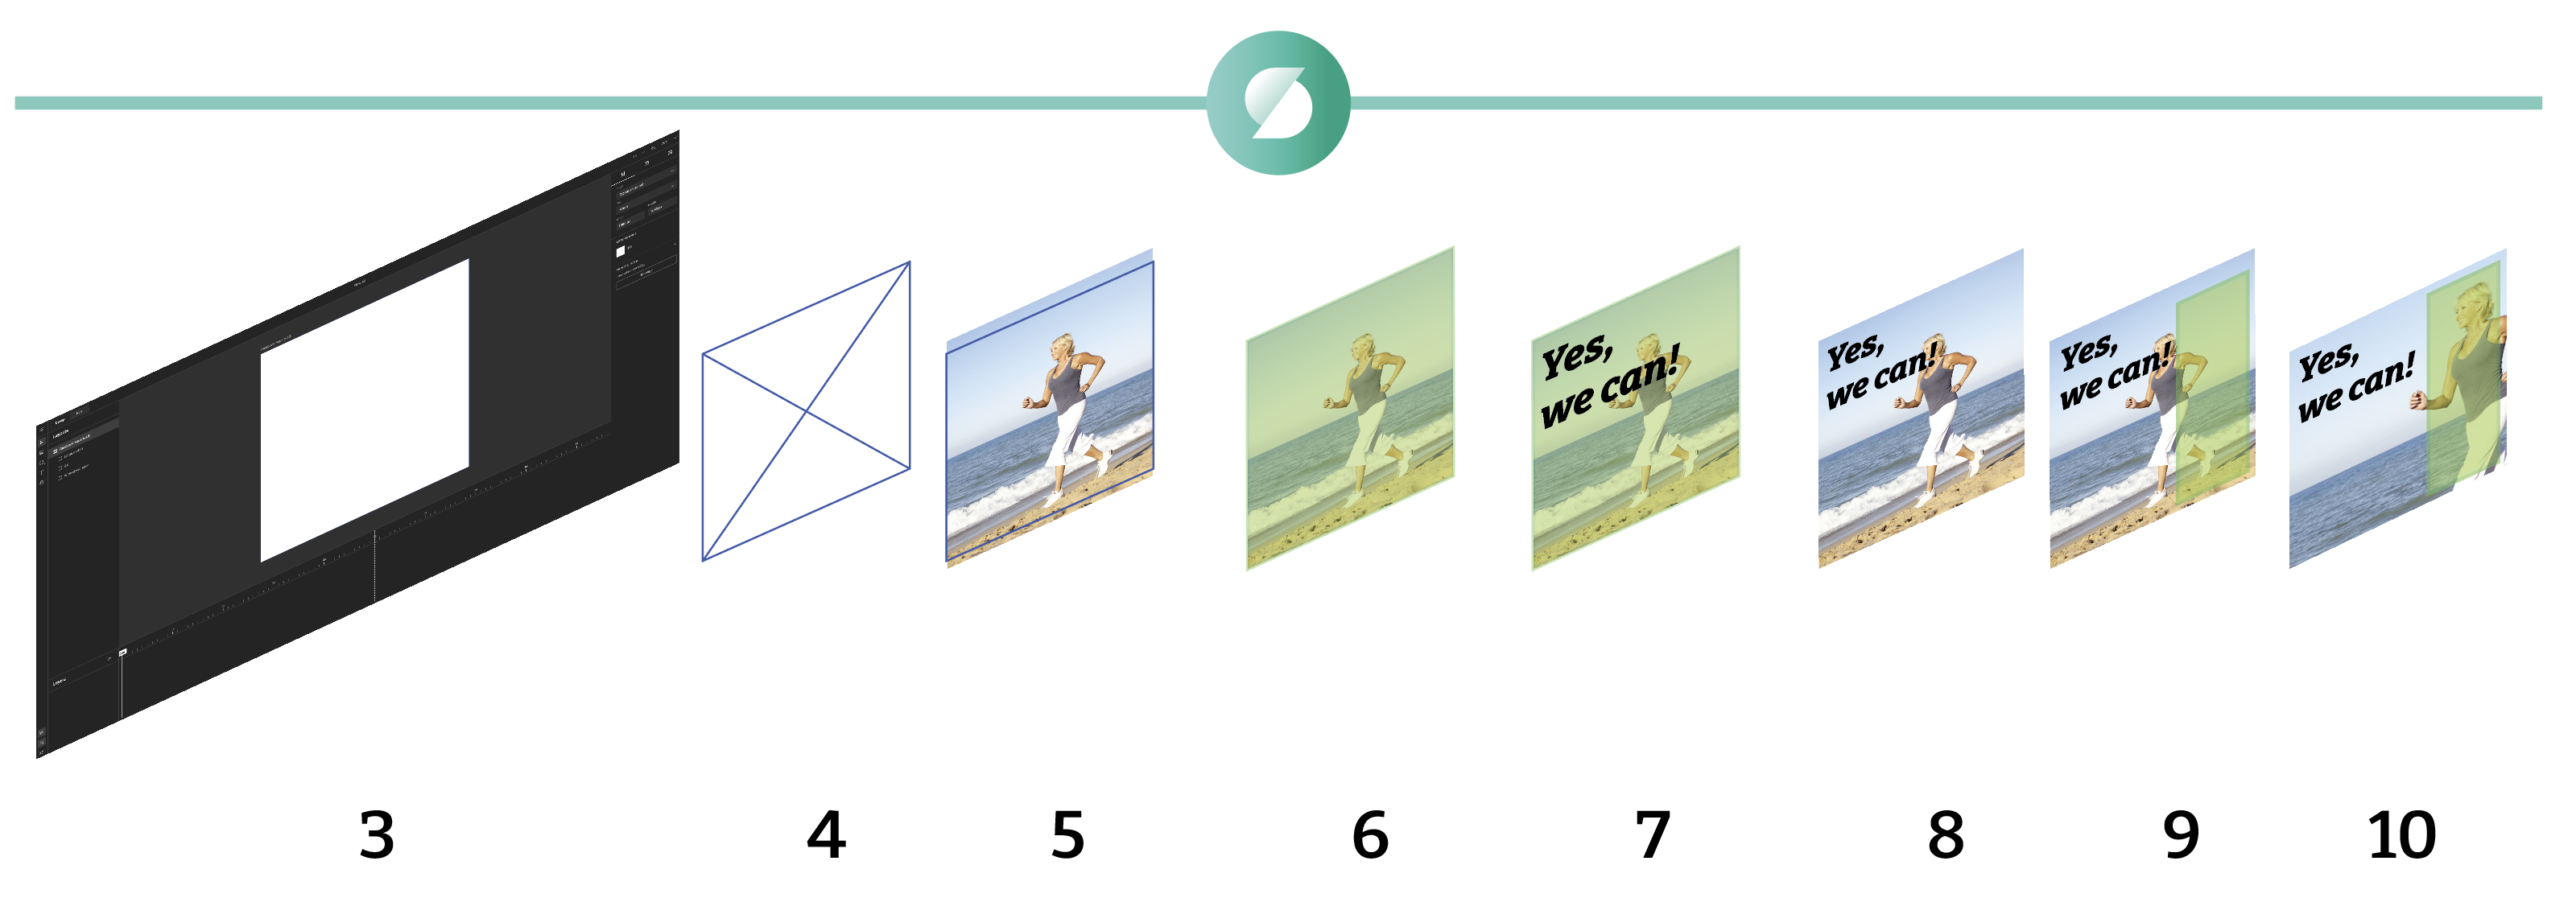
The following steps explain how Smart Crop works within GraFx Studio:
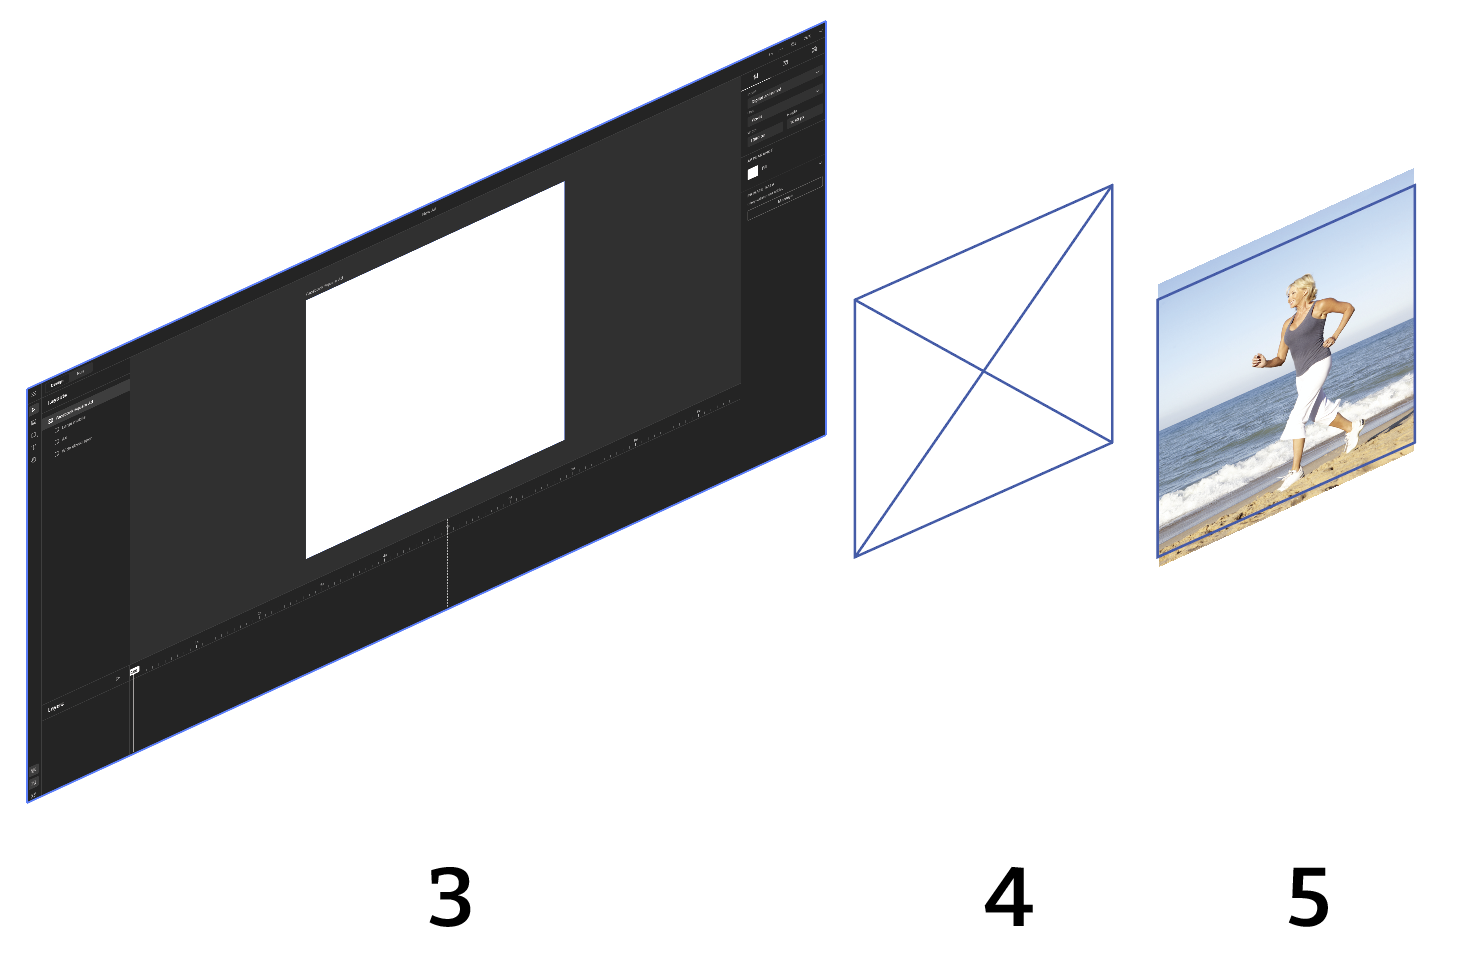
- Smart Template (3).
- Image frame in the Smart Template (4).
- The image placed into the frame (5).
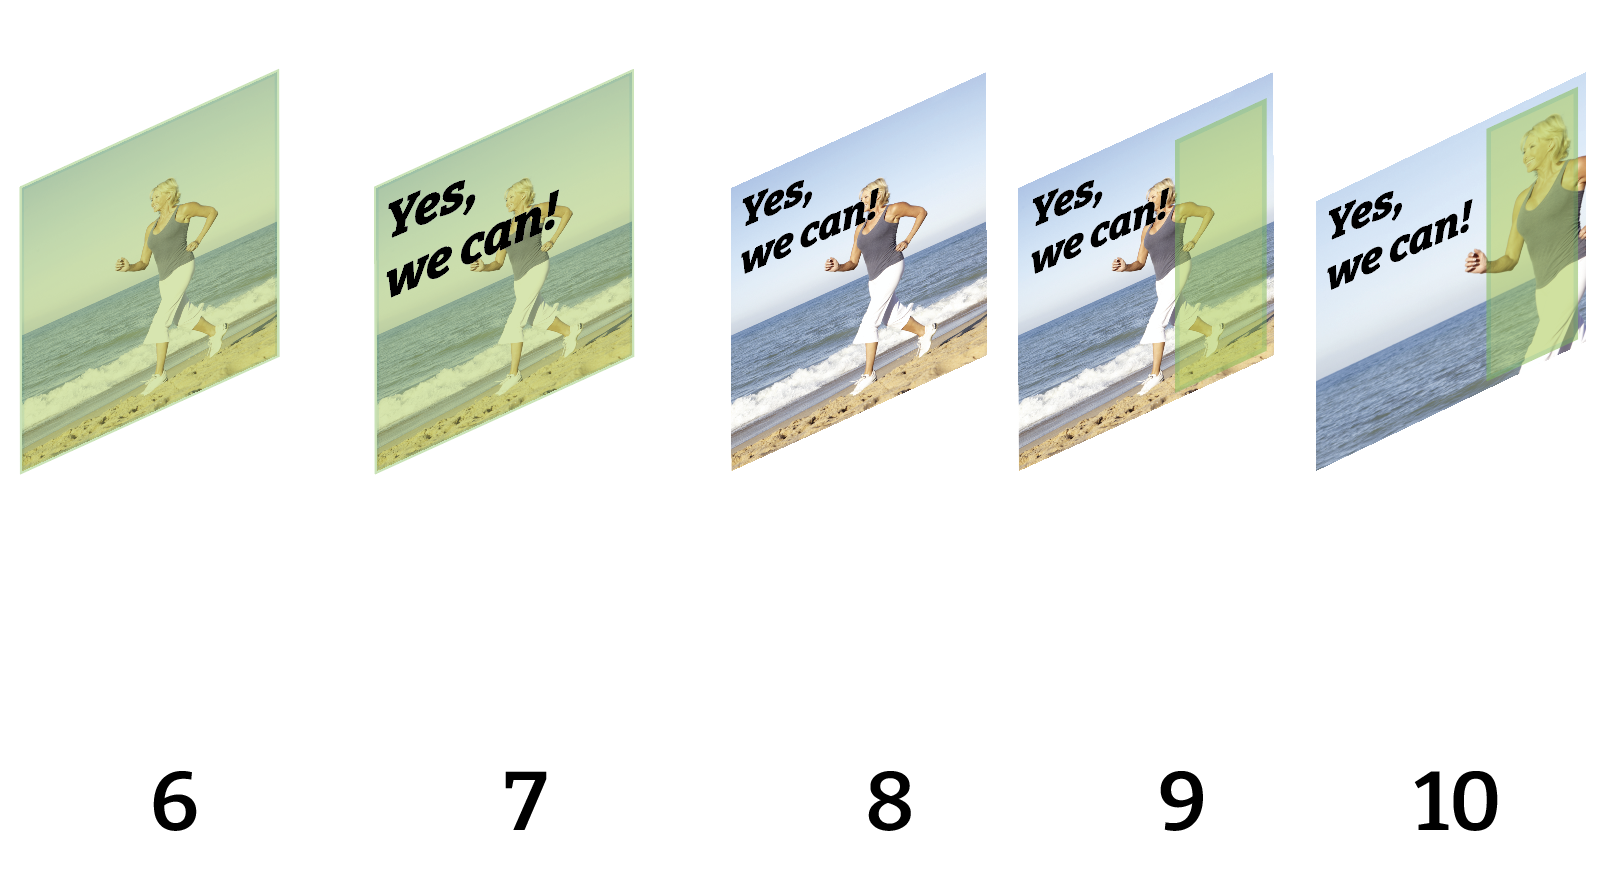
By default, the Fill mode is set to Fill. - Set the Fill property to Smart Crop. (6)
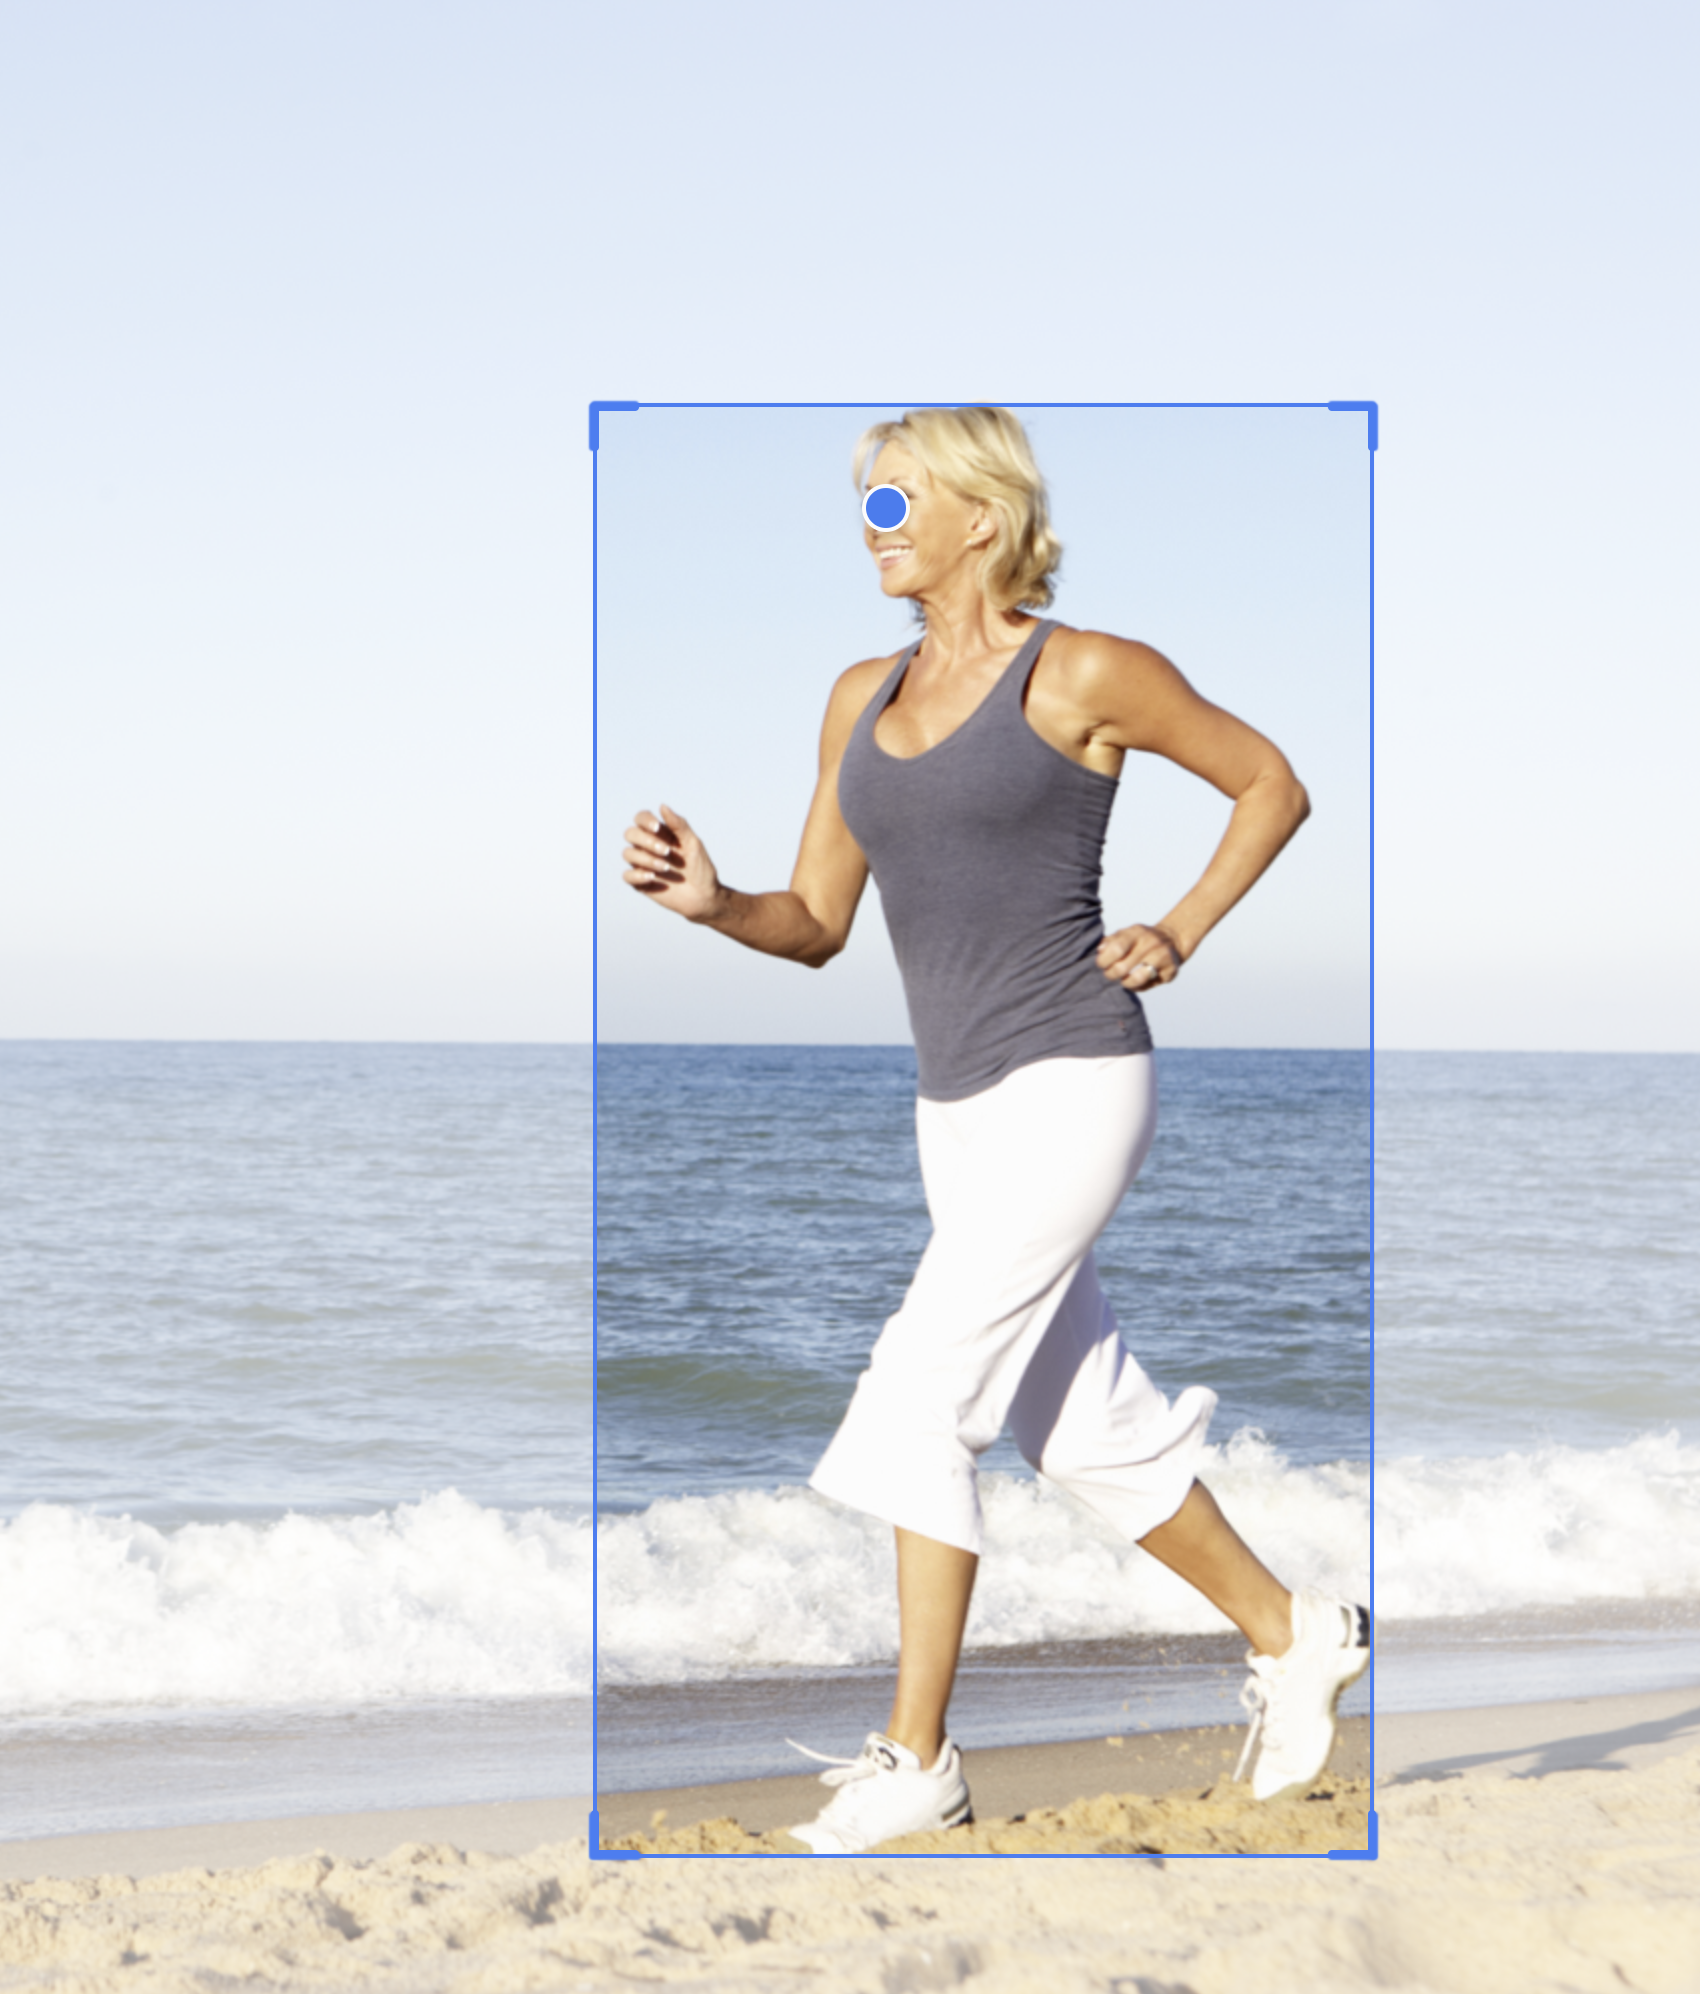
- If text or other elements overlap your image frame, you can define a specific Subject Position area. (7)
- Click Subject Position, adjust the area to indicate where the primary subject should be placed, and apply it. (9)
- The image is repositioned automatically according to Smart Crop rules, respecting the defined Subject Position. (10)
Rules of Smart Crop
Clear guidelines ensure consistent results:
- The defined Subject Area should completely fill the specified Subject Position.
- If whitespace appears, the image will scale up to fill the space automatically.
Subject types
A single asset can hold more than one Subject Area and Point of Interest, grouped under a subject type — for example person, product, or logo. Each subject type stores its own Subject Area and POI, so the same image can be cropped differently depending on the intent.
- Subject types are defined centrally on the environment. See Manage Subject Types.
- The Default type is the one detected automatically on upload and is used when no subject type is selected on an image frame.
- On an image frame with Smart Crop active, the template designer selects which subject type to apply — see Select a Subject type.
- Per-type Subject Areas and POIs are set from the media detail view — see Subject type.
Switching the Subject type dropdown on an image frame re-runs Smart Crop against the Subject Area and POI stored for that type — the frame stays the same, but what's inside it changes:
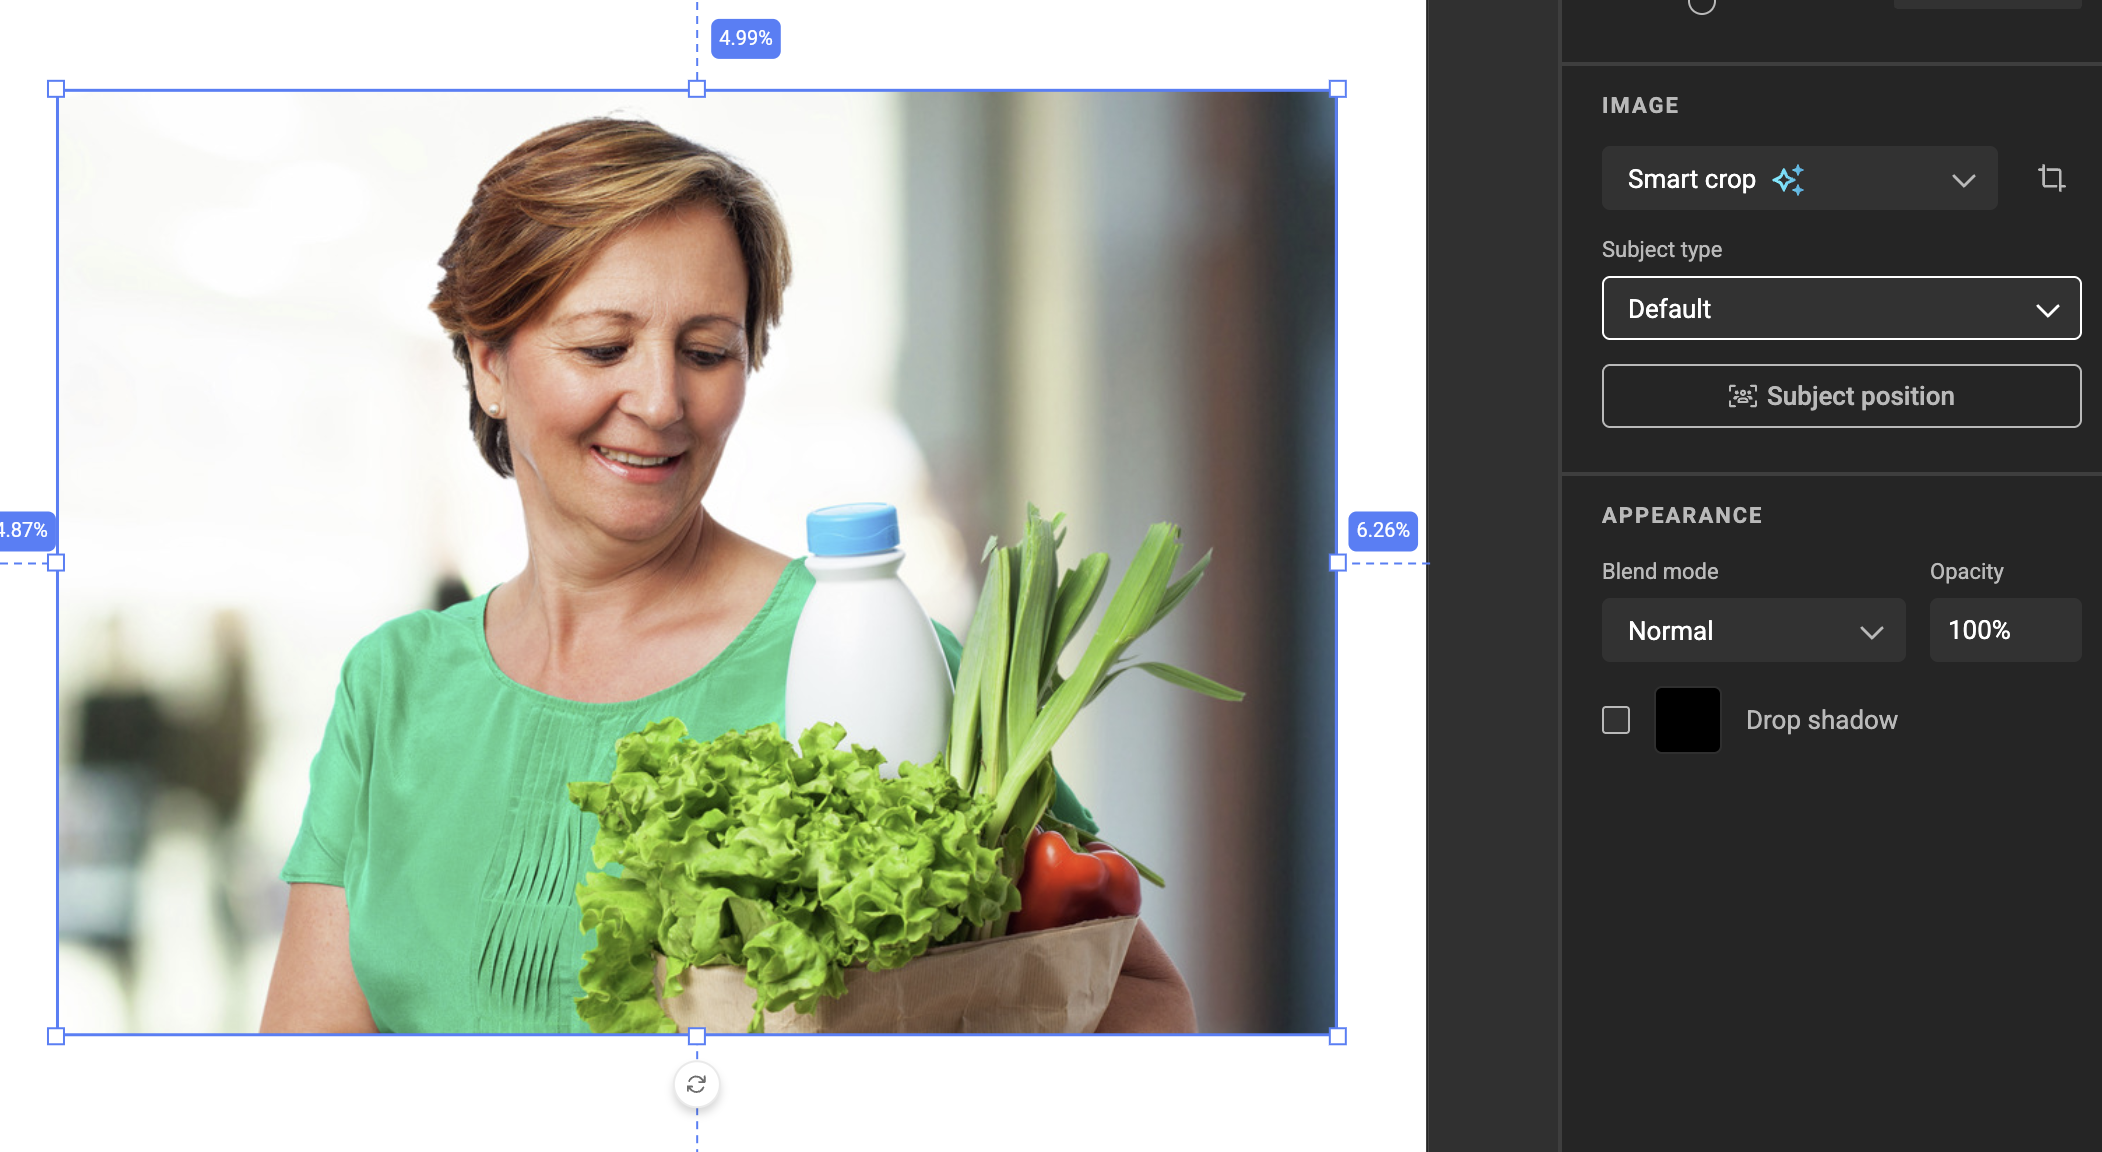
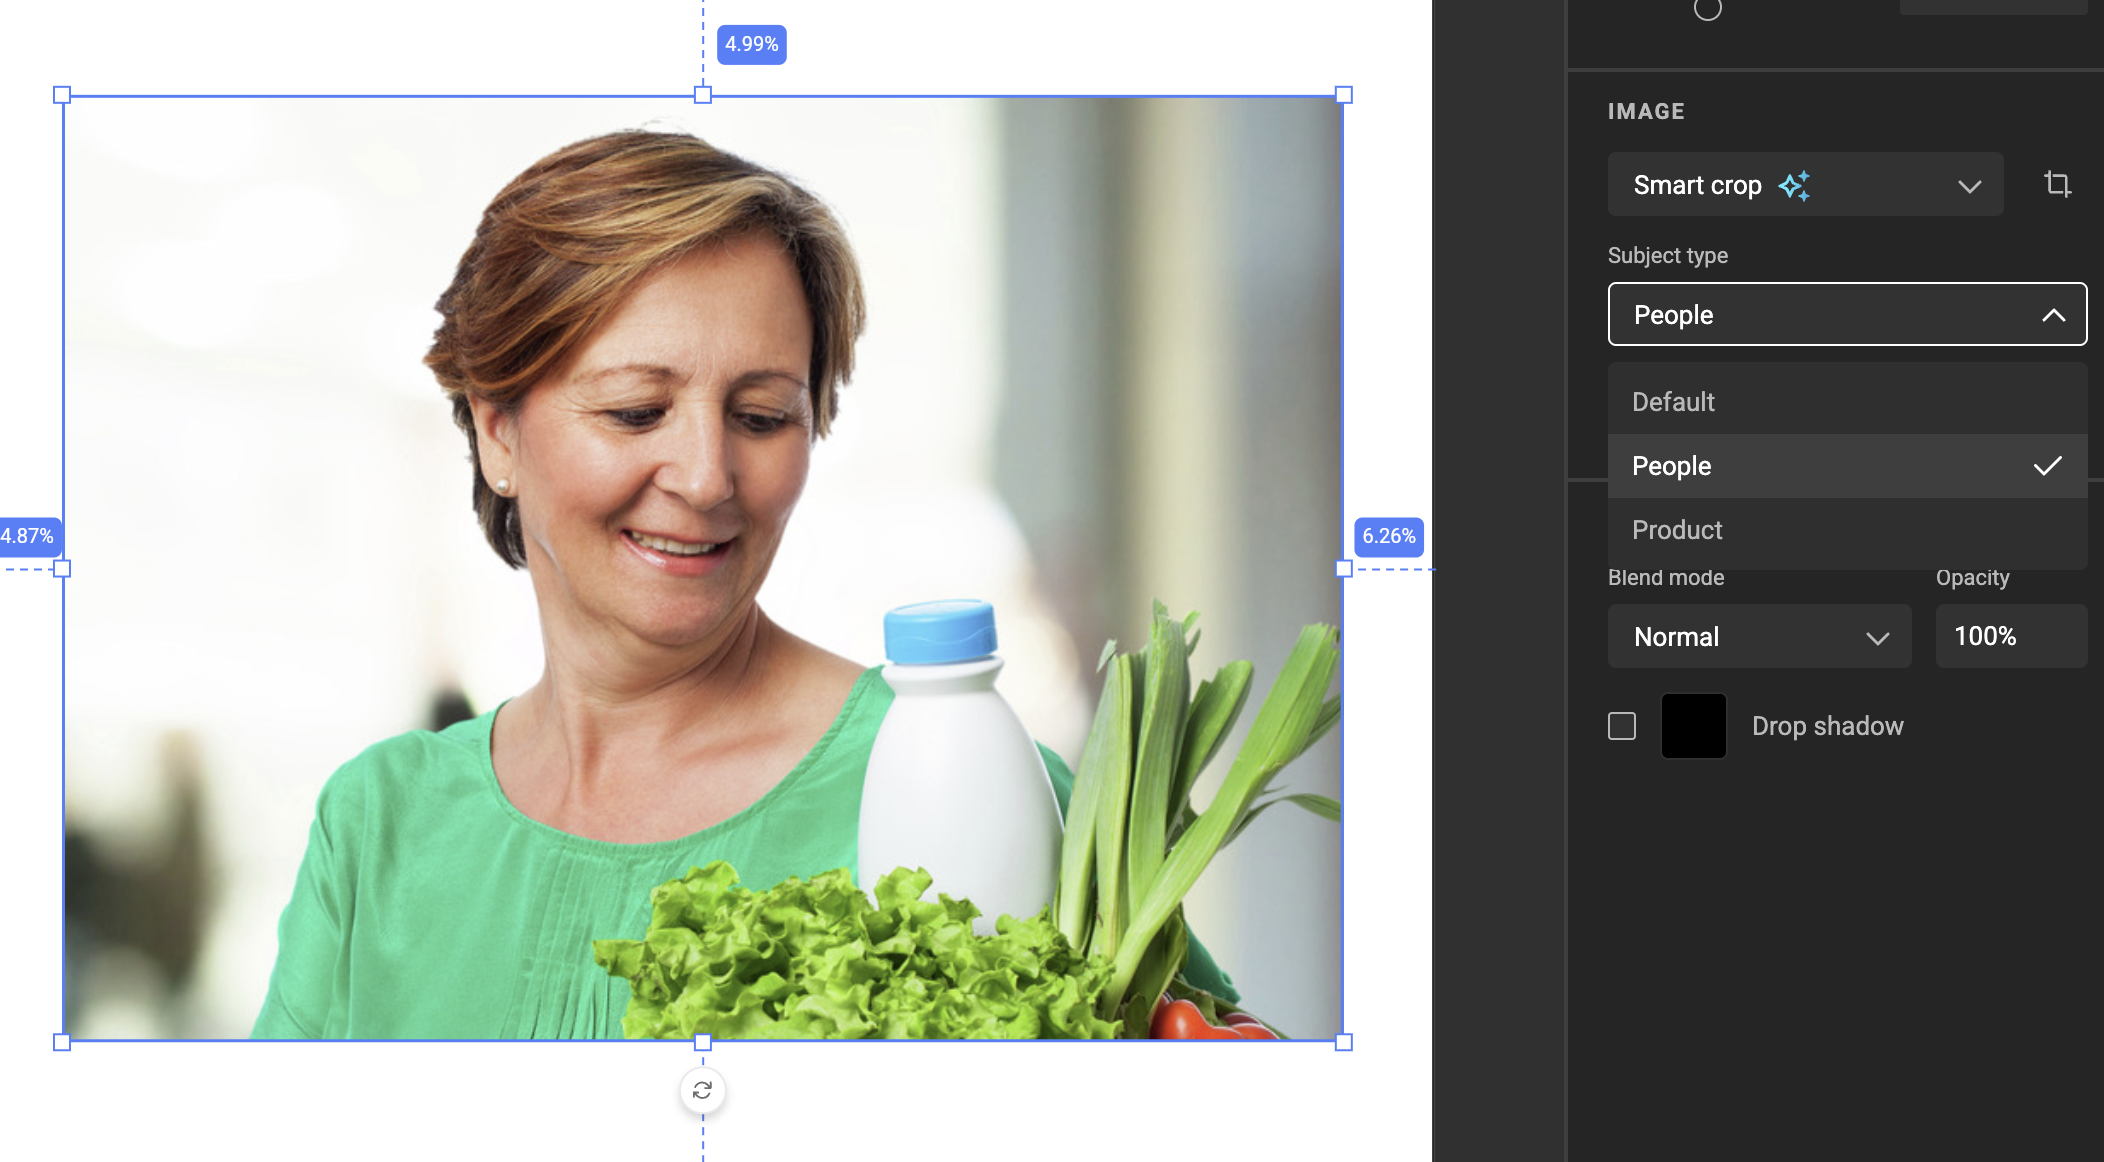
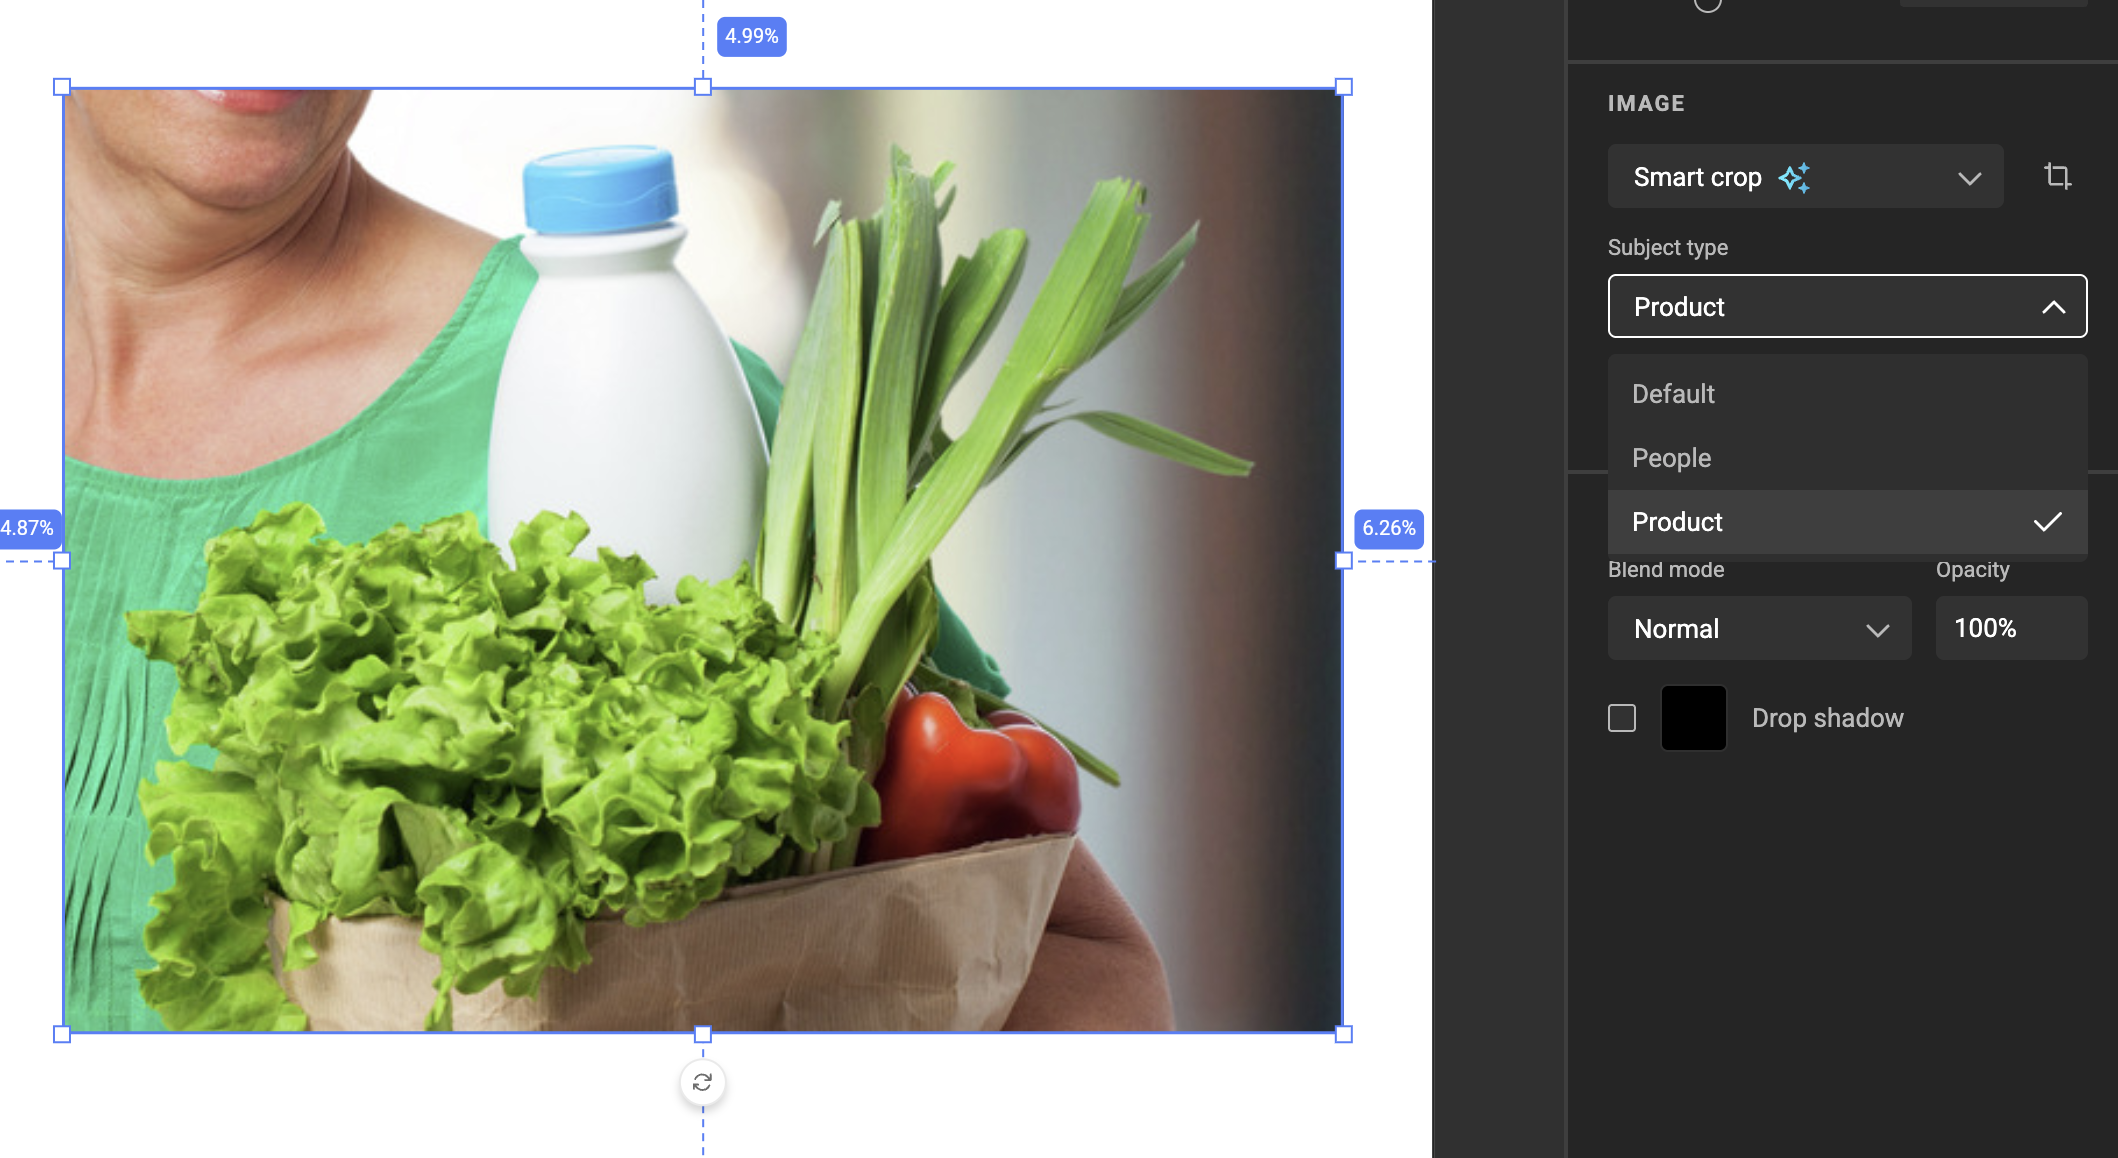
Default keeps the full scene, People centres on the person, and Product zooms in on the grocery bag — all from the same source asset and the same frame.
How to Adjust Smart Crop Results
If the automatic Smart Crop results aren't as expected, you can manually adjust the settings.
Handle with Care
Manual adjustments might produce results that differ from the original automated detection.
Adjusting the Asset
- Ensure there is sufficient space around the main subject in the original asset.
Without extra surrounding space, Smart Crop has limited room to adjust, potentially causing unwanted whitespace or scaling.
Manual Crop Override
In certain use cases—such as lifestyle imagery—automatic cropping may not deliver the desired result.
Manual Crop Override lets you fine-tune how an image appears inside a specific layout and frame.
This override is stored per image–layout–frame combination and ensures that the next time this specific image is loaded in the same layout and frame, your custom crop position is preserved.
Learn more about Manual Crop Override
Best Practices
- The Subject Area should fit closely around the primary subject.
- Place the Point of Interest exactly on the feature or individual you want to highlight, such as a person's eyes or an important object.
- Remember that metadata adjustments affect all templates using the same image.