Section 4: Working with Controllers
What is a Controller?
Controllers are the primary method of interfacing with GraFx Studio, the Studio SDK exposes multiple different controllers for you to utilize in your integration. These controllers expose certain behaviors of GraFx Studio and provide you with an easy to use interface to control these behaviors.
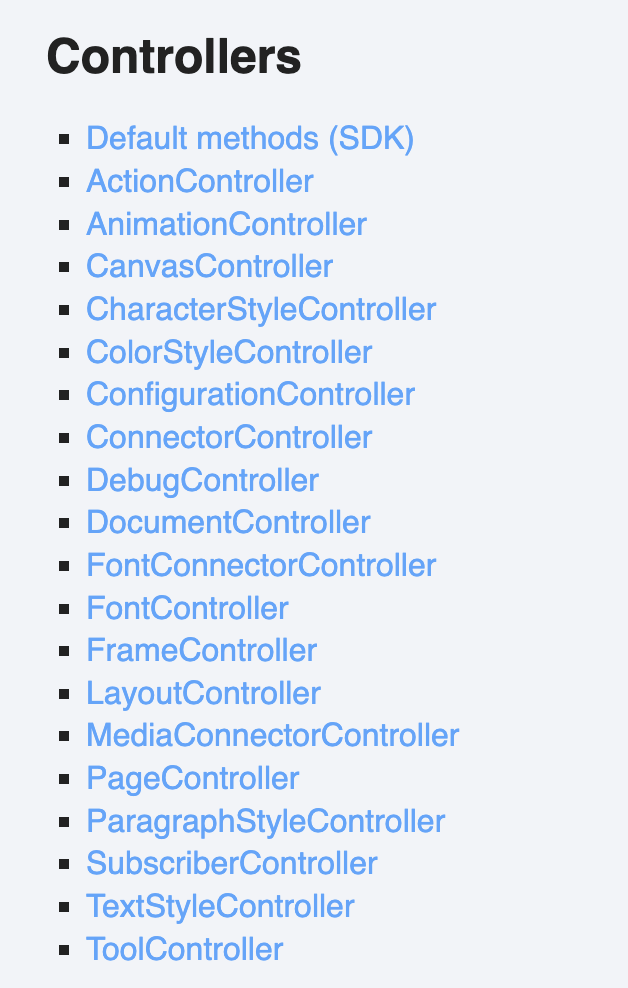
Currently there are 19 controllers in the SDK, but you see the list of them on the Studio SDK documentation here
Controllers follow a simple naming convention so normally you can determine where the functions to do something might be. This is incredibly helpful when exploring the SDK in our browsers "Developer Console" when we are on our integrations page
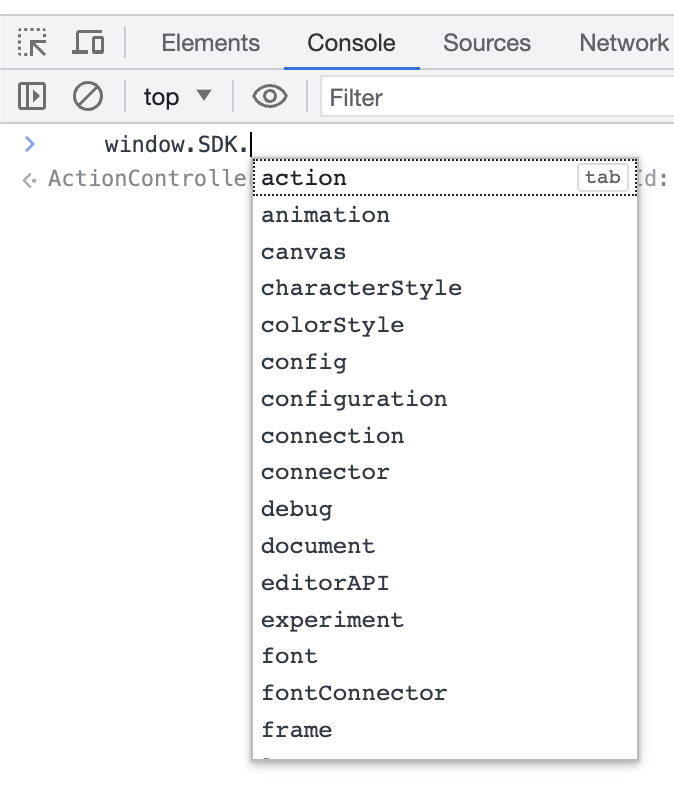
As you can see there are many options there, and normally you can assume what they might be related to. For example, if we wanted to manipulate a frame on page, chances are we could find functions for that in the FrameController which we can access by typing window.SDK.frame. and then we can see what functions are available.
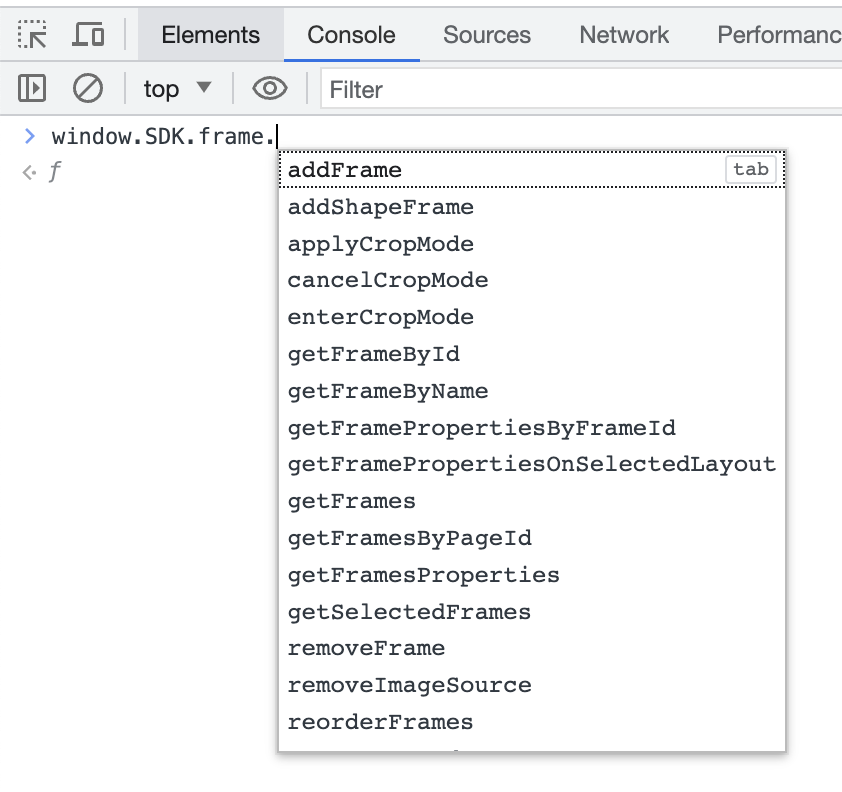
This method of exploring makes it really easy to try controllers and their functions out live in our integration and test them out. You can also read about the functions of the FrameController on the github documentation for the Studio SDK. You can find the expected parameters for each function and what the function does on our source documentation.
Now that we touched on what the Studio SDK controllers can do for you, lets start using them in our integration :D
Loading a document in to the editor
Our first controller will be the DocumentController. This is for, you guessed it, controlling the document loaded in to our Studio editor.
Getting a GraFx Studio document
The first the we need is an Studio document to load. GraFx Studio serializes documents in JSON format. You can choose many ways to store and load JSON but for this example we will simple store it in a variable in another file and import it to our integration.
There is not much to explain here, we are going to create a new file named default-doc.js in our src folder and we will just export a variable from this file. It is best to just copy the code below and paste it in to that newly created file.
default-doc.js
const defaultJSON = `{\"selectedLayoutId\":\"0\",\"sdkVersion\":\"0.133.2\",\"engineVersion\":\"0.1.1\",\"properties\":{\"type\":\"template\"},\"pages\":[{\"id\":\"0\",\"number\":0,\"frames\":[{\"id\":\"1\",\"name\":\"banner-text\",\"type\":\"text\",\"constrainProportions\":false,\"textContent\":\"{\\\"textFlow\\\":[{\\\"type\\\":\\\"paragraph\\\",\\\"textAlign\\\":\\\"center\\\"},{\\\"type\\\":\\\"span\\\"},{\\\"type\\\":\\\"text\\\",\\\"content\\\":\\\"Studio Integration Course\\\"}]}\",\"paddingLeft\":0,\"paddingTop\":0,\"paddingRight\":0,\"paddingBottom\":0,\"numberOfColumns\":1,\"columnGap\":5,\"textDirection\":\"leftToRight\",\"flowDirection\":\"horizontal\",\"verticalAlign\":\"top\",\"textStroke\":false,\"textStrokeWeight\":1,\"textStrokeColor\":0,\"hasClippingPath\":false,\"blendMode\":\"normal\"},{\"id\":\"2\",\"name\":\"image-frame\",\"type\":\"image\",\"blendMode\":\"normal\",\"constrainProportions\":false}]}],\"layouts\":[{\"id\":\"0\",\"name\":\"Default\",\"frameProperties\":[{\"id\":\"1\",\"x\":12,\"y\":9,\"width\":278,\"height\":64,\"rotationDegrees\":0,\"rotationOriginY\":0,\"scaleX\":1,\"scaleY\":1,\"included\":true,\"fitMode\":\"fill\",\"type\":\"top\",\"minCopyfitting\":0.1,\"maxCopyfitting\":10,\"enableCopyfitting\":true},{\"id\":\"2\",\"x\":42.25,\"y\":101,\"width\":215.5,\"height\":129,\"rotationDegrees\":0,\"rotationOriginY\":0,\"scaleX\":1,\"scaleY\":1,\"included\":true,\"fitMode\":\"fill\",\"type\":\"top\",\"minCopyfitting\":0.1,\"maxCopyfitting\":10,\"enableCopyfitting\":false}],\"width\":300,\"height\":250,\"childLayouts\":[],\"type\":\"top\",\"frameAnimations\":[{\"id\":\"1\",\"from\":0,\"to\":5000,\"basicAnimations\":{}},{\"id\":\"2\",\"from\":0,\"to\":5000,\"basicAnimations\":{}}],\"timelineLengthMs\":5000,\"animated\":true}],\"stylekit\":{\"colors\":[],\"characterStyles\":[],\"paragraphStyles\":[],\"fonts\":[]},\"variables\":[],\"connectors\":[{\"id\":\"grafx-media\",\"source\":\"local\",\"url\":\"grafx-media.json\",\"options\":{},\"mappings\":[]},{\"id\":\"grafx-font\",\"source\":\"local\",\"url\":\"grafx-font.json\",\"options\":{},\"mappings\":[]}],\"actions\":[]}`

export { defaultJSON }
Now in back in our index.js we can import this document JSON by adding an import statement at the top of the file with our other import.
Creating a load() function
Let's create a function that will take some JSON and load it in to the editor. This will be our first async function since under the hood, we are actually sending a message for the editor to do something, and the editor will response to us with a promise that it will do it, we will wait for that promise to actually happen using the await keyword.
async function loadDocument(docJSON) {
  if (docJSON) {
    await window.SDK.document.load(docJSON);
  } else {
    await window.SDK.document.load("{}");
  }
}
You can see we have an if statement in our function to check if we actually provided the function with document JSON or not. If the function is not called with document JSON provided, it will simply load an empty document in the else case.
We can now call this function at the bottom of our initEditor() function, but remember that since our loadDocument function is asynchronous, we will need to await it in our initEditor() function which means that we also need to make it asynchronous (only asynchronous functions can use await). To do this we just need to make a couple small modifications to our function.
async function initEditor() {
  const token = await generateToken();
  const environmentAPI = `<BASEURL>/grafx/api/v1/environment/<ENVIRONMENT>/`

  if (token == null) {
    throw new Error("Token is null or undefined");
  }

  const SDK = new StudioSDK({
    editorId: "studio-editor"
  });

  SDK.loadEditor();
  window.SDK = SDK;

  SDK.configuration.setValue(WellKnownConfigurationKeys.GraFxStudioAuthToken, token);
  SDK.configuration.setValue(WellKnownConfigurationKeys.GraFxStudioEnvironmentApiUrl, environmentAPI);

  await loadDocument(defaultJSON);
}
We are simply adding async in front of our function and then awaiting the loadDocument function that we supply with the default document JSON we imported.
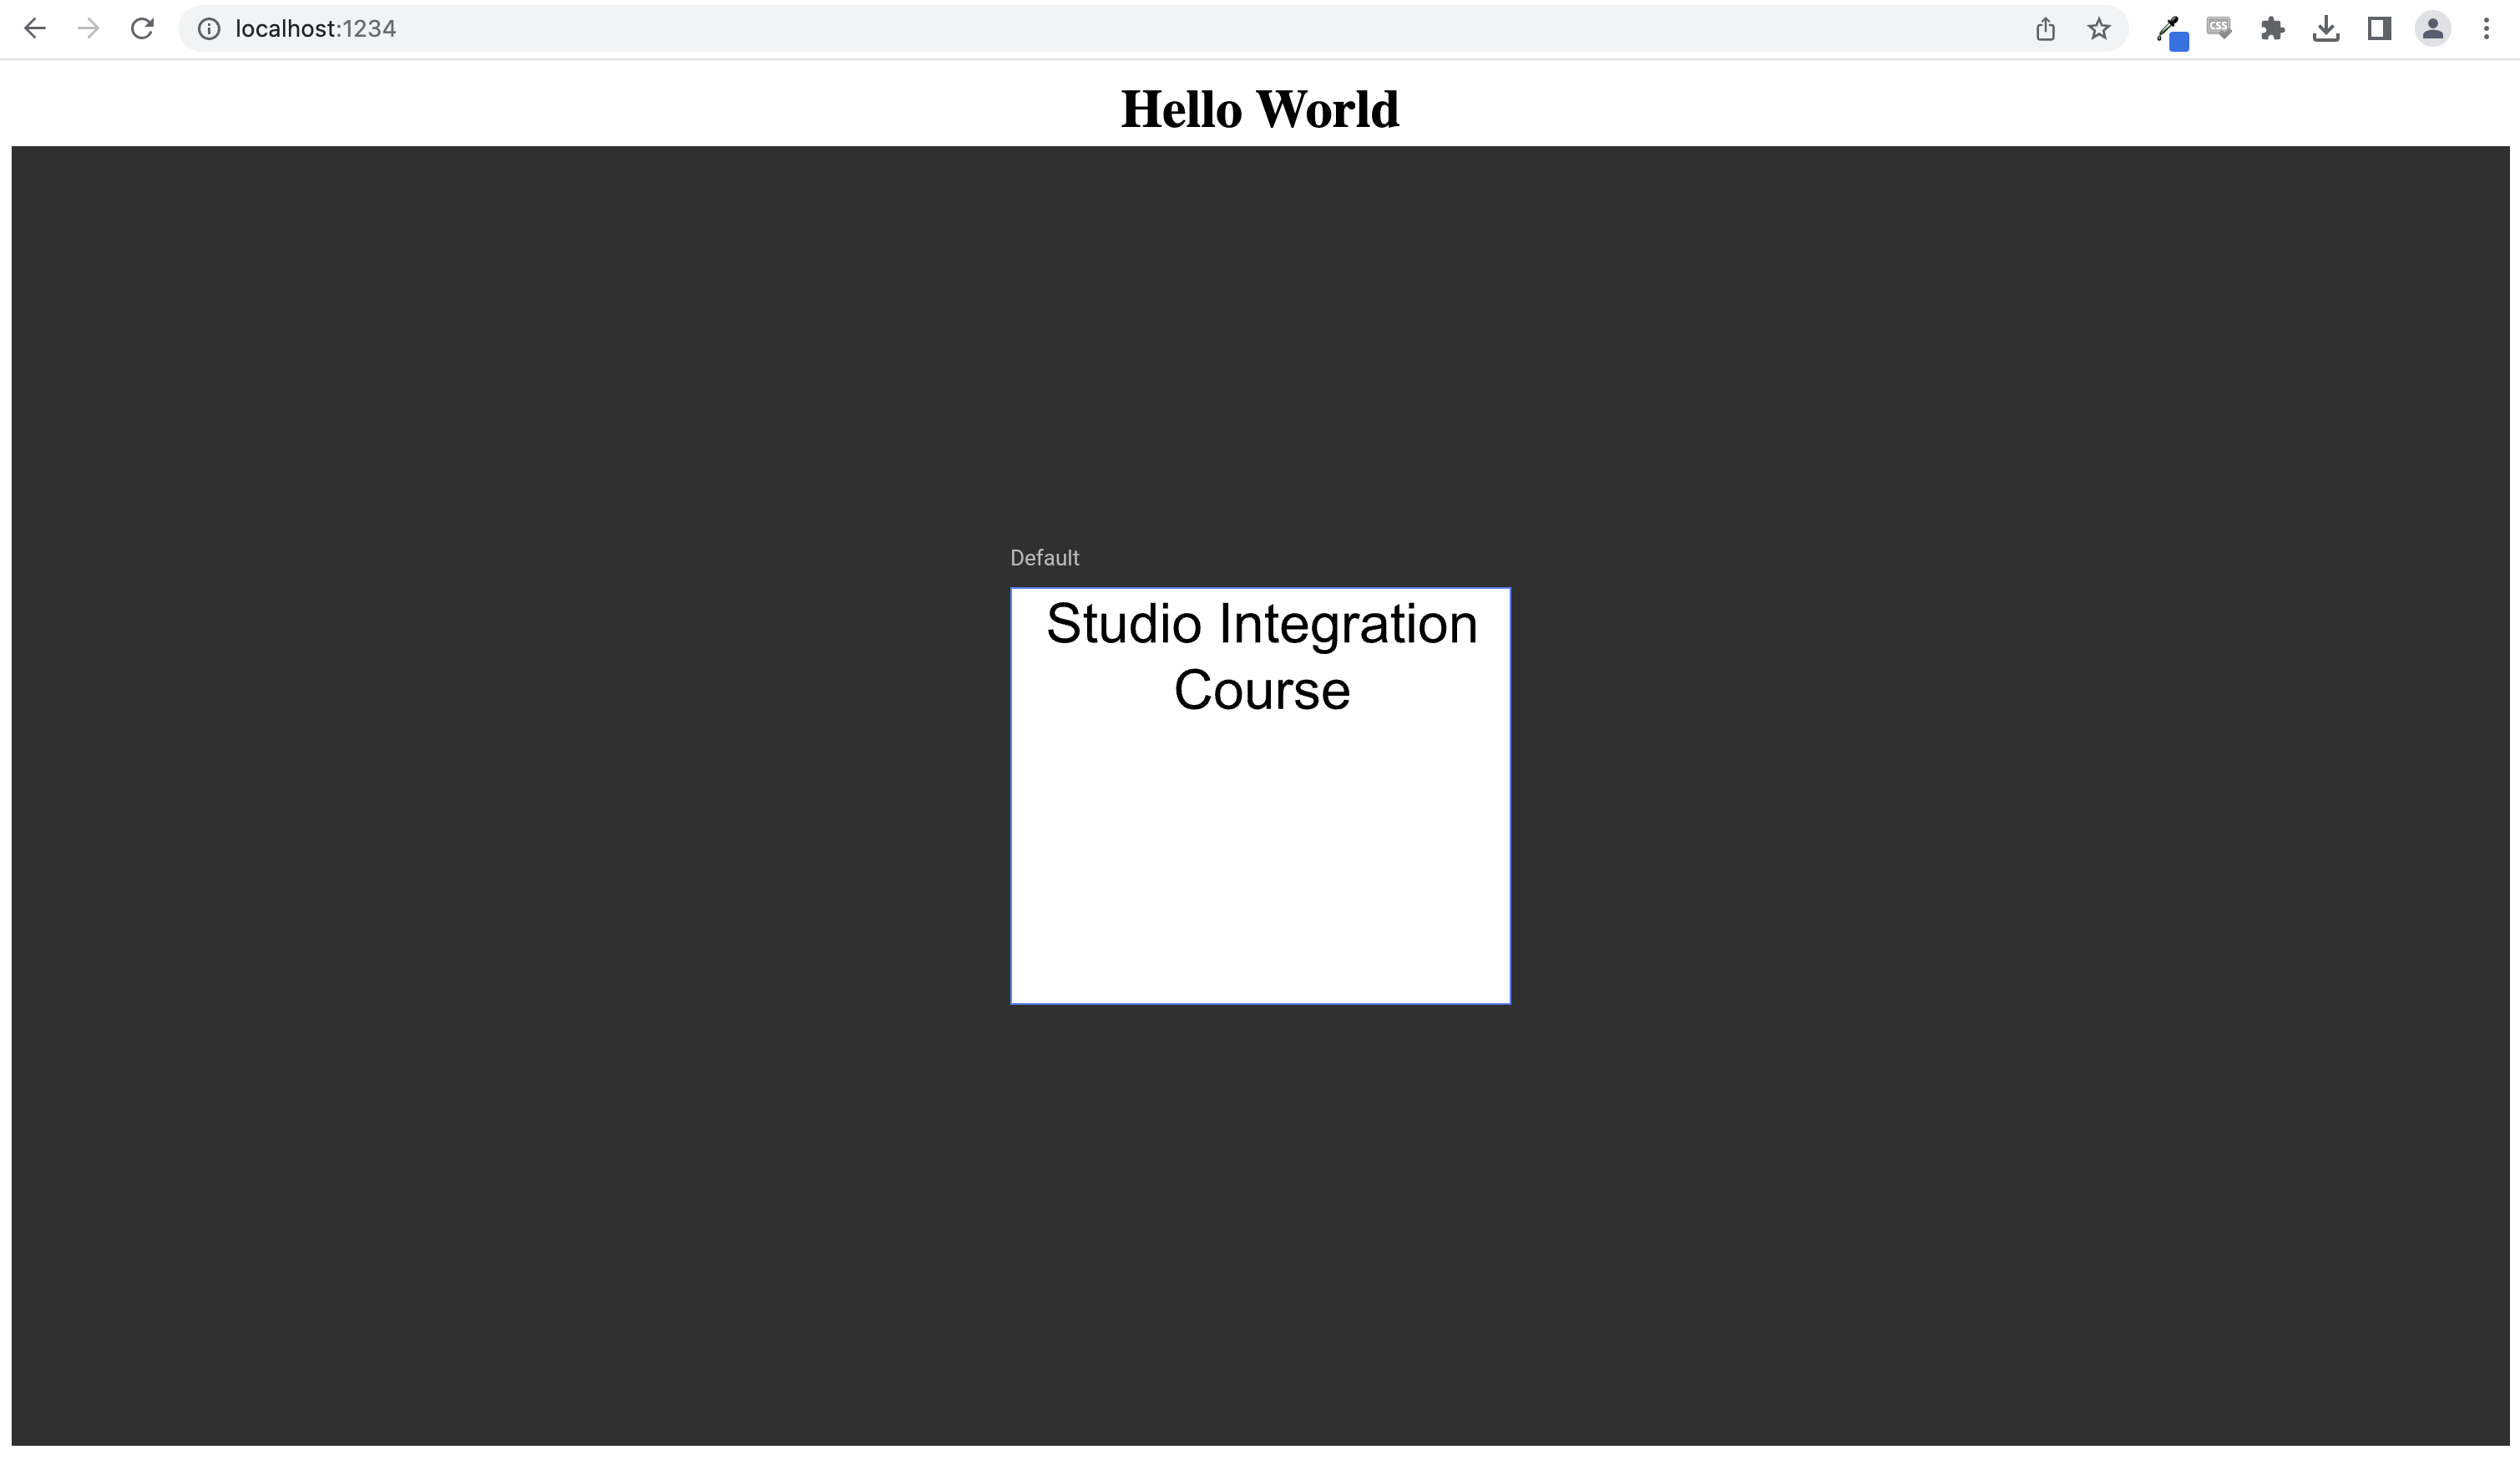
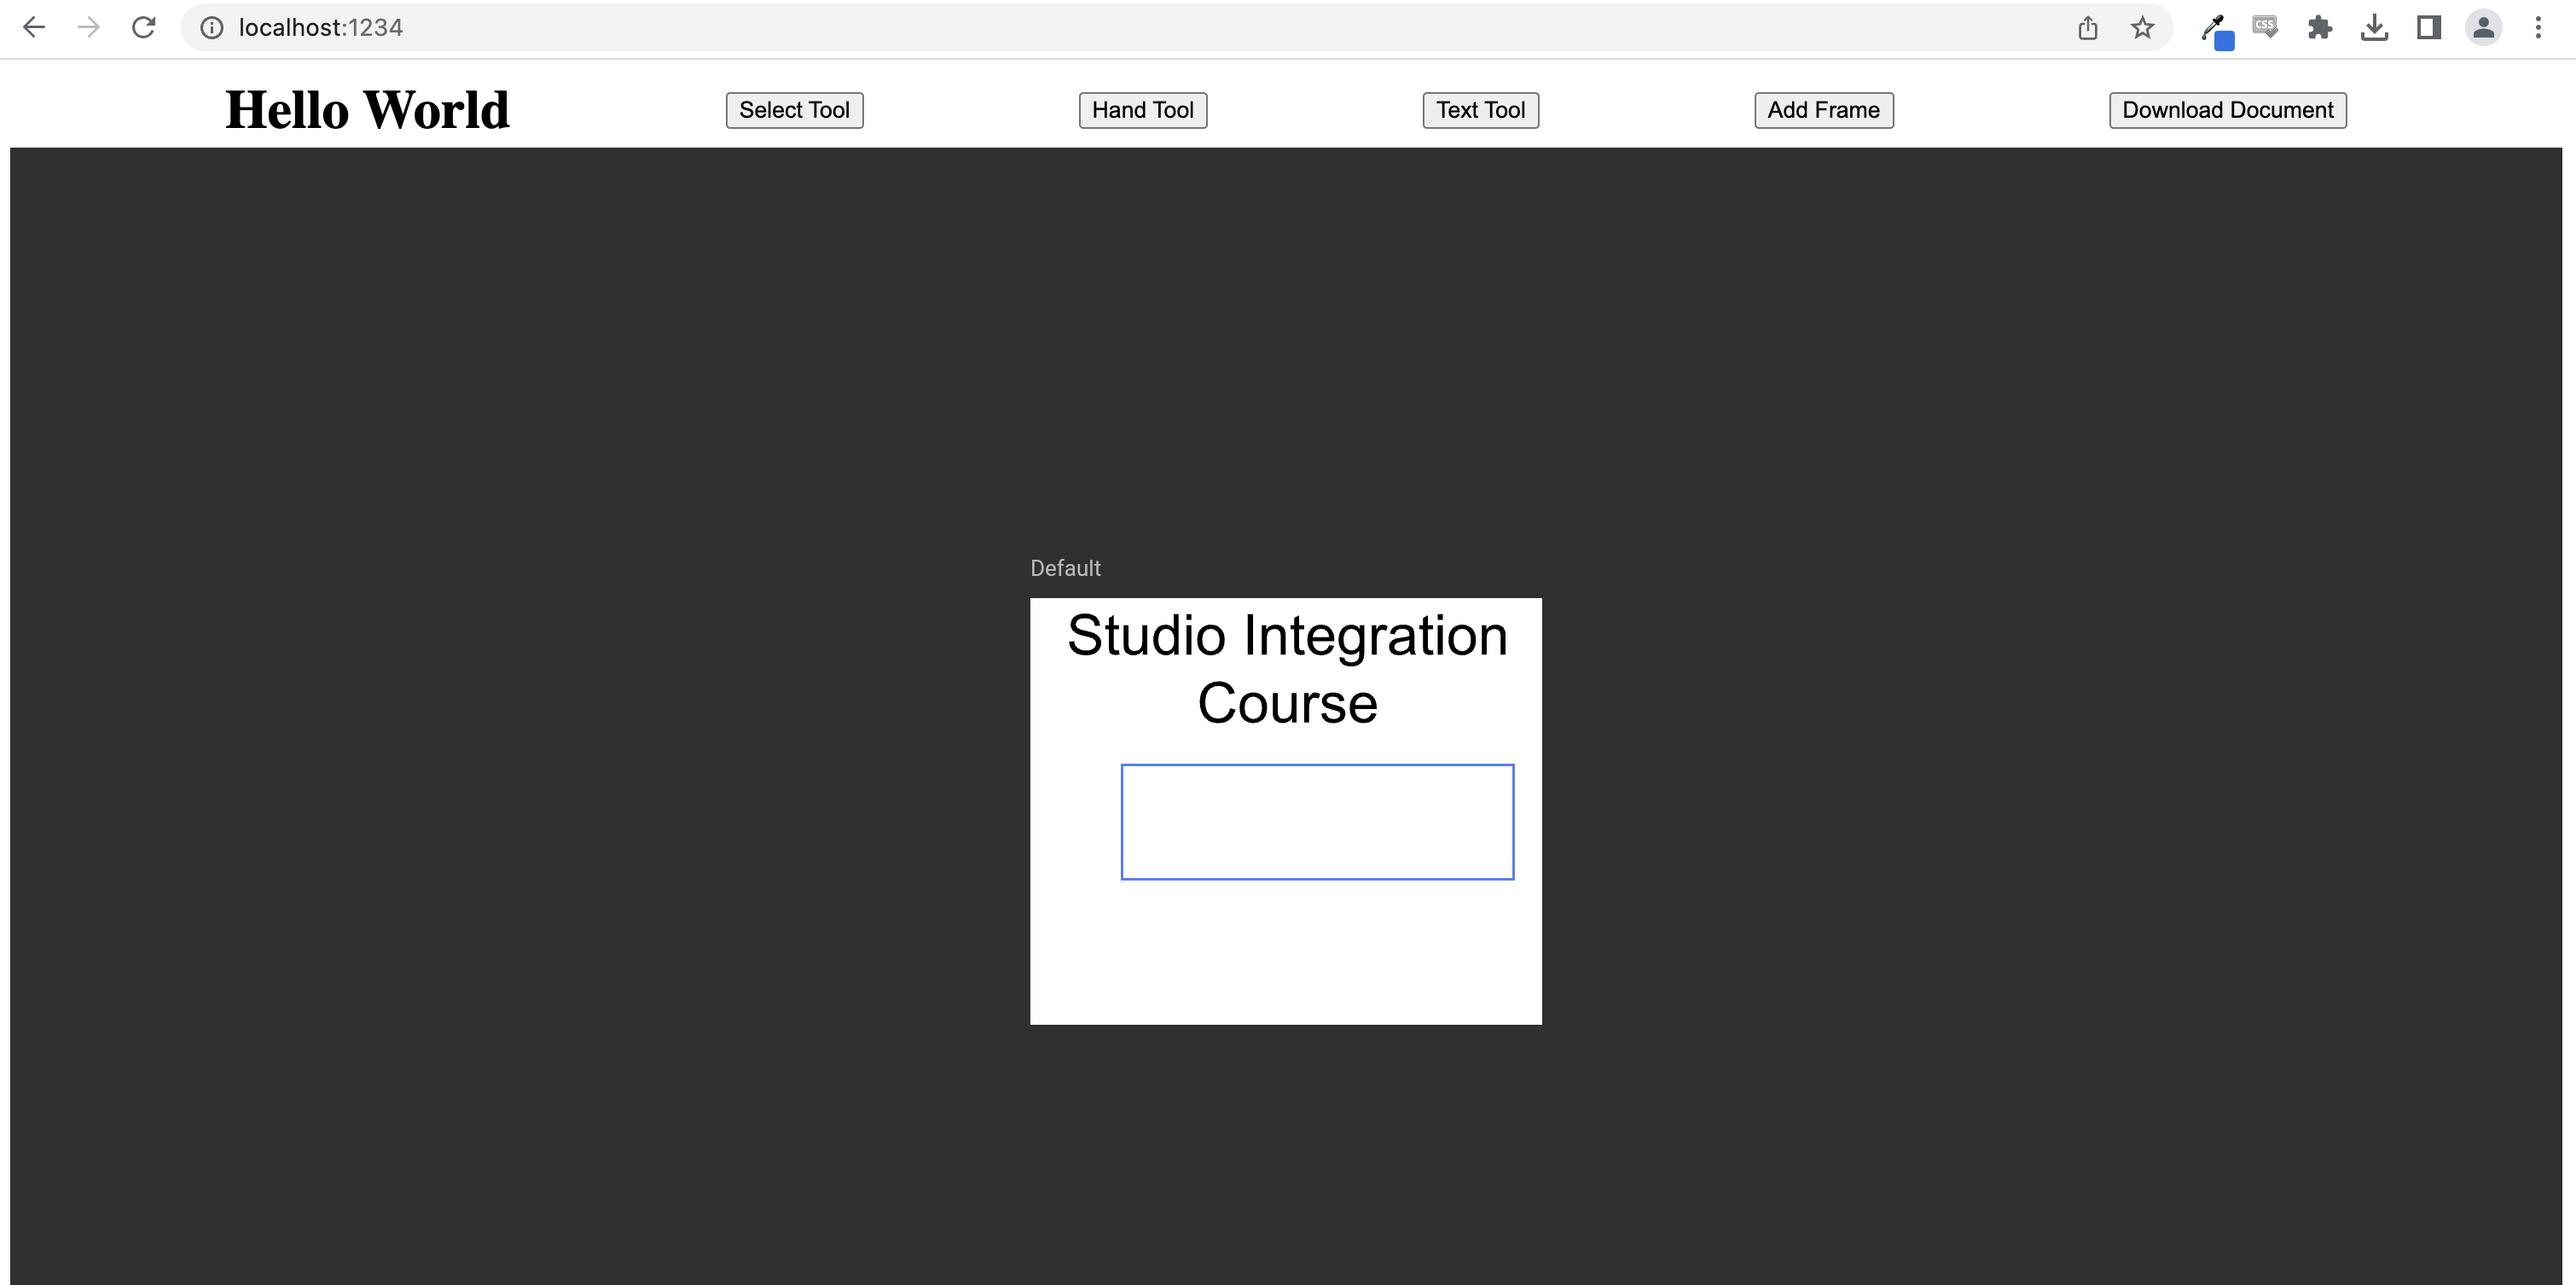
Now with the server running our integration page should look something like this
For now, we can safely ignore the "running" message until we hookup the media connector.
Extracting the template JSON from the editor
After the studio session is done, we probably want to get the underlying document JSON to save to our database or persist somewhere else. For this course we are going to create a "Download Template" button. Creating this download button will require some more advanced JavaScript. We will first add a hidden <a> element to our index.html. This is the element we will use to attach the document data to so we can download it.
Right below the editor <div> we can add this element
<div style="height: 90vh" id="studio-editor"></div>
<a id="downloadAnchor" style="display:hidden"></a>
Next let's create out button to trigger the JavaScript we will create. We will do this under the <h1> header we created earlier.
Finally, we need the JavaScript to actually power this function! Lets switch back over to our index.js file and add some logic.
The primary function will be to actually extract the document JSON from the DocumentController. For that we will create an async function named getDocumentJSON() that will returned the stringified (so we can easily store it) version of the JSON for the document currently in the editor.
async function getDocumentJSON() {
  const documentJSON = (await SDK.document.getCurrentState()).data
  return JSON.stringify(documentJSON)
}
Then we will create out actual download() function that will do some JavaScript magic to create a file for our document JSON and attach it to the <a> element we made earlier and then actually click the hidden element to download the file. This is a neat trick in JavaScript you can do to download a file with JavaScript but it isn't important to know for this course so you can just copy and paste the code. Your integration will probably send the JSON to your own endpoint or save the template to a GraFx environment.
window.downloadDocument = async function() {
  const documentJSON = await getDocumentJSON();
  const documentData = "data:text/json;charset=utf-8," + encodeURIComponent(documentJSON);
  const downloadAnchor = document.getElementById('downloadAnchor');
  downloadAnchor.setAttribute("href", documentData);
  downloadAnchor.setAttribute("download", "document.json");
  downloadAnchor.click();
}
Hopefully your integration will now have a "Download Document" button that downloads the document JSON when you click it!
Adding a frame
Next let's add button that creates a text frame.
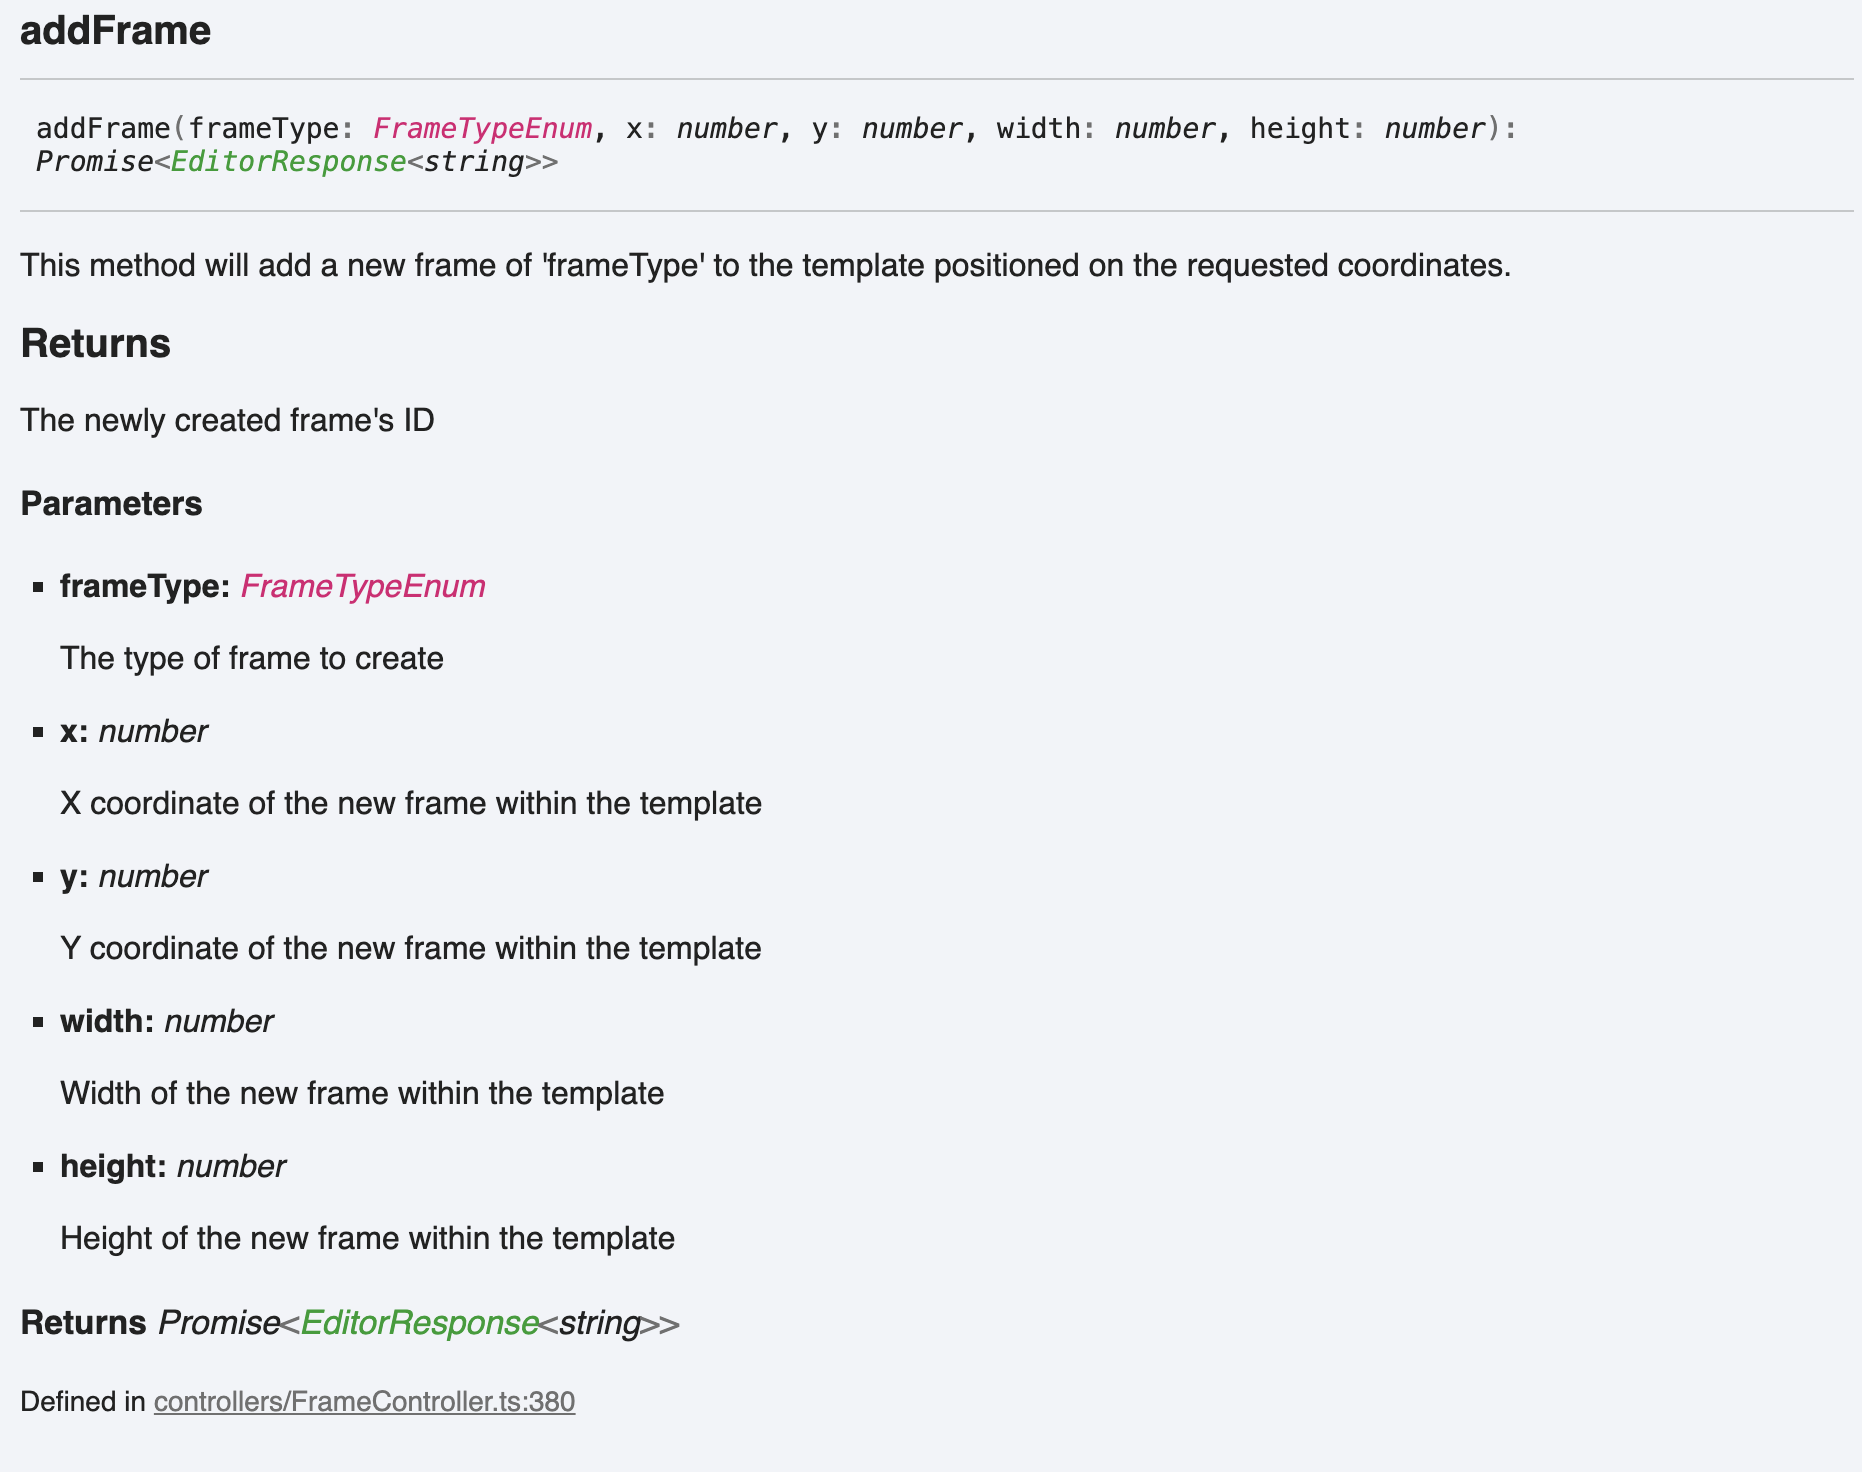
To do this we can look at the Studio SDK documentation and find under our FrameController the addFrame() method.
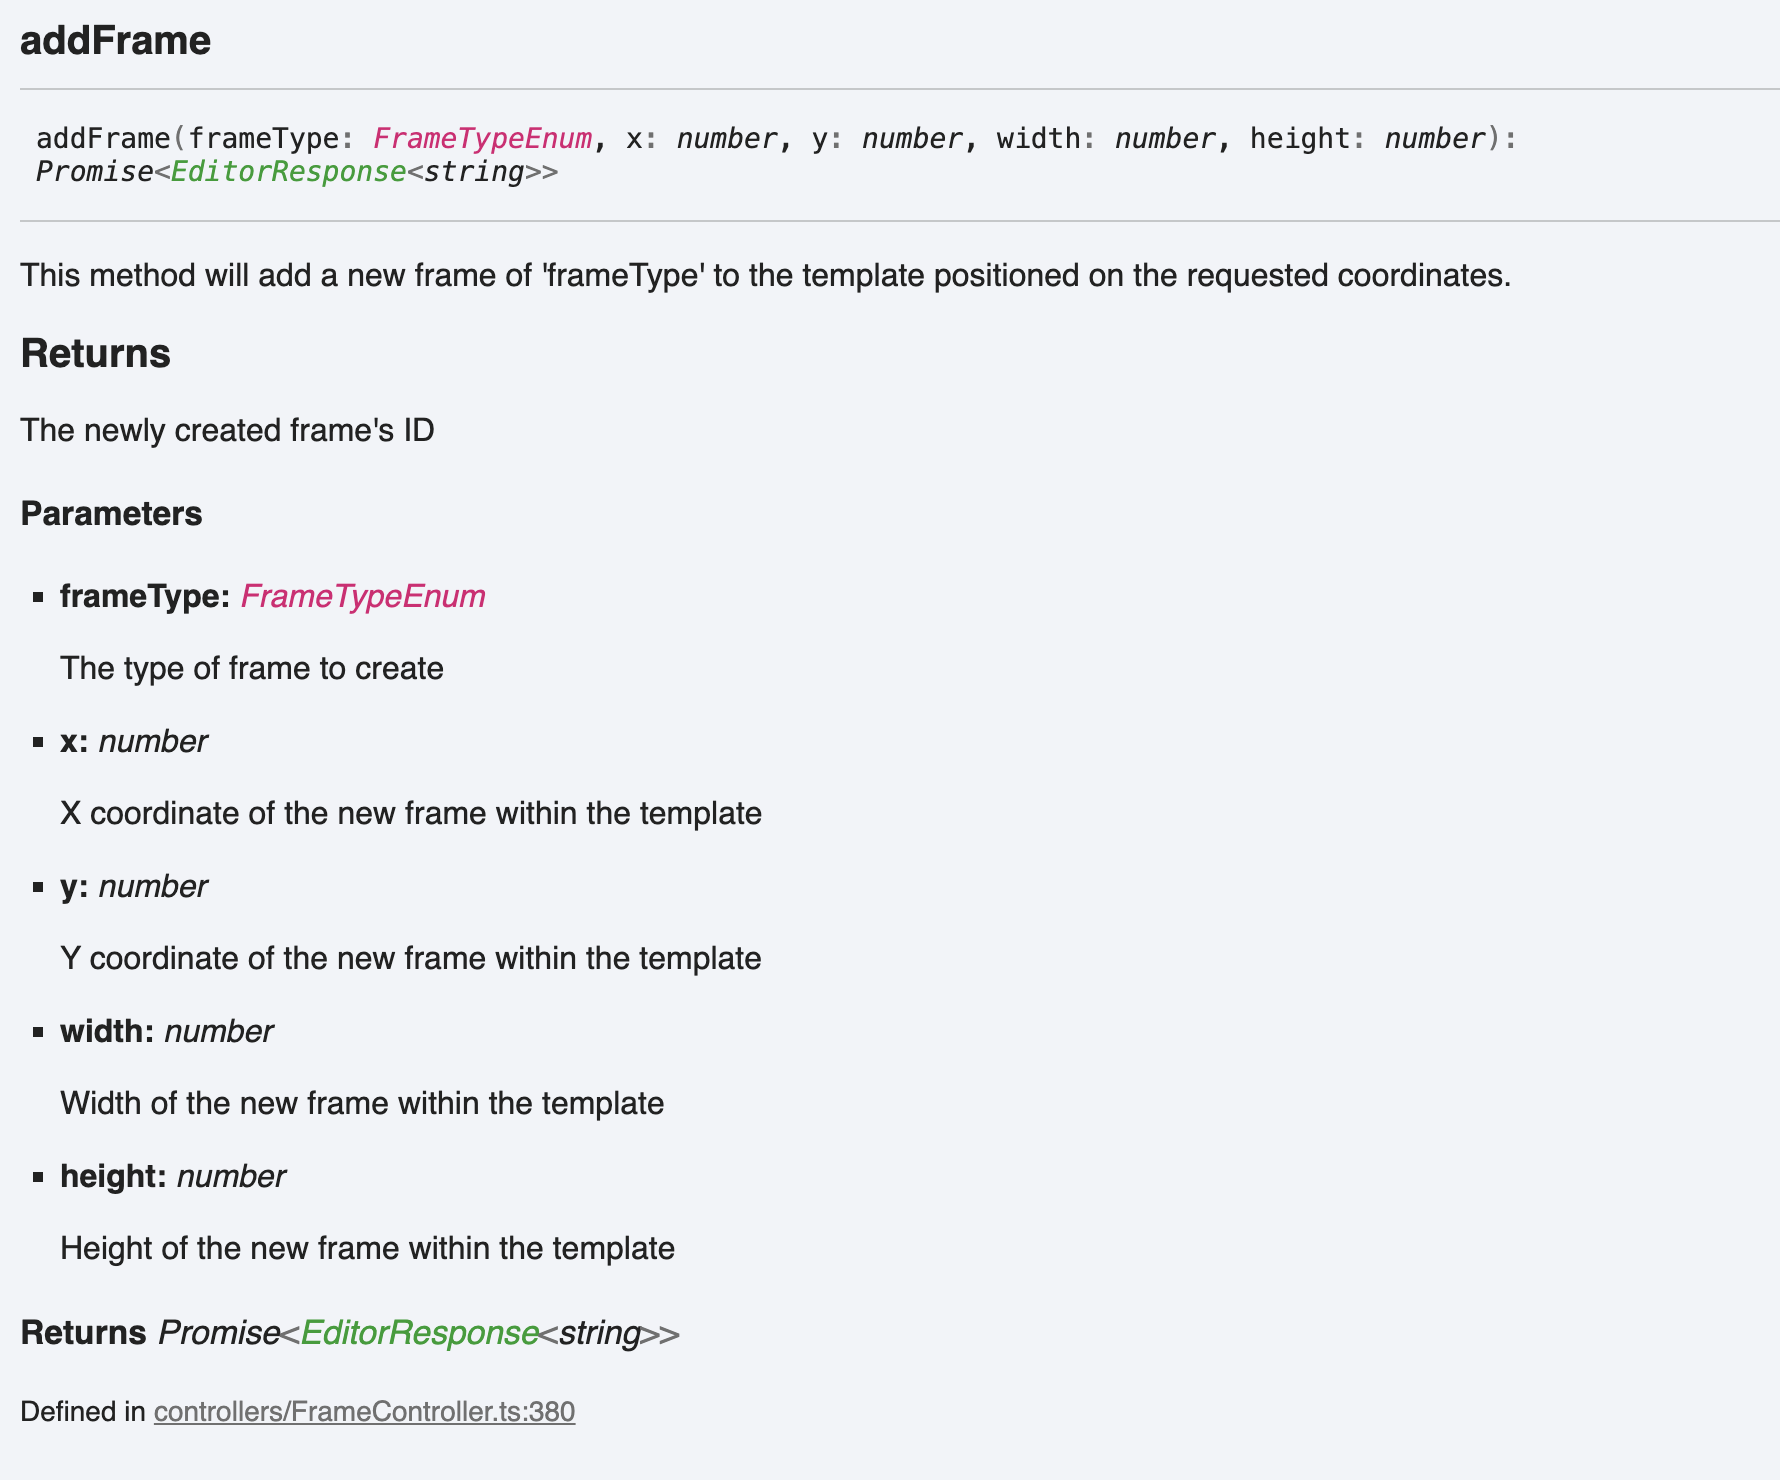
This takes a FrameTypeEnum but as you can see clicking FrameTypeEnum in the documentation will let you know what valid types are part of that Enum. Add the moment there are "text", "shape" and "image" frame enum types.
Let's create a simple function that creates a 100x100 text frame at the position x:10 y:10.
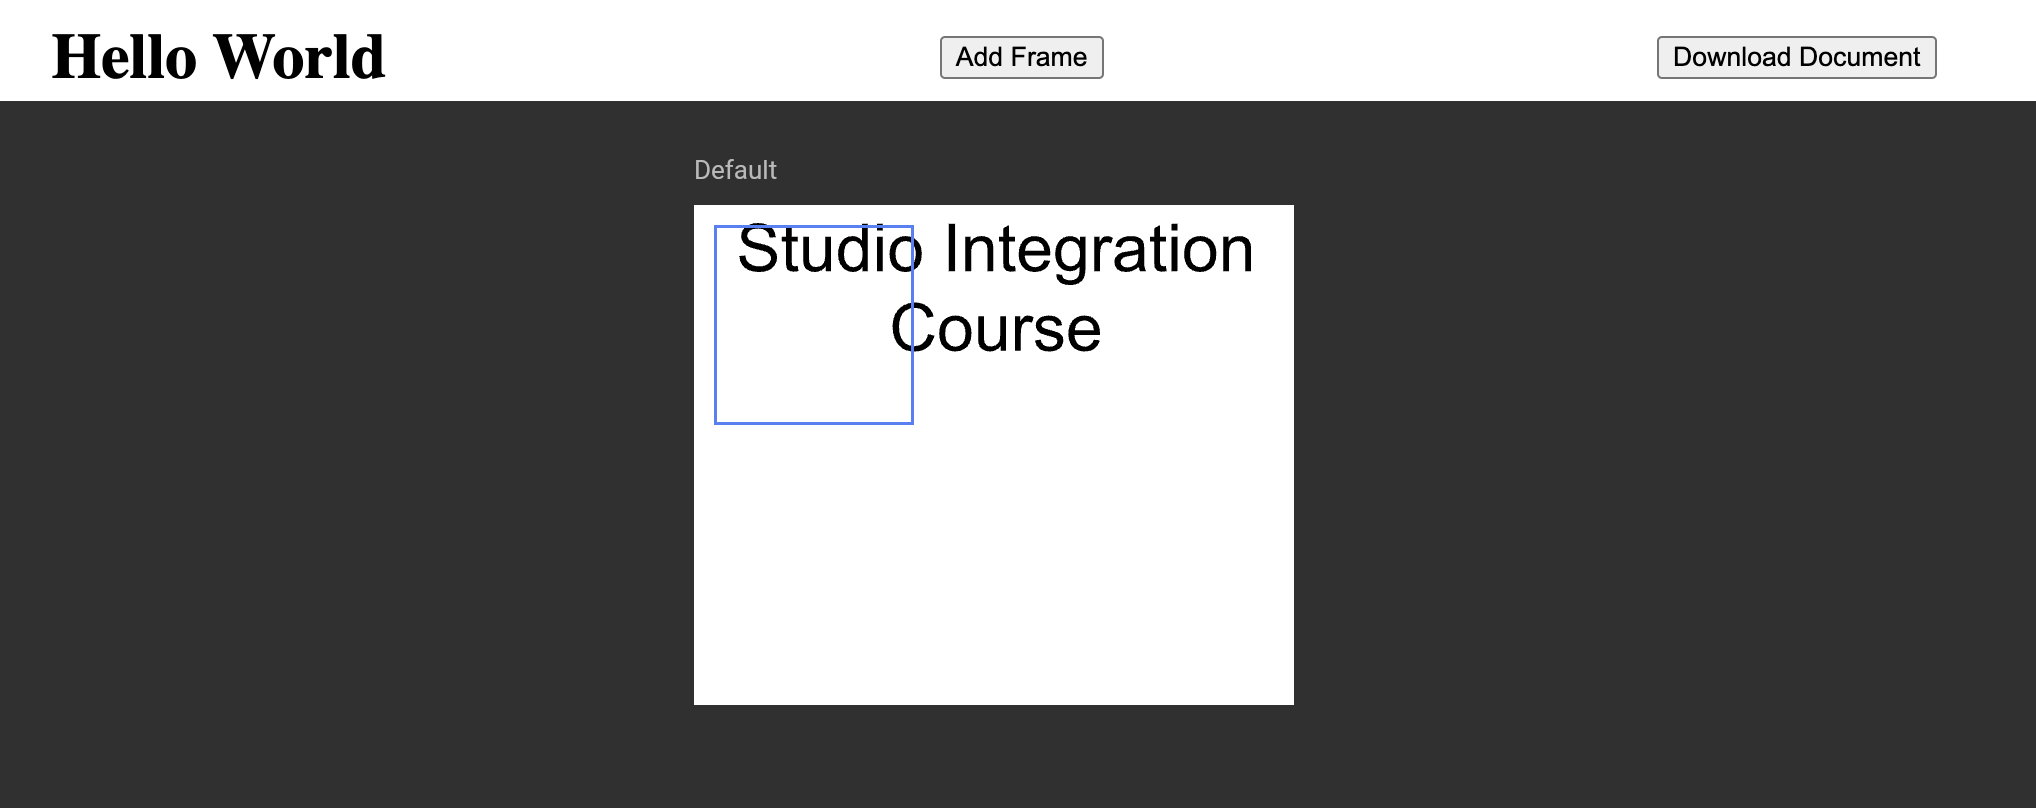
Then we can simply just add another <button> to our index.html calling that function.
Now when we click that button we should get a new text frame being added.
What if we did not know where and how big we wanted our text box to be? I now present you, the Text Frame Tool
Changing Tools
The ToolController can allow us to change the current mouse tool.
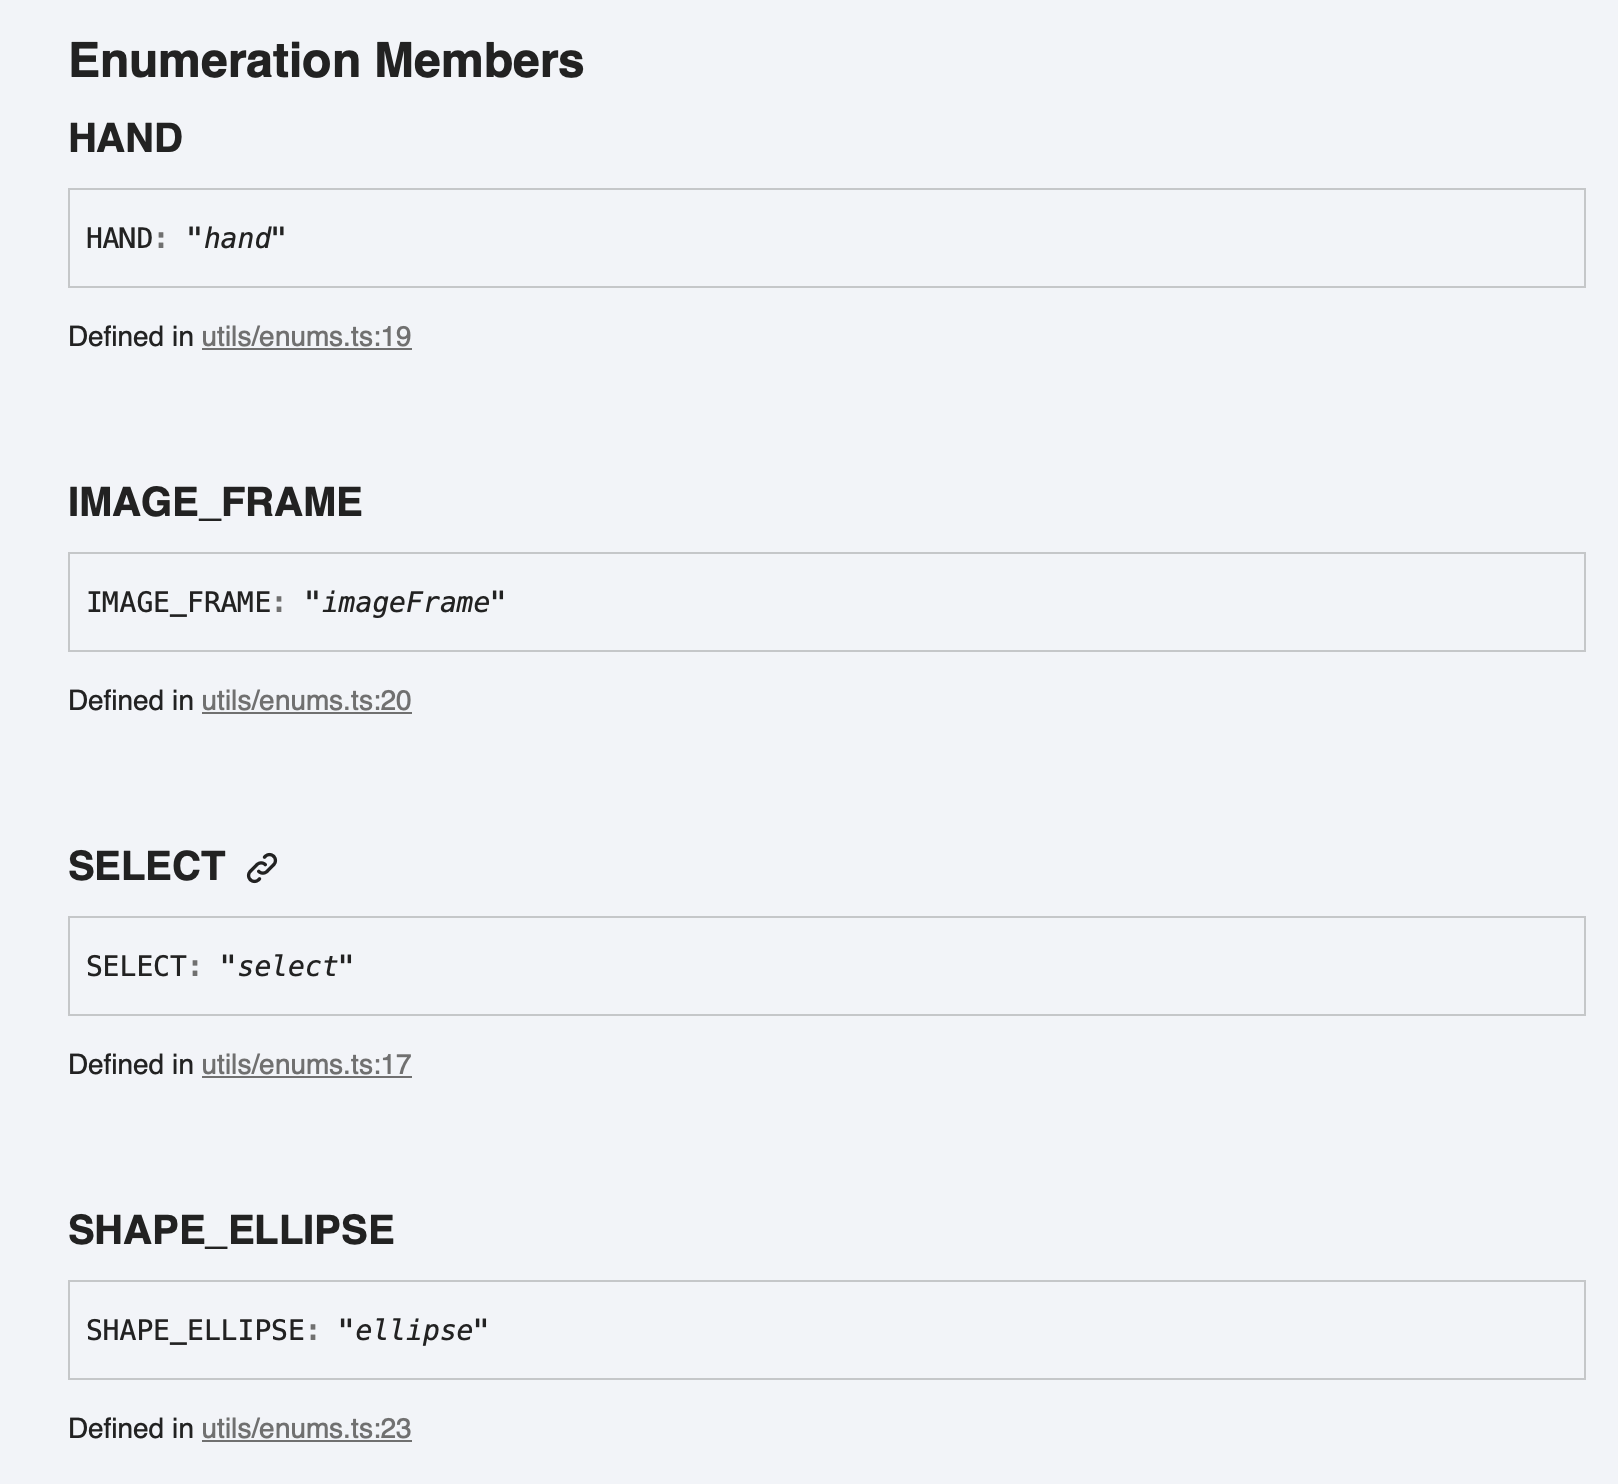
To change to the text frame tool we can simply expose the SDK function to our window and make a Text Tool button that will call our function with the tool name. You can find the names of all the tools index.js by clicking on the ToolType enum and reading the SDK page
So we can add a function to our window that accepts a tool name and calls our SDK function with that tool.
Then we can create our buttons in the index.html above our other buttons and pass in the string name for the tool to our function.
<button onclick="setTool('select')">Select Tool</button>
<button onclick="setTool('hand')">Hand Tool</button>
<button onclick="setTool('textFrame')">Text Tool</button>
Now on our integration we should have the ability to select our text tool and click then draw a text frame where we would like it. We can also play around with our hand tool and return back to the select.
This brings us to the end of section 4! Hopefully you now have a basic understanding of interacting with the Studio SDK via the Controllers. You should be able to find functions for the tasks you want to perform by looking through that SDK Documentation mentioned above.