Use components in a template
This guide explains how to place components on a template canvas, configure how they fill their frame, and map their variables to template variables.
See Components for an introduction, or Build a component to create one first. New to components? Start with the tutorial for a full end-to-end walkthrough.
HTML output not supported
Templates that include components cannot be exported as HTML. Print, static digital, and animated digital (GIF, MP4) output are all supported.
Place a component
Open the template in the Template Designer Workspace. In the left toolbar, click the Resources icon at the bottom.
The Resources panel opens. Select Components.
![]()
The component browser opens, showing all available components. Use the search field to find a component by name.

Click a component to place it on the canvas. The component is placed as a frame at the center of the active layout.
Placement rules: The component is placed at the center of the canvas. If the component's default size is larger than the current layout, it is scaled down to fit within the layout boundaries.
Multiple instances
You can place the same component multiple times on the same page. Each placement is an independent instance with its own position, size, and variable mapping.
This is the basis for use cases like a coupon sheet (same pricing component, once per coupon) or a leaflet page (same product ad component, once per product).
Resize Mode
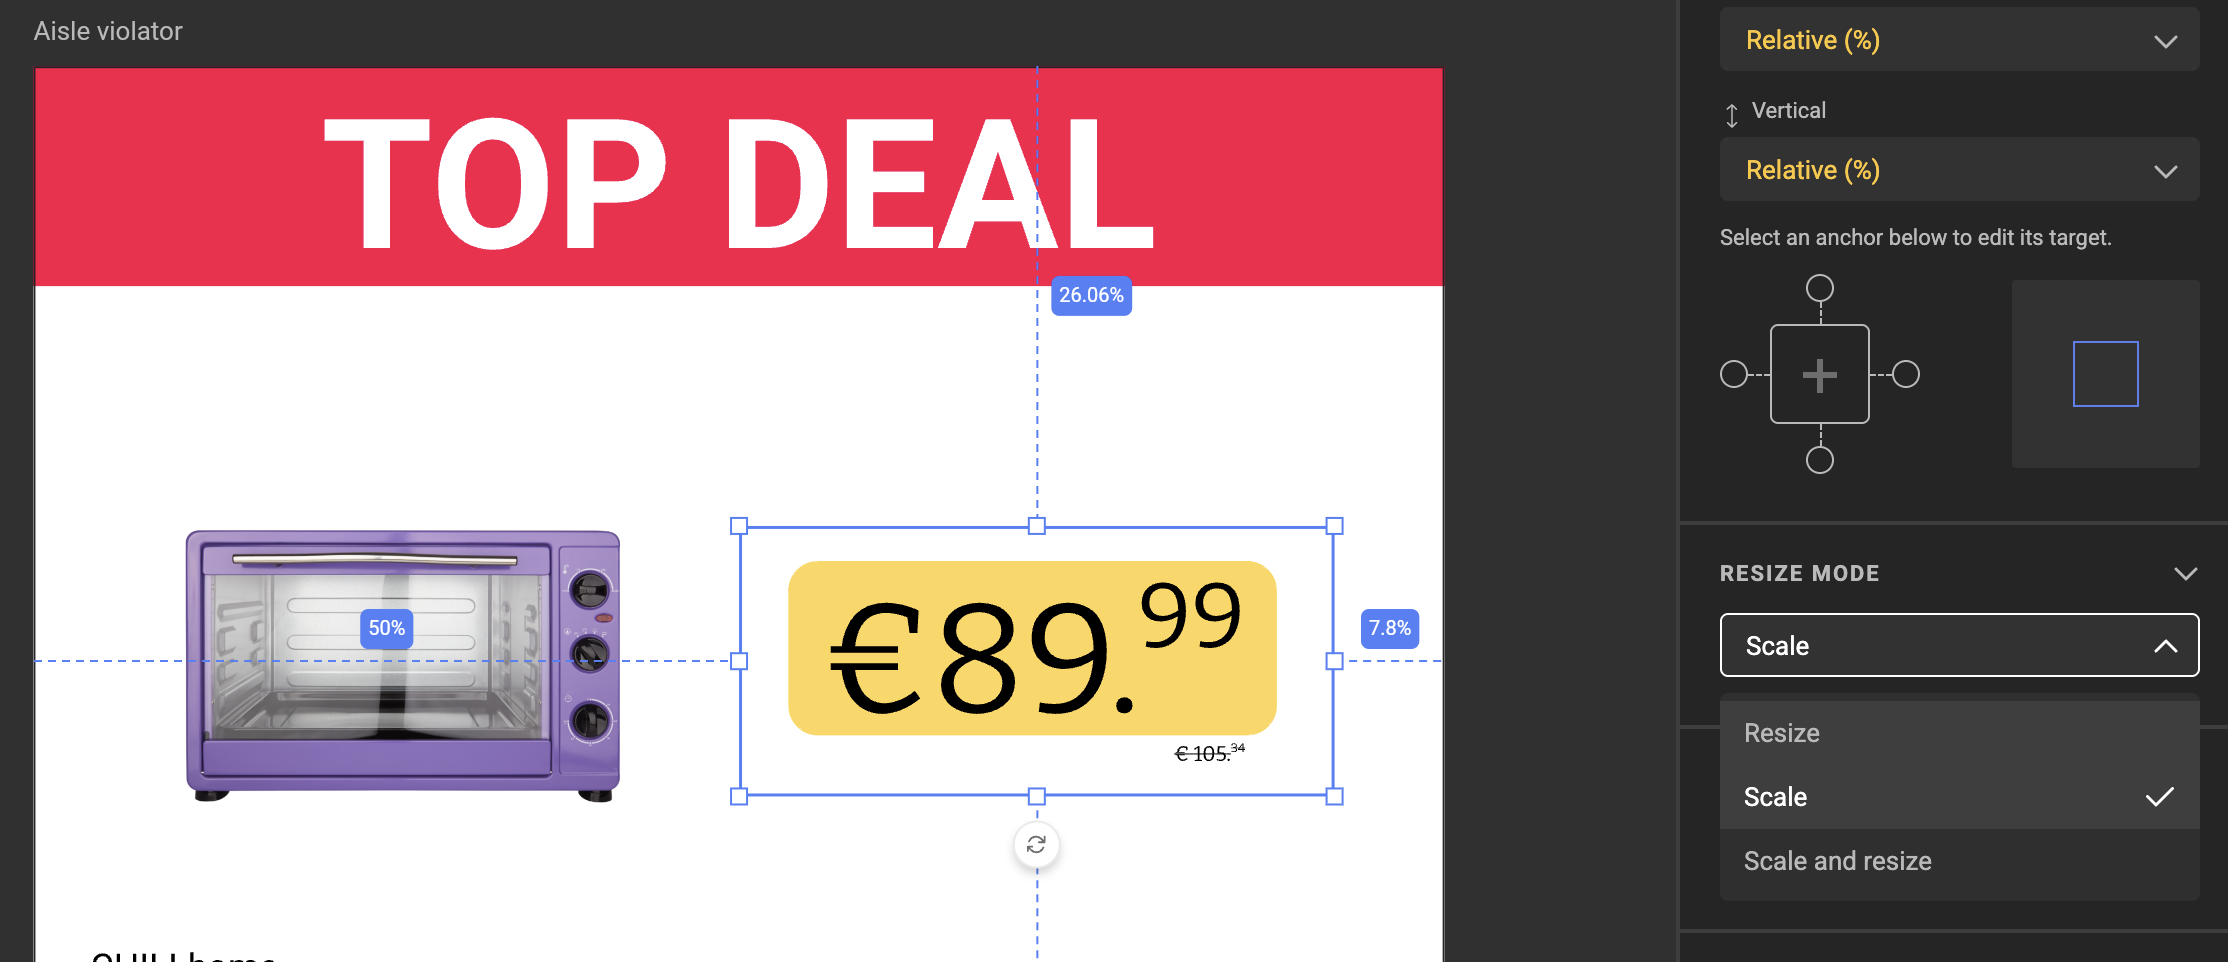
A component can have multiple layouts — for example a square, horizontal, and vertical version of the same design. The Resize Mode setting controls how the component fills the frame you've placed it in.
With a component frame selected, find the Resize Mode section in the right properties panel.
In short: Scale fits the component inside the frame. Resize gives the component the frame's dimensions and lets it adapt internally. Scale and resize does both — scale first, then resize to fill what's left.
Scale
The component is scaled to fit inside the frame, preserving its aspect ratio. Everything inside scales with it — including the real-world size of text. Any space the component doesn't cover appears as white space.
Use Scale when you want the design to look the same, just bigger or smaller — for example resizing an A4 layout to A5.
Resize
The frame's width and height become the component's dimensions. The component adapts internally using anchoring, copyfitting, autogrow, and actions — but absolute sizes such as font size stay the same.
Use Resize when a component must occupy different frame sizes while keeping its text consistent — for example, a promo block that spans one or two slots on a leaflet without the font getting bigger.
Scale and resize
The component is scaled to fit, then — if its aspect ratio doesn't match the frame — its width or height is extended so it fills the frame. Internal rules handle that extension, so nothing overflows.
Use Scale and resize when you want the component to fill the frame without leaving white space and without text getting bigger.
Switching layouts via an action
Resize Mode controls how the component fits the frame, but not which internal layout is active. Layout switching is not part of any Resize Mode — it happens only when an action inside the component calls selectLayout. The mechanism below works the same way in all three modes, though it's most useful with Scale, where aspect ratio is preserved and picking the right layout prevents unnecessary white space.
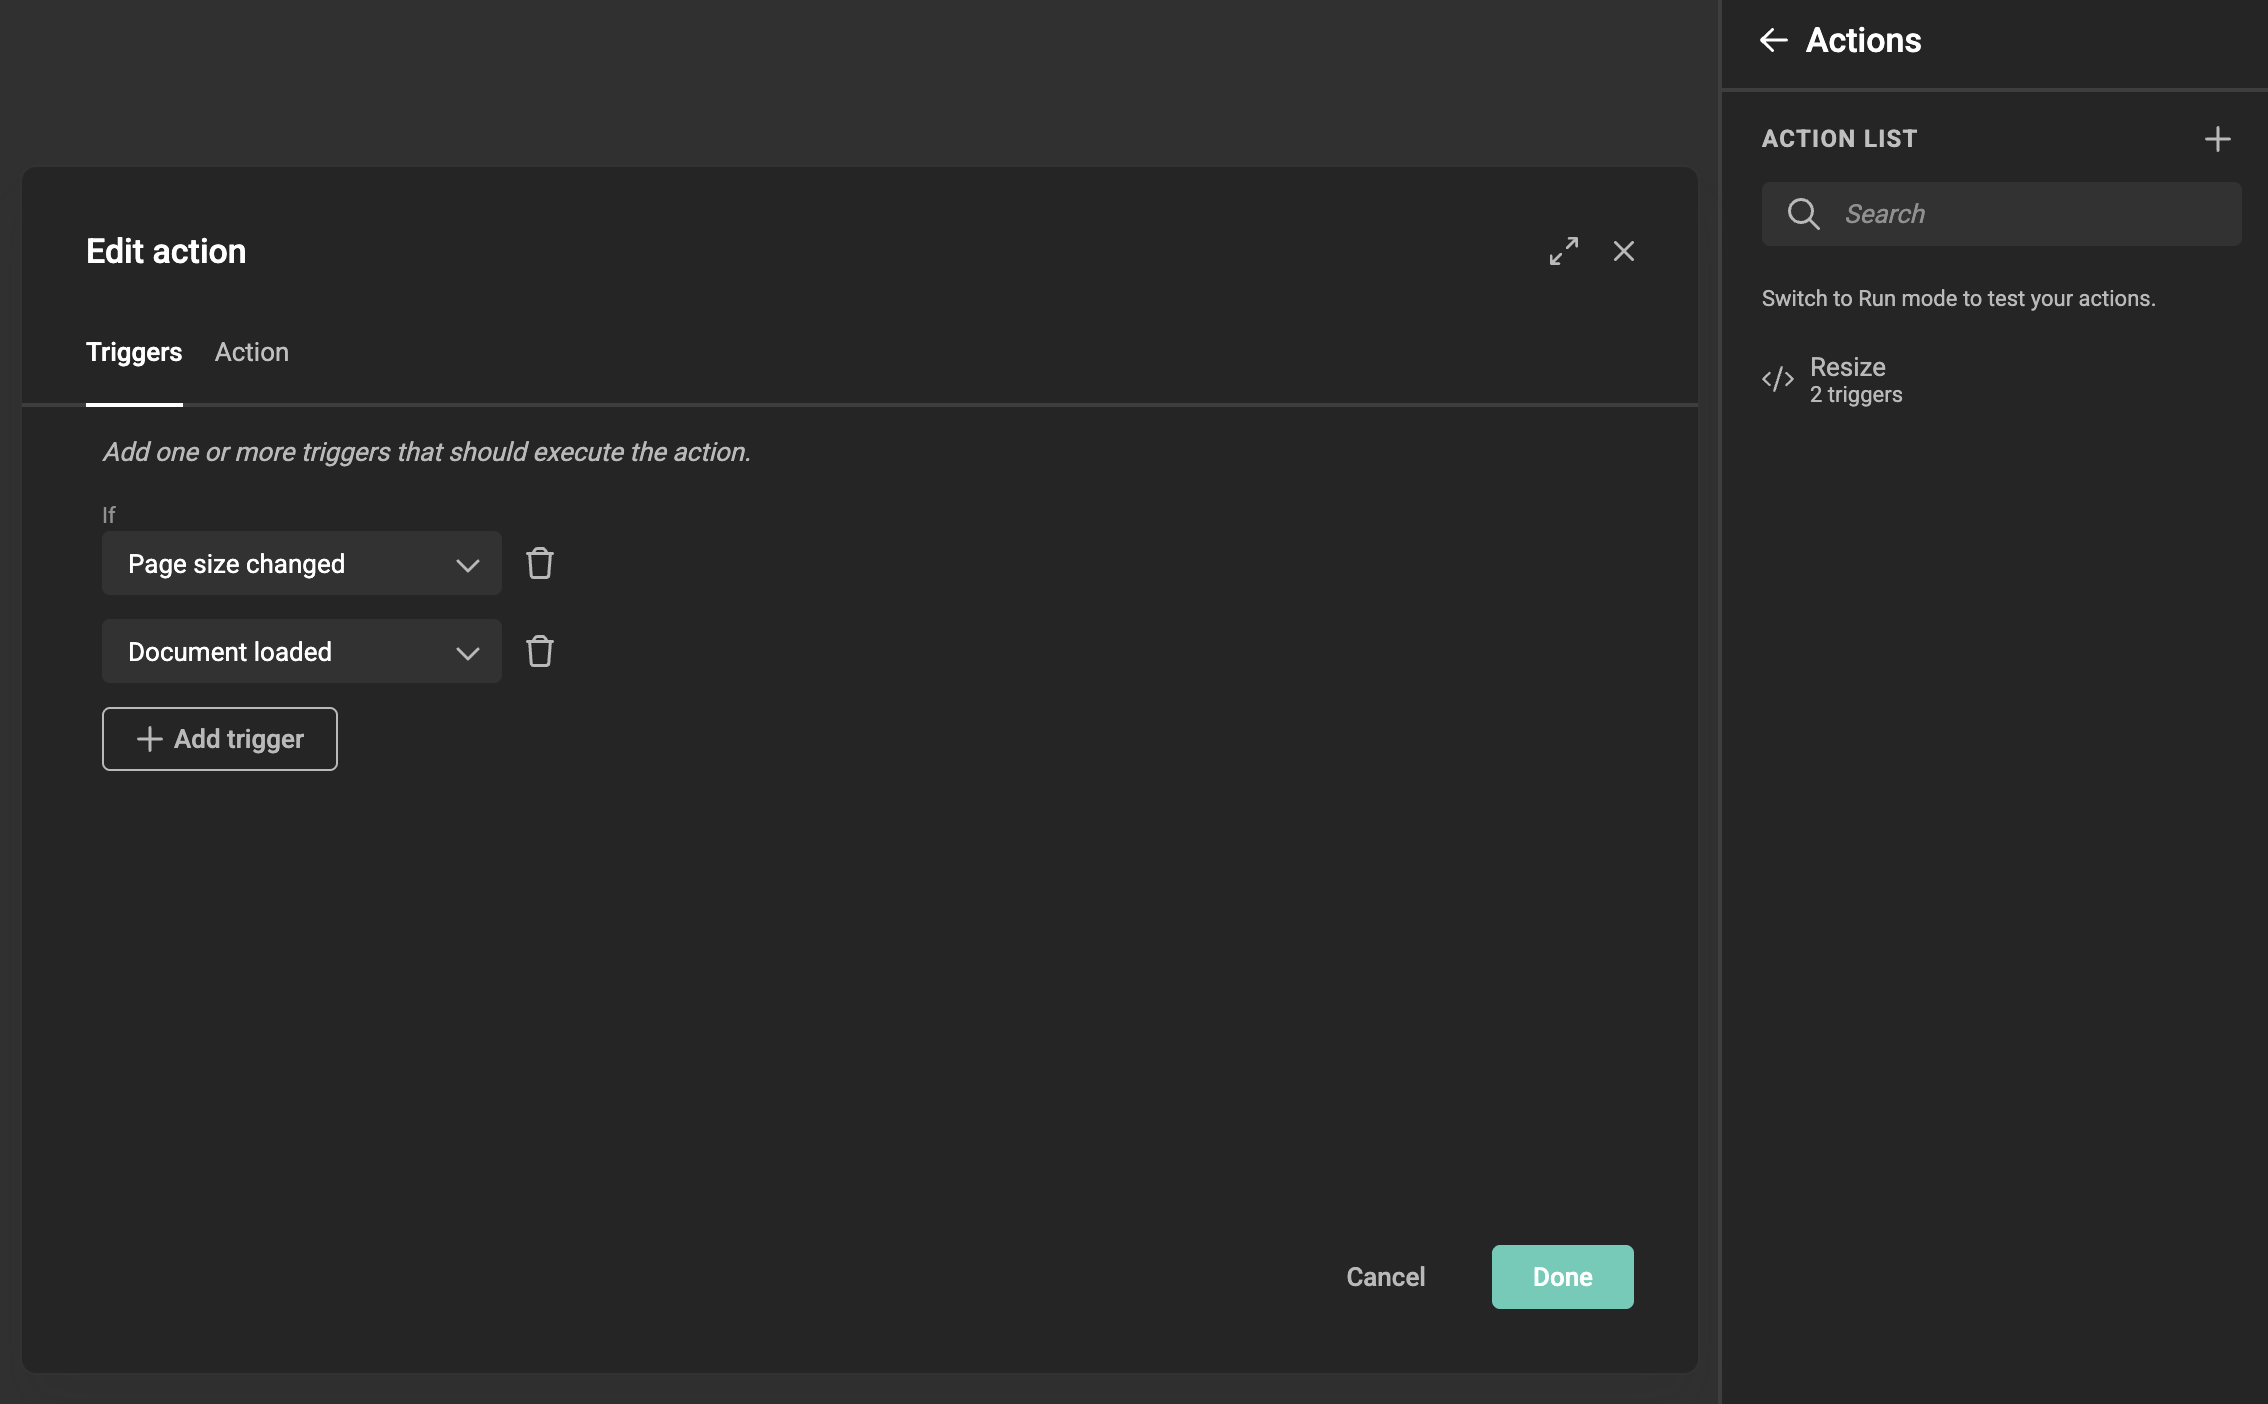
When the frame is resized in the template, a Page size changed event fires inside the component, regardless of which Resize Mode is selected. Use that event together with Document loaded (for the initial open) to run a script that picks a layout.
The example below chooses between a vertical and horizontal layout based on aspect ratio. A component is a self-contained page in its own right, so inside the action getPageWidth() and getPageHeight() give you the component's current page dimensions, and selectLayout swaps the active layout.
Open the component, add a new action, and on the Triggers tab add both Document loaded and Page size changed.
On the Action tab, paste the script below. It reads the page dimensions and calls selectLayout with the name of the layout to switch to. Replace "vertical" and "horizontal" with the names of the layouts you've defined — and feel free to extend the logic for more than two layouts.
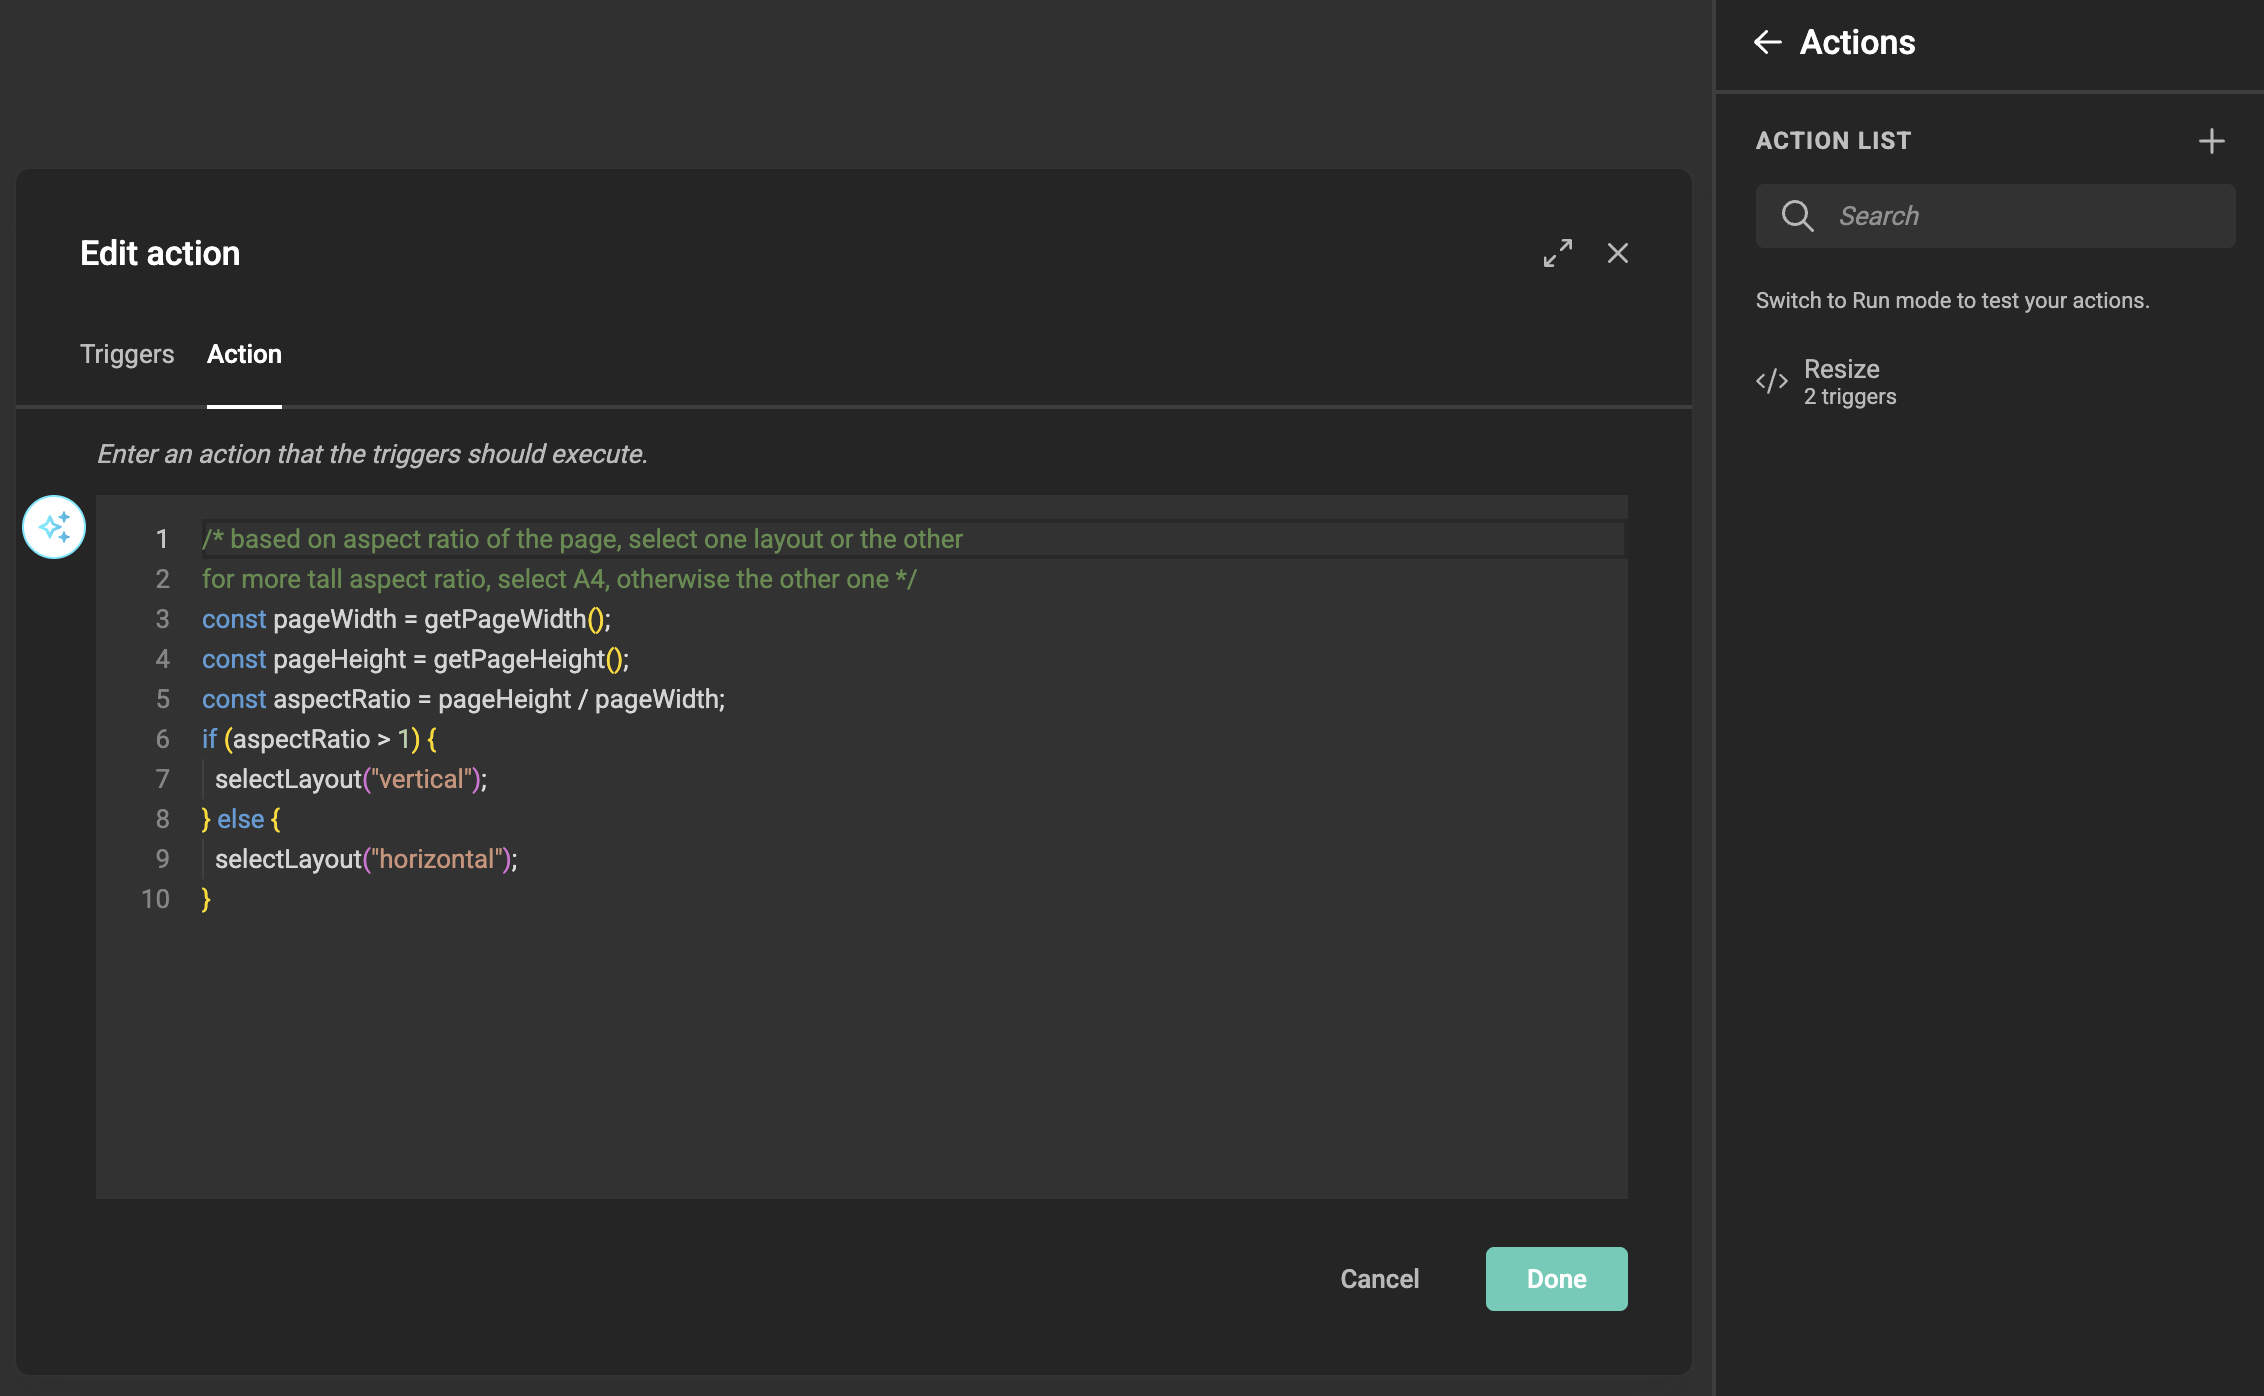
Script to place inside the component:
/* Based on the aspect ratio of the page, select one layout or the other.
   For a taller aspect ratio, select the vertical layout; otherwise the horizontal one. */
const pageWidth = getPageWidth();
const pageHeight = getPageHeight();
const aspectRatio = pageHeight / pageWidth;

if (aspectRatio > 1) {
  selectLayout("vertical");
} else {
  selectLayout("horizontal");
}
Variable mapping
Variable mapping is how you connect the component's variables to variables at the template level. This is what allows each component instance to show different data — even when it's the same component placed multiple times on the same page.
Open the mapping modal
Select a component frame on the canvas. In the right properties panel, find the Component Variables section and click Manage mapping.
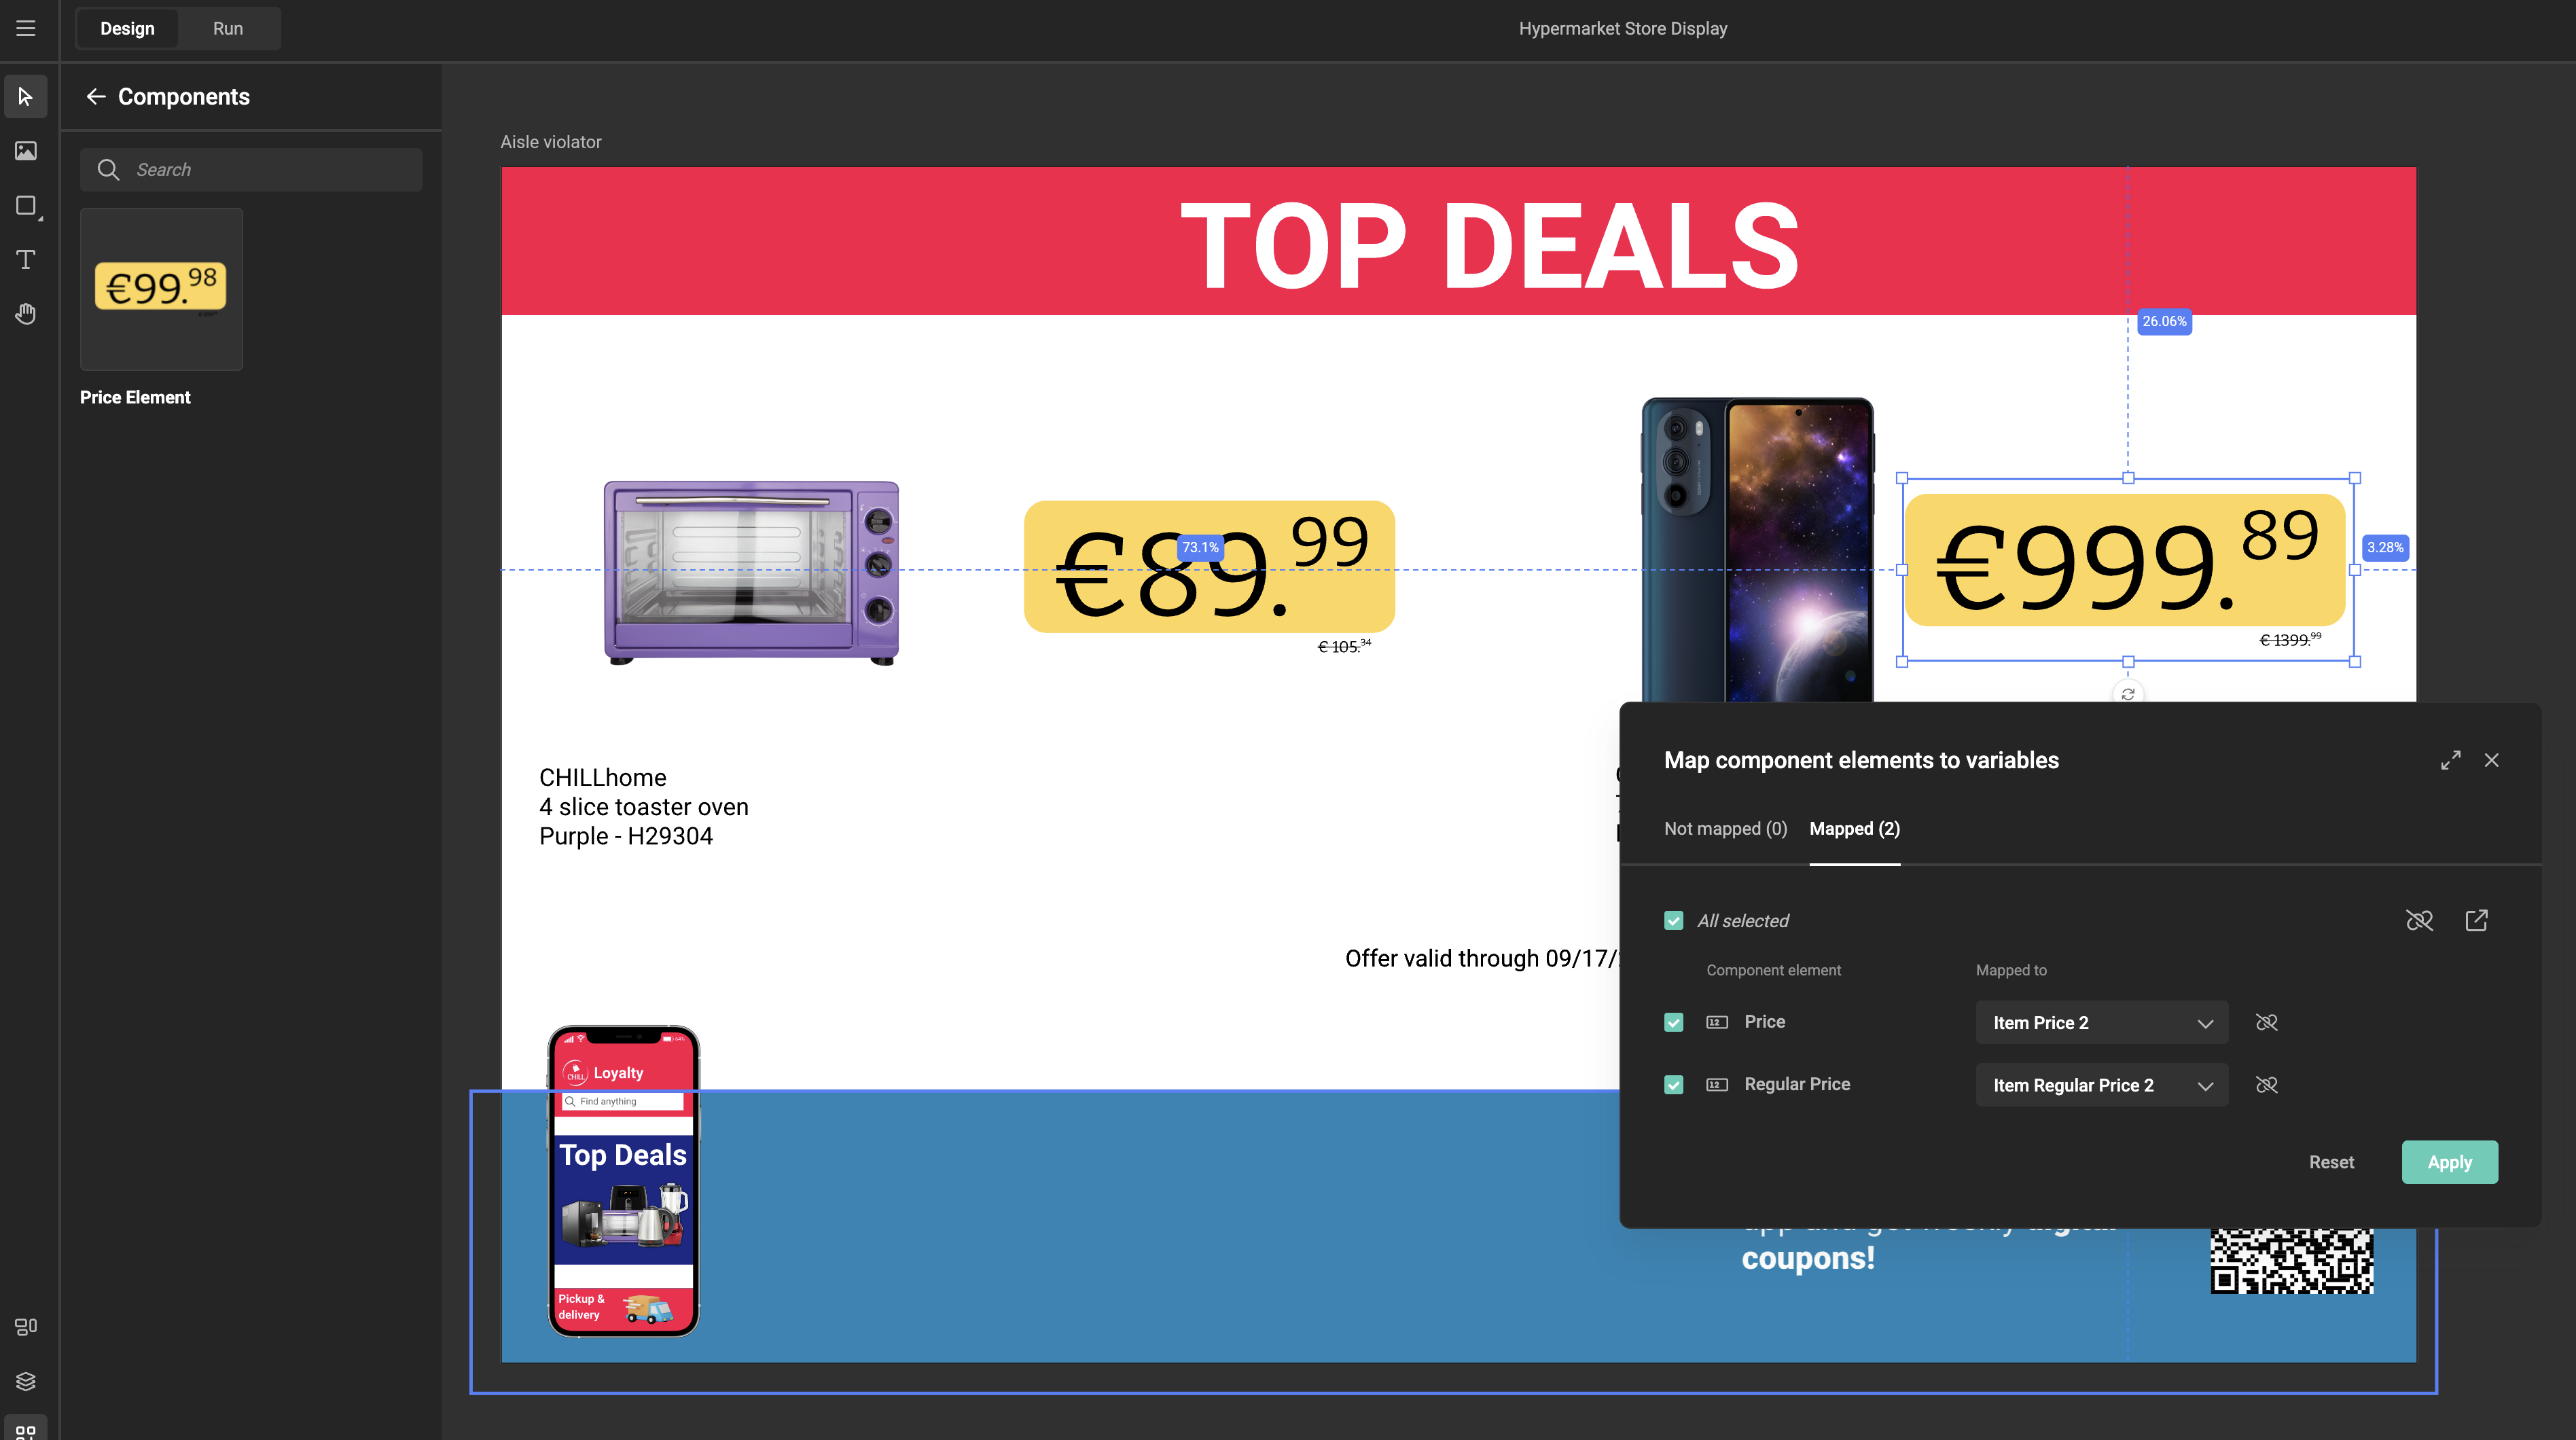
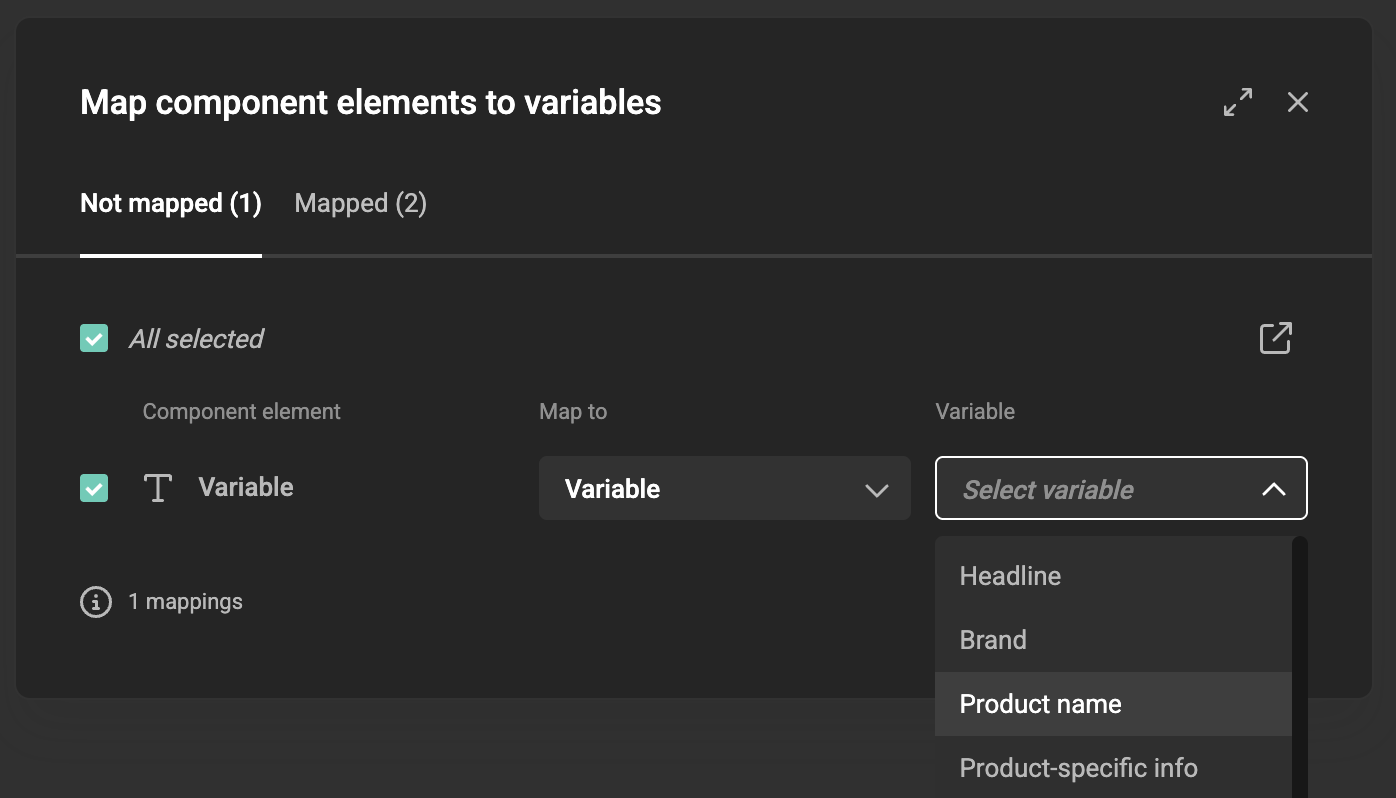
The Map component elements to variables modal opens.
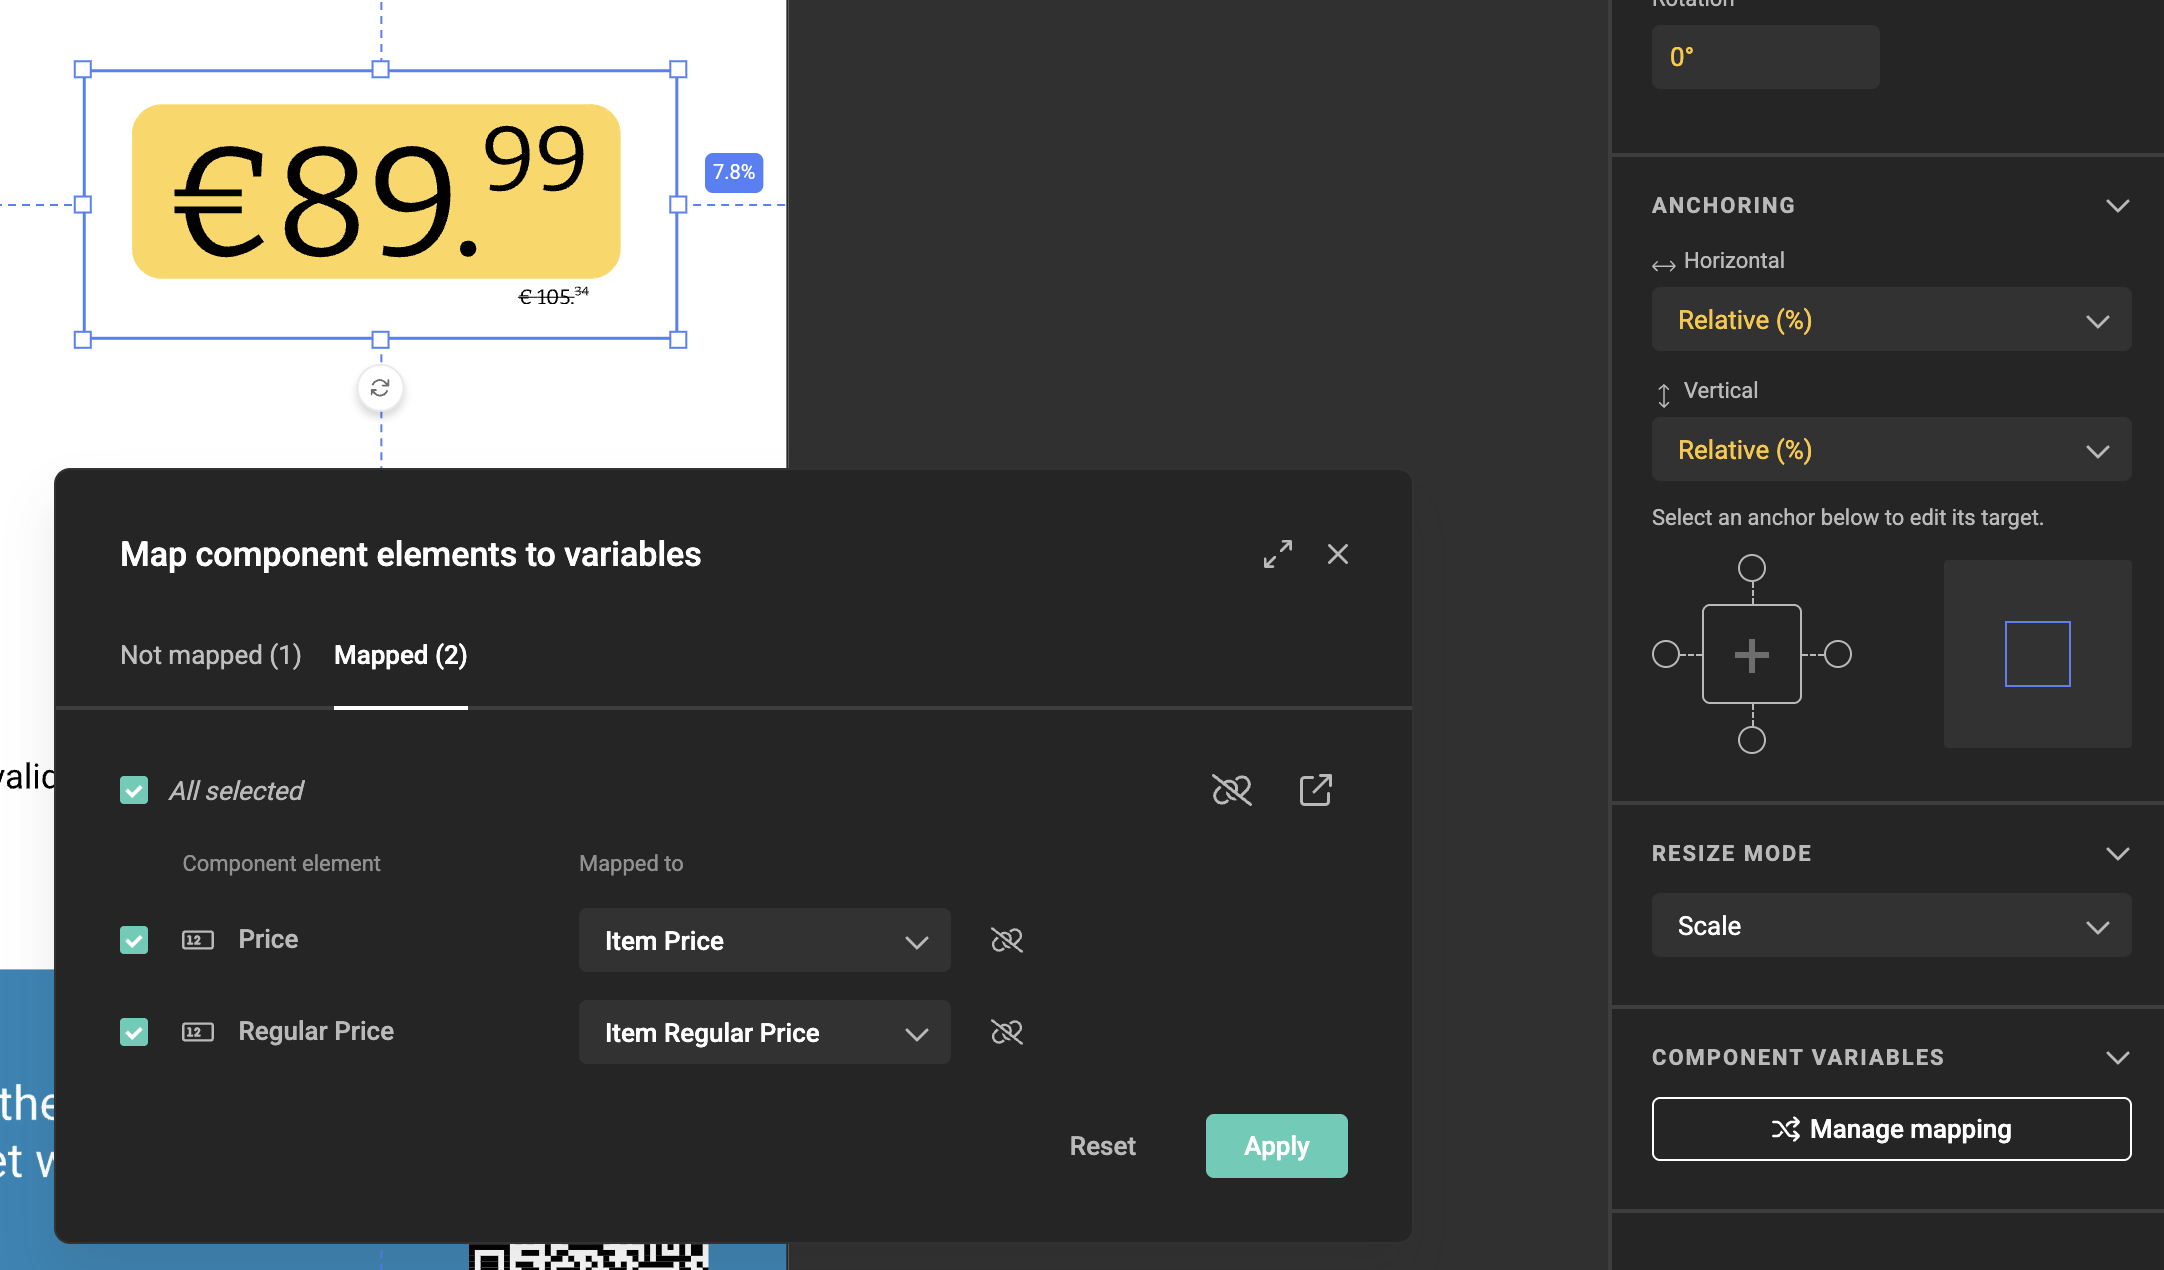
The mapping modal
The modal has two tabs:
- Not mapped — component variables that are not yet connected to a template variable
- Mapped — component variables that have already been connected
Each row shows:
- Component element — the variable defined in the component, with its type icon
- Map to — how the connection is made: to a new variable or an existing one
- Variable — the template variable that will receive or supply the value
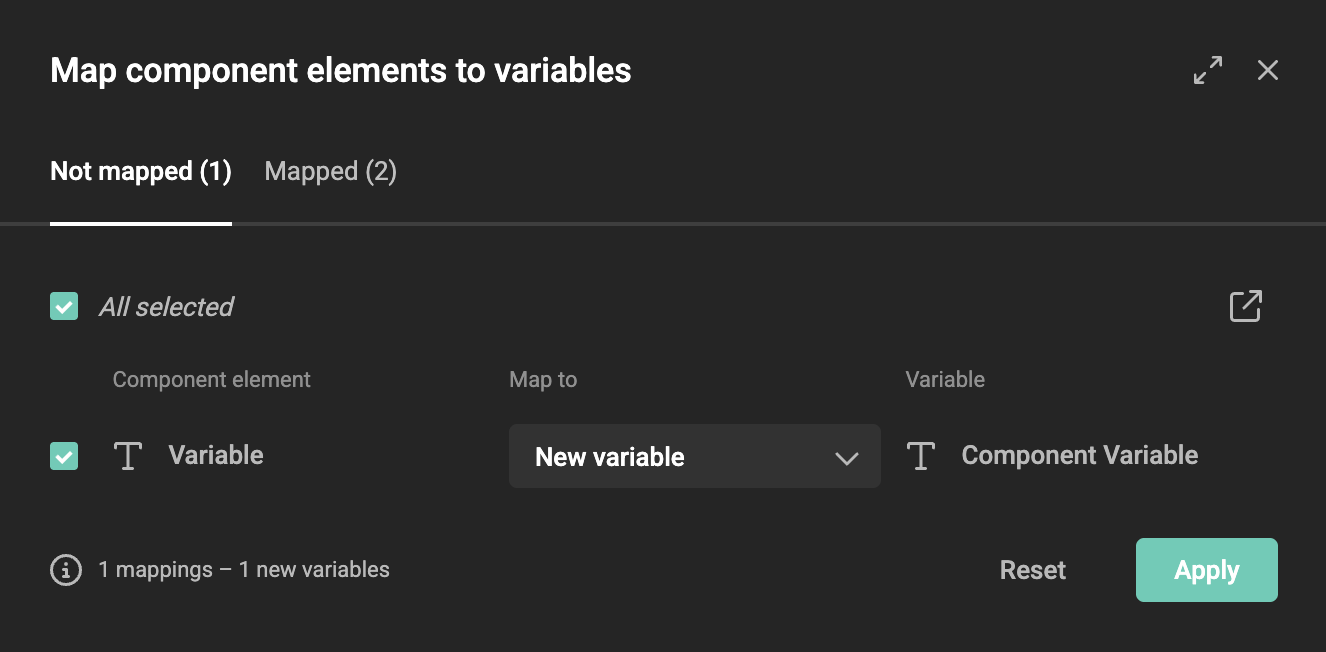
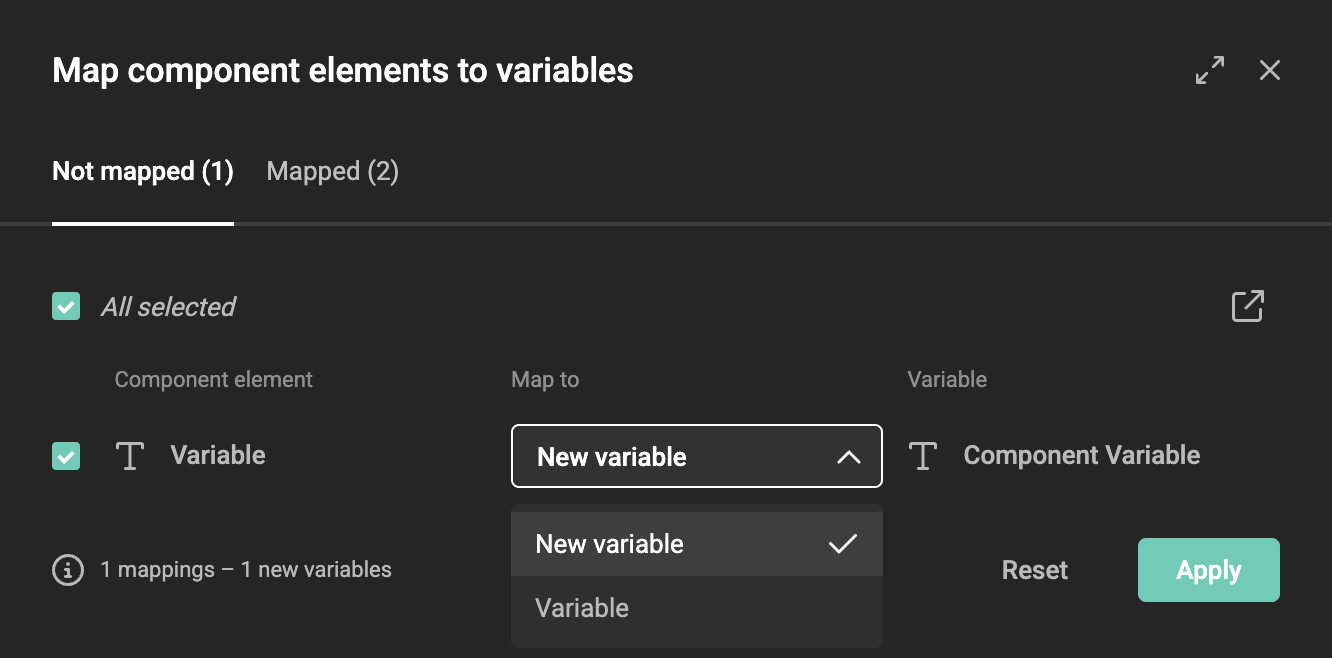
Map to a new variable
If the template does not yet have matching variables, set Map to to New variable. GraFx Studio creates a new template variable for each component variable, named automatically based on the component variable name.
The summary at the bottom of the modal shows how many mappings will be created and how many new variables will be added. Click Apply to confirm.
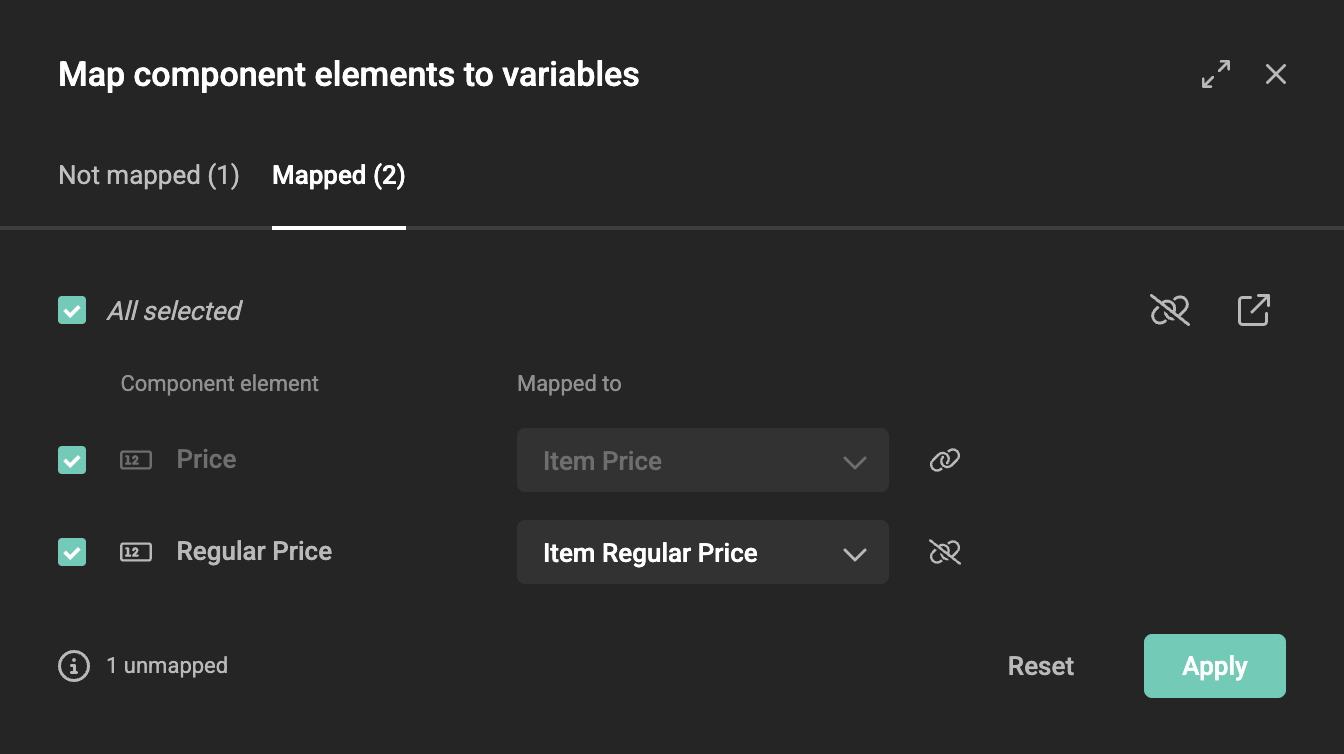
Map to an existing variable
If the template already has variables — for example because another instance of the same component was already mapped — set Map to to Variable and choose the existing template variable from the dropdown.
This is also how you connect two component instances to the same template variable, if you want them to always show the same value.
Per-instance mapping
Each component instance on the canvas has its own mapping configuration. A template with three price tag components on one page can map each to a completely different set of template variables — price_1, price_2, price_3 — so each coupon shows its own price independently.
Mapped variables in the variable list
After applying the mapping, the new template variables appear in the variable list under a Component group, named after the component instance.
These variables work like any other template variable — they can be used in actions, exposed in Studio UI, or driven by a data source.
Constraint compatibility
When you map a component variable to an existing template variable, GraFx Studio checks whether the two variables are compatible. If the component variable has a range constraint (e.g. a number variable restricted to [-10, -5]) and the template variable has an overlapping or incompatible range (e.g. [0, 10]), the mapping row shows an error state and the mapping cannot be applied until the ranges are made consistent — either by updating the component variable or the template variable.
Required variables are not inherited
If a component variable is marked as required, mapping it to a template variable does not automatically make the template variable required. There is no visual indicator in Run Mode or Studio UI that a mapped template variable feeds into a required component variable. If output is generated while the value is empty, the output will fail. Check the error report on the output task page for details.
Reset a mapping
To remove all mappings for a component instance, open Manage mapping and click Reset. This clears all connections without deleting the template variables that were created.