Data source variables
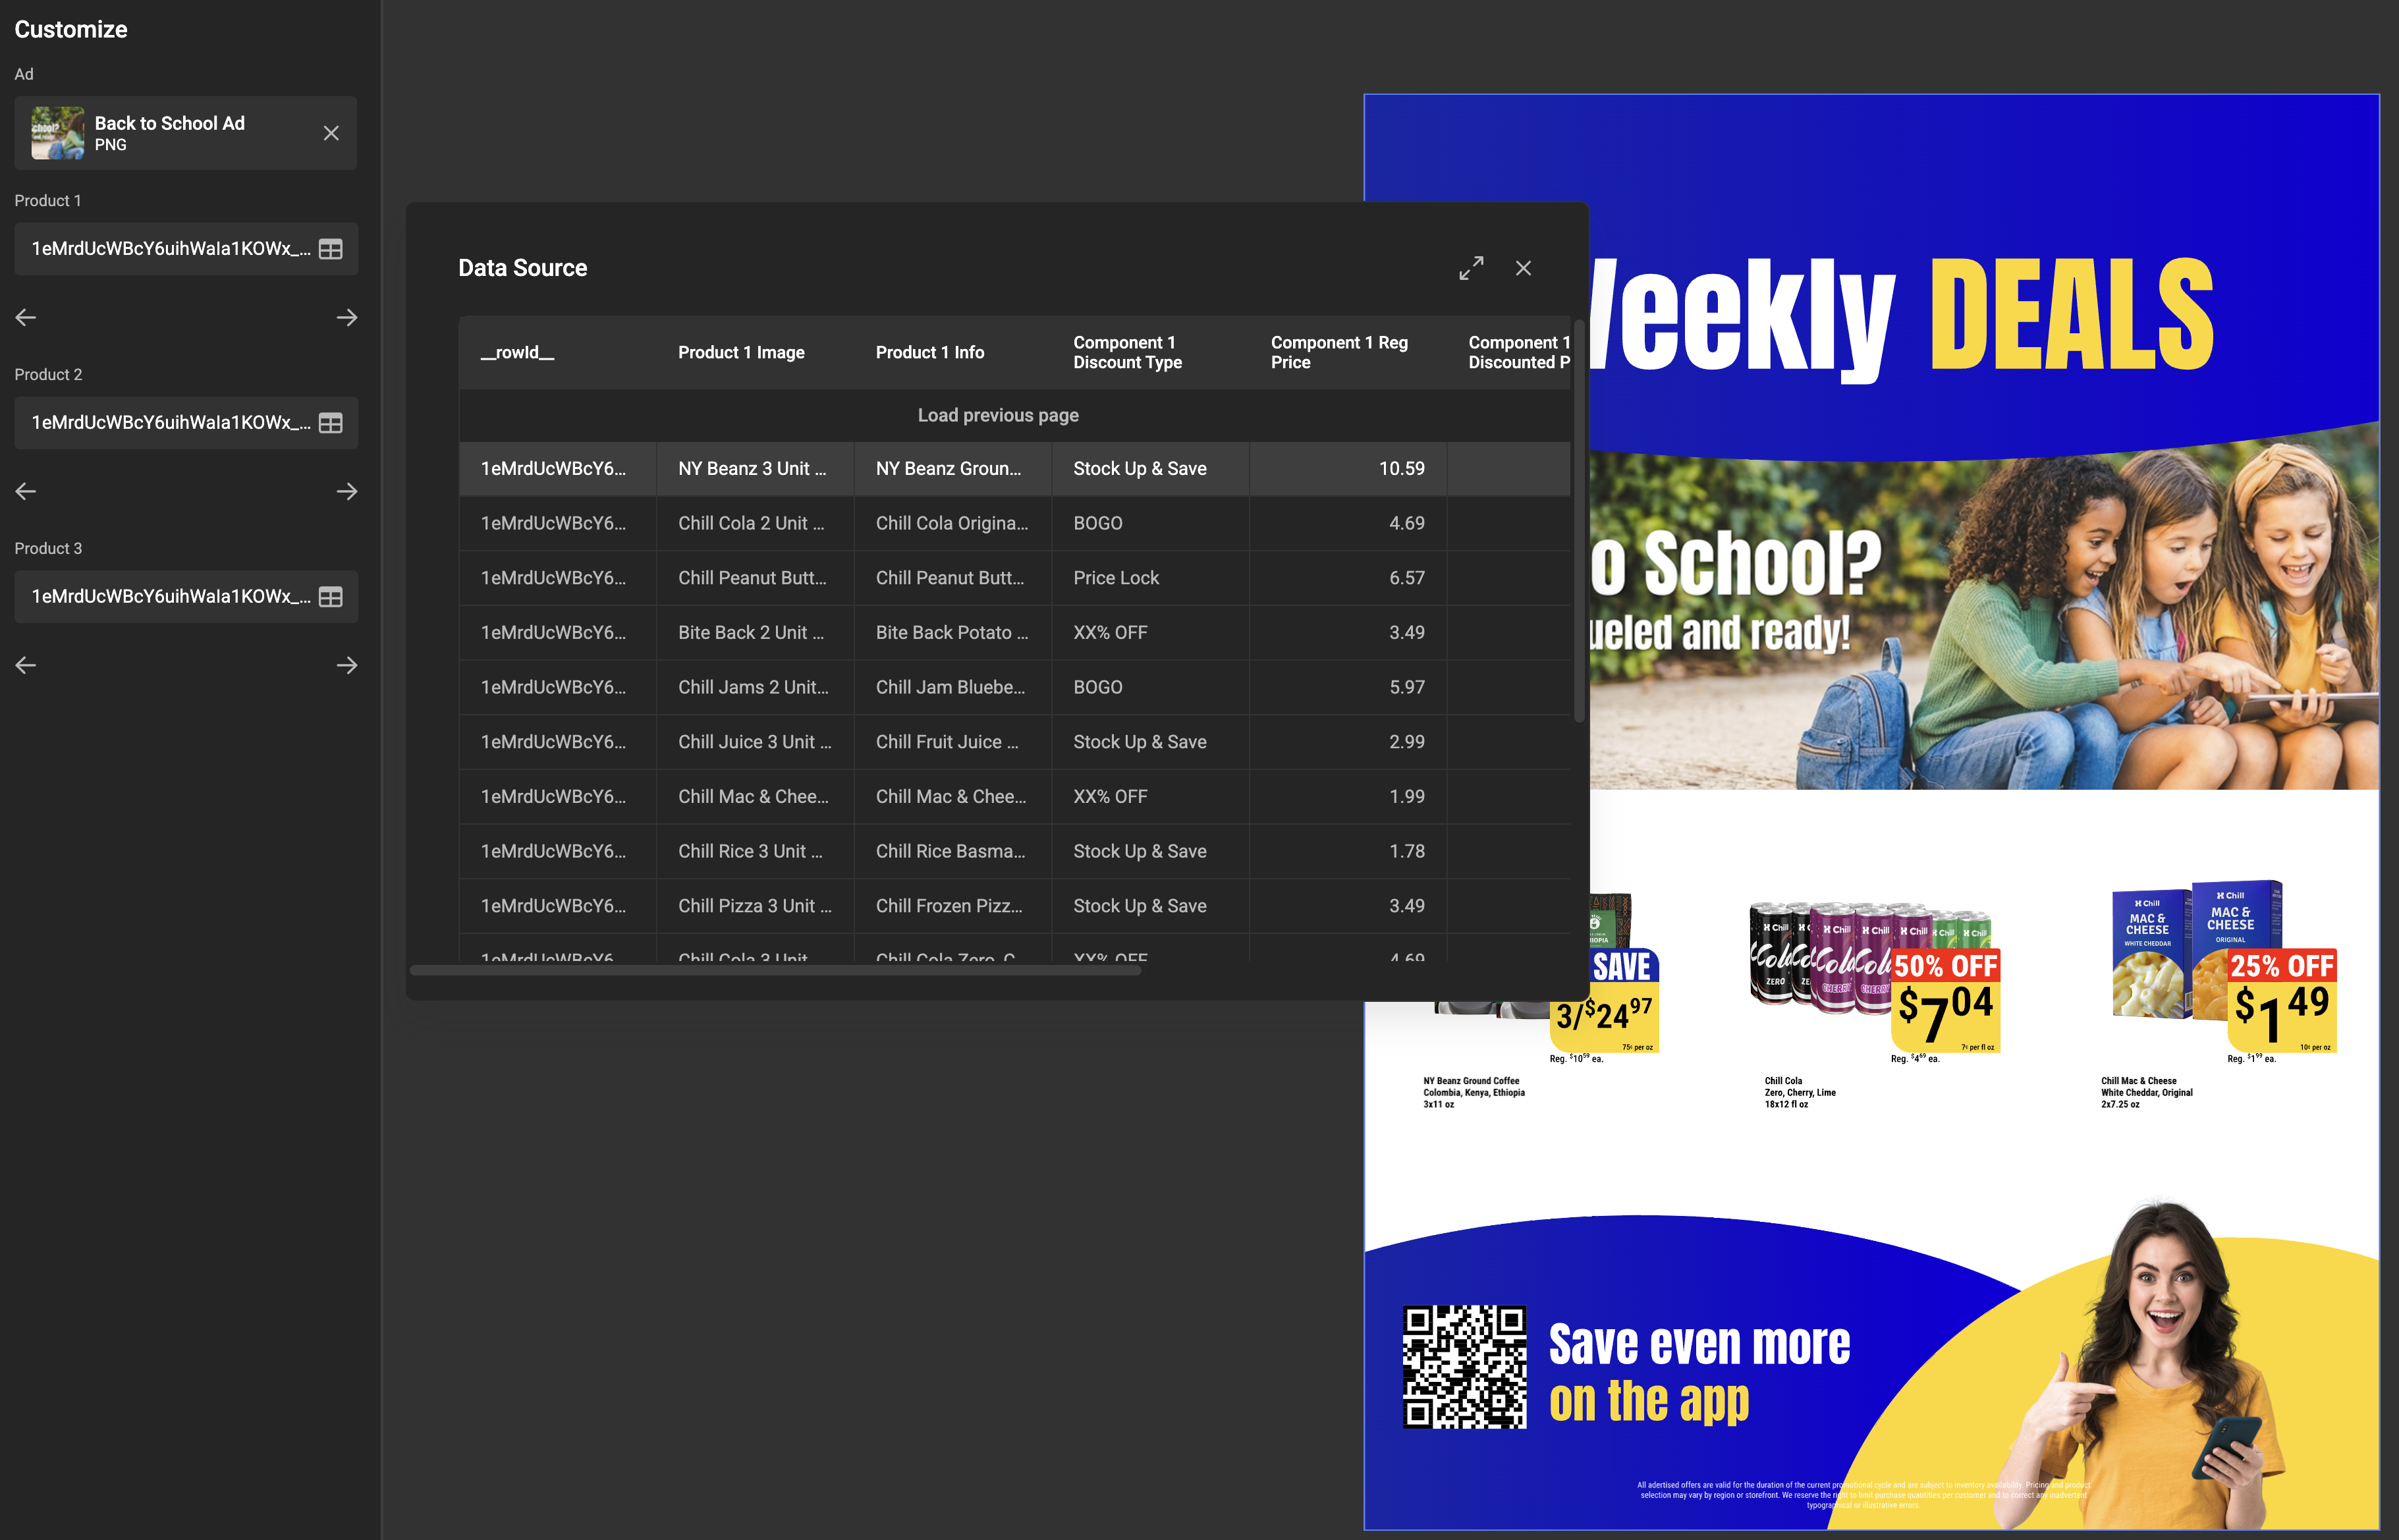
A data source variable is a variable type that sources data from an external system — a PIM, a CRM, an ERP — and makes it available inside the template for the end user to choose from. It presents that data as a table of records and keeps a reference to the one row the user selected.
Data source variables work only with components
The values of the selected row reach your design by being mapped to the variables of a component placed in the template. There is no way to feed a data source variable into a plain text or image frame directly.
So before a data source variable is of any use, the content it should fill has to be built as a component. See Use a record to fill a component.
The records are either pulled in through a data connector or pushed in by an integration. The variable stores only the reference to the selected row, not a copy of the data, which is what makes it the right tool for self-service work: pick your product, get your poster.
Template Variables
When referring to variables we can mean Template variables or JavaScript variables. On this page we are talking about Template variables.
A typical use case
Picture a local marketeer opening a template to customise a promotion. The document has three product slots to fill, each one a component with its own name, price and image. Filling those by hand means typing every field for every product — and getting each one exactly right.

A data source variable turns that into a single choice. The marketeer picks a row from a dataset — one product — and that product's name, price and image flow into the component the designer mapped it to. Three picks, three filled promotions, nothing typed by hand.
Not the same as an output data source
A template can also have an output data source, which looks similar but does a different job. The distinction matters, because picking the wrong one leads to a template that produces one output when you wanted five hundred, or the reverse.
| Output data source | Data source variable | |
|---|---|---|
| What it does | Iterates over every row to drive a batch of outputs | Holds one selected row, used inside a single document |
| Drives output | Yes — one output per row | No |
| Navigation | Forward through all rows | Browse, and one row stays selected |
| Typical use | Variable data printing: 500 personalised mailers | Self-service: pick a product, get a poster |
A template can use both together. See Data connectors for the output data source.
Where the data comes from
A data source variable is populated in one of two ways, chosen per variable:
- Connector (default) — GraFx Studio pulls the data through a data connector. Use this when the data lives in a system you can reach: a PIM, a CRM, a spreadsheet, an API.
- Data injection — the records are handed to the template by the application that embeds GraFx Studio. Nothing is fetched: the integration pushes a set of rows in through the SDK at runtime, and you declare the columns yourself so the template knows their shape. Use this when the surrounding application already has the data in hand and routing it through a connector would be a detour.
Both end up in the same place: a table of rows with a selected row. Only the plumbing differs.
Create a data source variable
Open the variables panel from the properties panel on the right (the wrench & screwdriver tool), then choose Variables — the same starting point as defining any template variable.
Add a variable and set its Variable type to Data source. The General tab then shows:
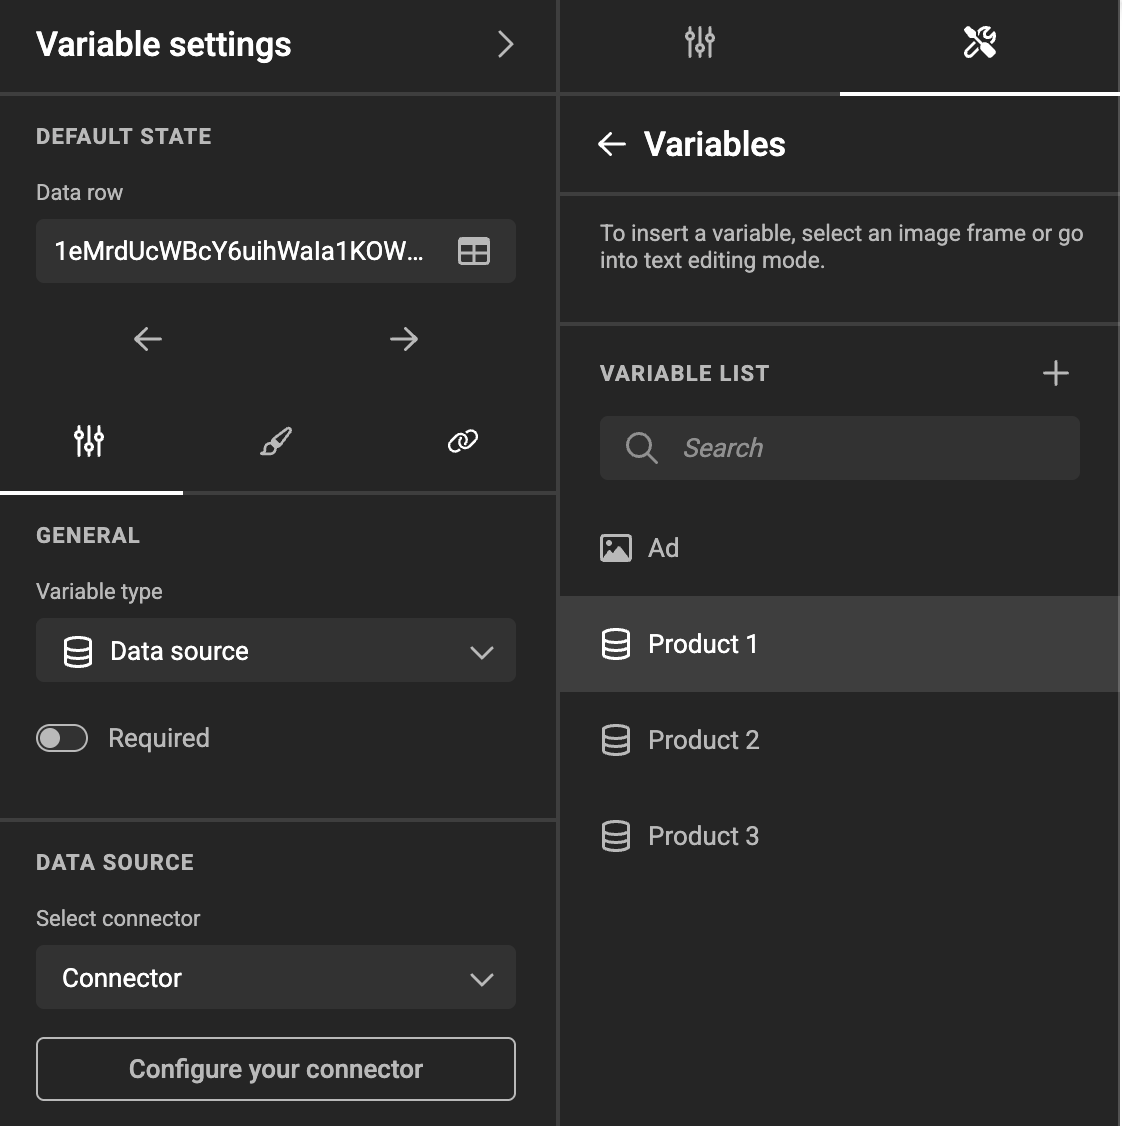
- Required — optional toggle. It stays disabled until the variable actually has a source: a connector is selected, or the source is set to Data injection with at least one field. Remove every field from a Data injection schema and Required switches back off and disables again.
- A DATA SOURCE section with a Select connector dropdown, set to Connector by default.
Until the source is configured, the Default state panel shows "No preview available. Configure your data source".
Connector
With Connector selected in the DATA SOURCE section, click Configure your connector to open the Connector tab, then:
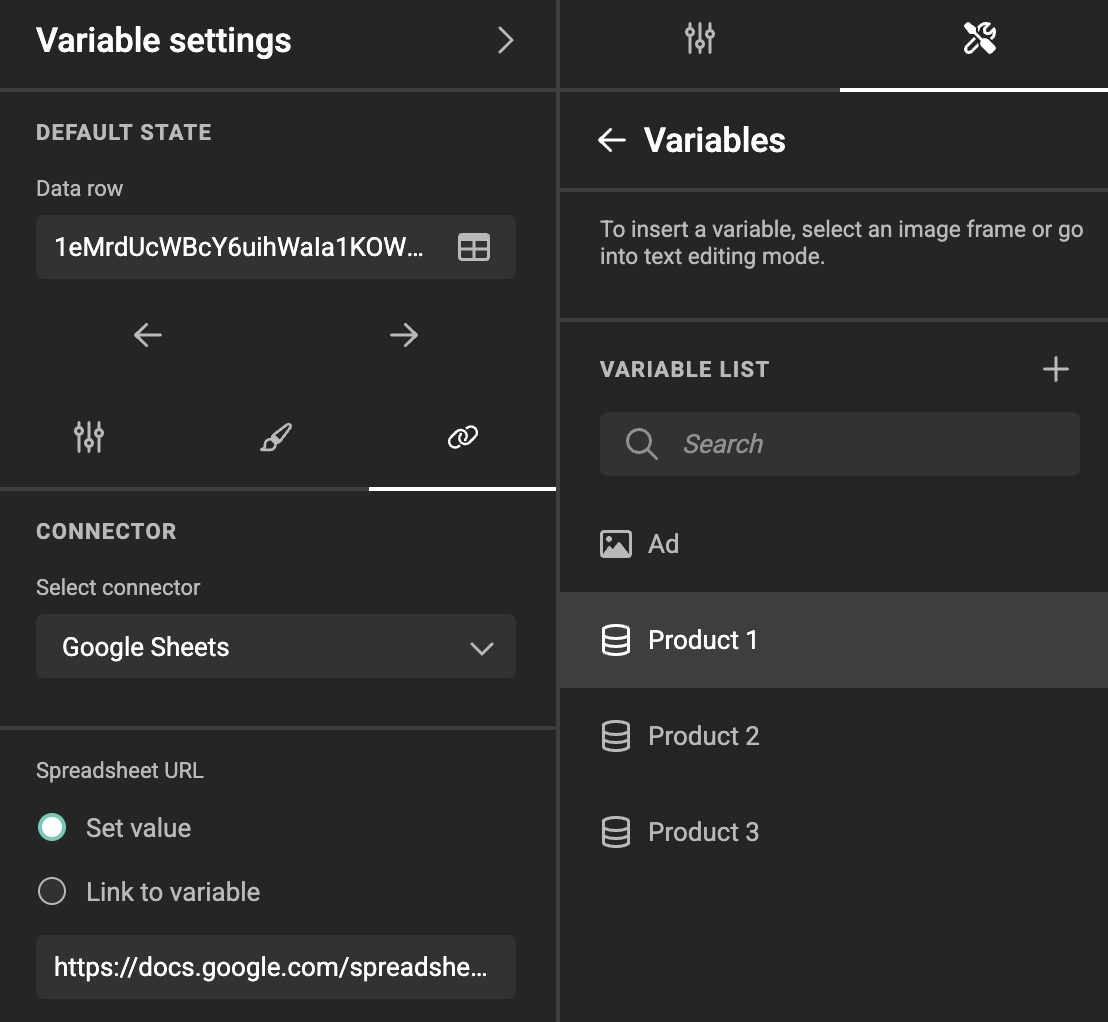
- Pick the connector from the dropdown.
- Fill in the configuration options. These are dynamic — the connector declares them, so what you see depends on the connector. Commonly a search or query parameter, an endpoint, or a record type.
Each configuration field can be set to a static value or linked to another variable — the same pattern used for media connectors. Linking a field to a variable is what makes cascading selection possible: when the linked variable changes, the query re-runs and this variable's rows change with it.
The connector must support this use case
Support for data source variables is an opt-in extension a data connector has to implement explicitly. A connector built only for batch output will not appear in the dropdown. If one is missing, check that it declares the capability and that it is enabled on your environment — see Data Connector Fundamentals — Data Source Variable use case.
Data injection
Set Select connector to Data injection and the Connector tab is hidden; a Manage fields button appears instead.
Because nothing is pulling data, GraFx Studio cannot discover the shape of it. You have to declare it. In the Manage fields modal, add one field per column with a Name and a Type:
- Single-line text
- Multi-line text
- Number
- Boolean
- Date
At least one field is needed before List mode can be configured.
Two rules govern what happens when the pushed data doesn't match the schema:
- Extra fields in the incoming data are ignored.
- A declared field that is missing from the incoming data is left empty for every row.
Testing an injection variable
There is no data to pull, so a template using data injection looks empty in the designer workspace until an integration pushes rows in — the variable shows No data available. Plan for how you will test; the values only appear once the surrounding application supplies them.
Choose how the end user sees it
On the User interface tab, Show variable as controls the end-user presentation:
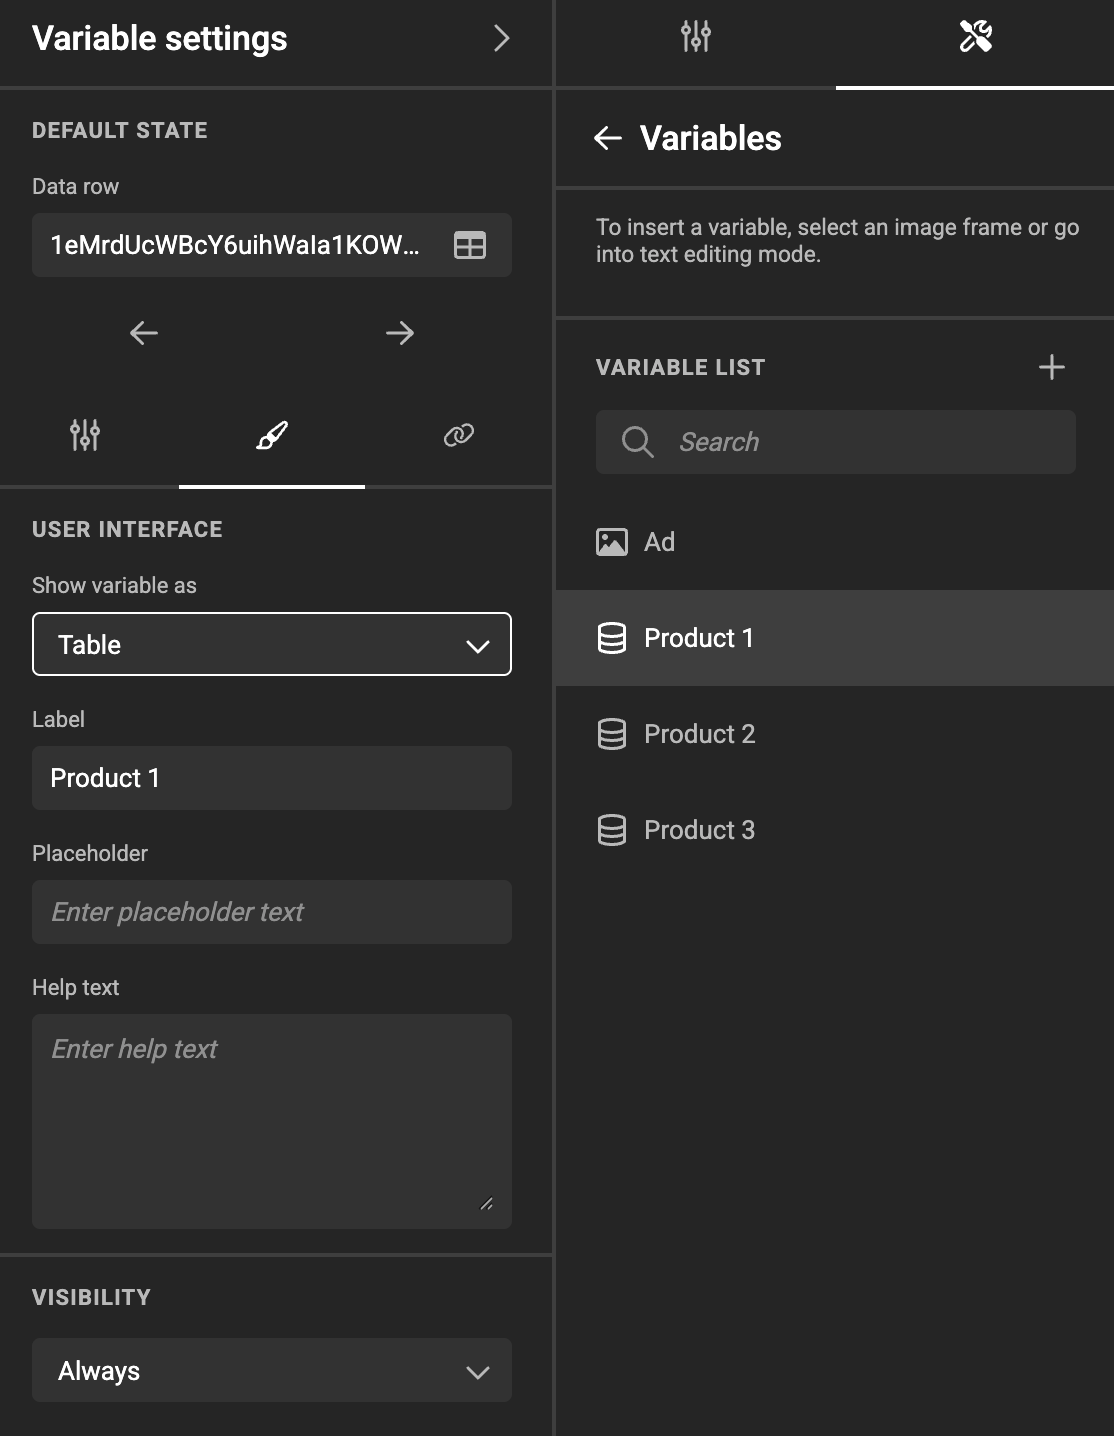
- Table (default) — the end user opens a table of all rows and clicks one, much like the output data source table, but with navigation both forwards and backwards. Nothing else to configure.
- List — the end user picks from a simple dropdown that loads more rows as they scroll. Because a list shows one line per row, you must choose which column supplies that line.
When you select List, a Display column dropdown appears. Pick the column to use as the visible label.
If the data source is not configured yet, that dropdown is disabled with a tooltip — configure the connector or declare your injection fields first, then come back.
If the data model changes
Change the source and GraFx Studio tries to keep your choice. If the new data model still contains the column you picked, the selection is preserved. If it doesn't, the display column is not silently reassigned — the dropdown returns to its placeholder state and you choose again.
The tab also carries the usual presentation fields, which work as they do for every other variable type: Label, Placeholder, Help text, and Visibility (default Always). See Variable settings.
Default state
The Default state section is where you set which row is selected when someone opens the template.
In the designer workspace, GraFx Studio does not fetch data automatically. You open the input, browse the rows with the previous and next controls (or scroll, in List mode), and the row you land on becomes the default row stored in the template.
From then on:
- Opening a project with a default row selects that row.
- Opening a project without one fetches and selects the first row.
Use a record to fill a component
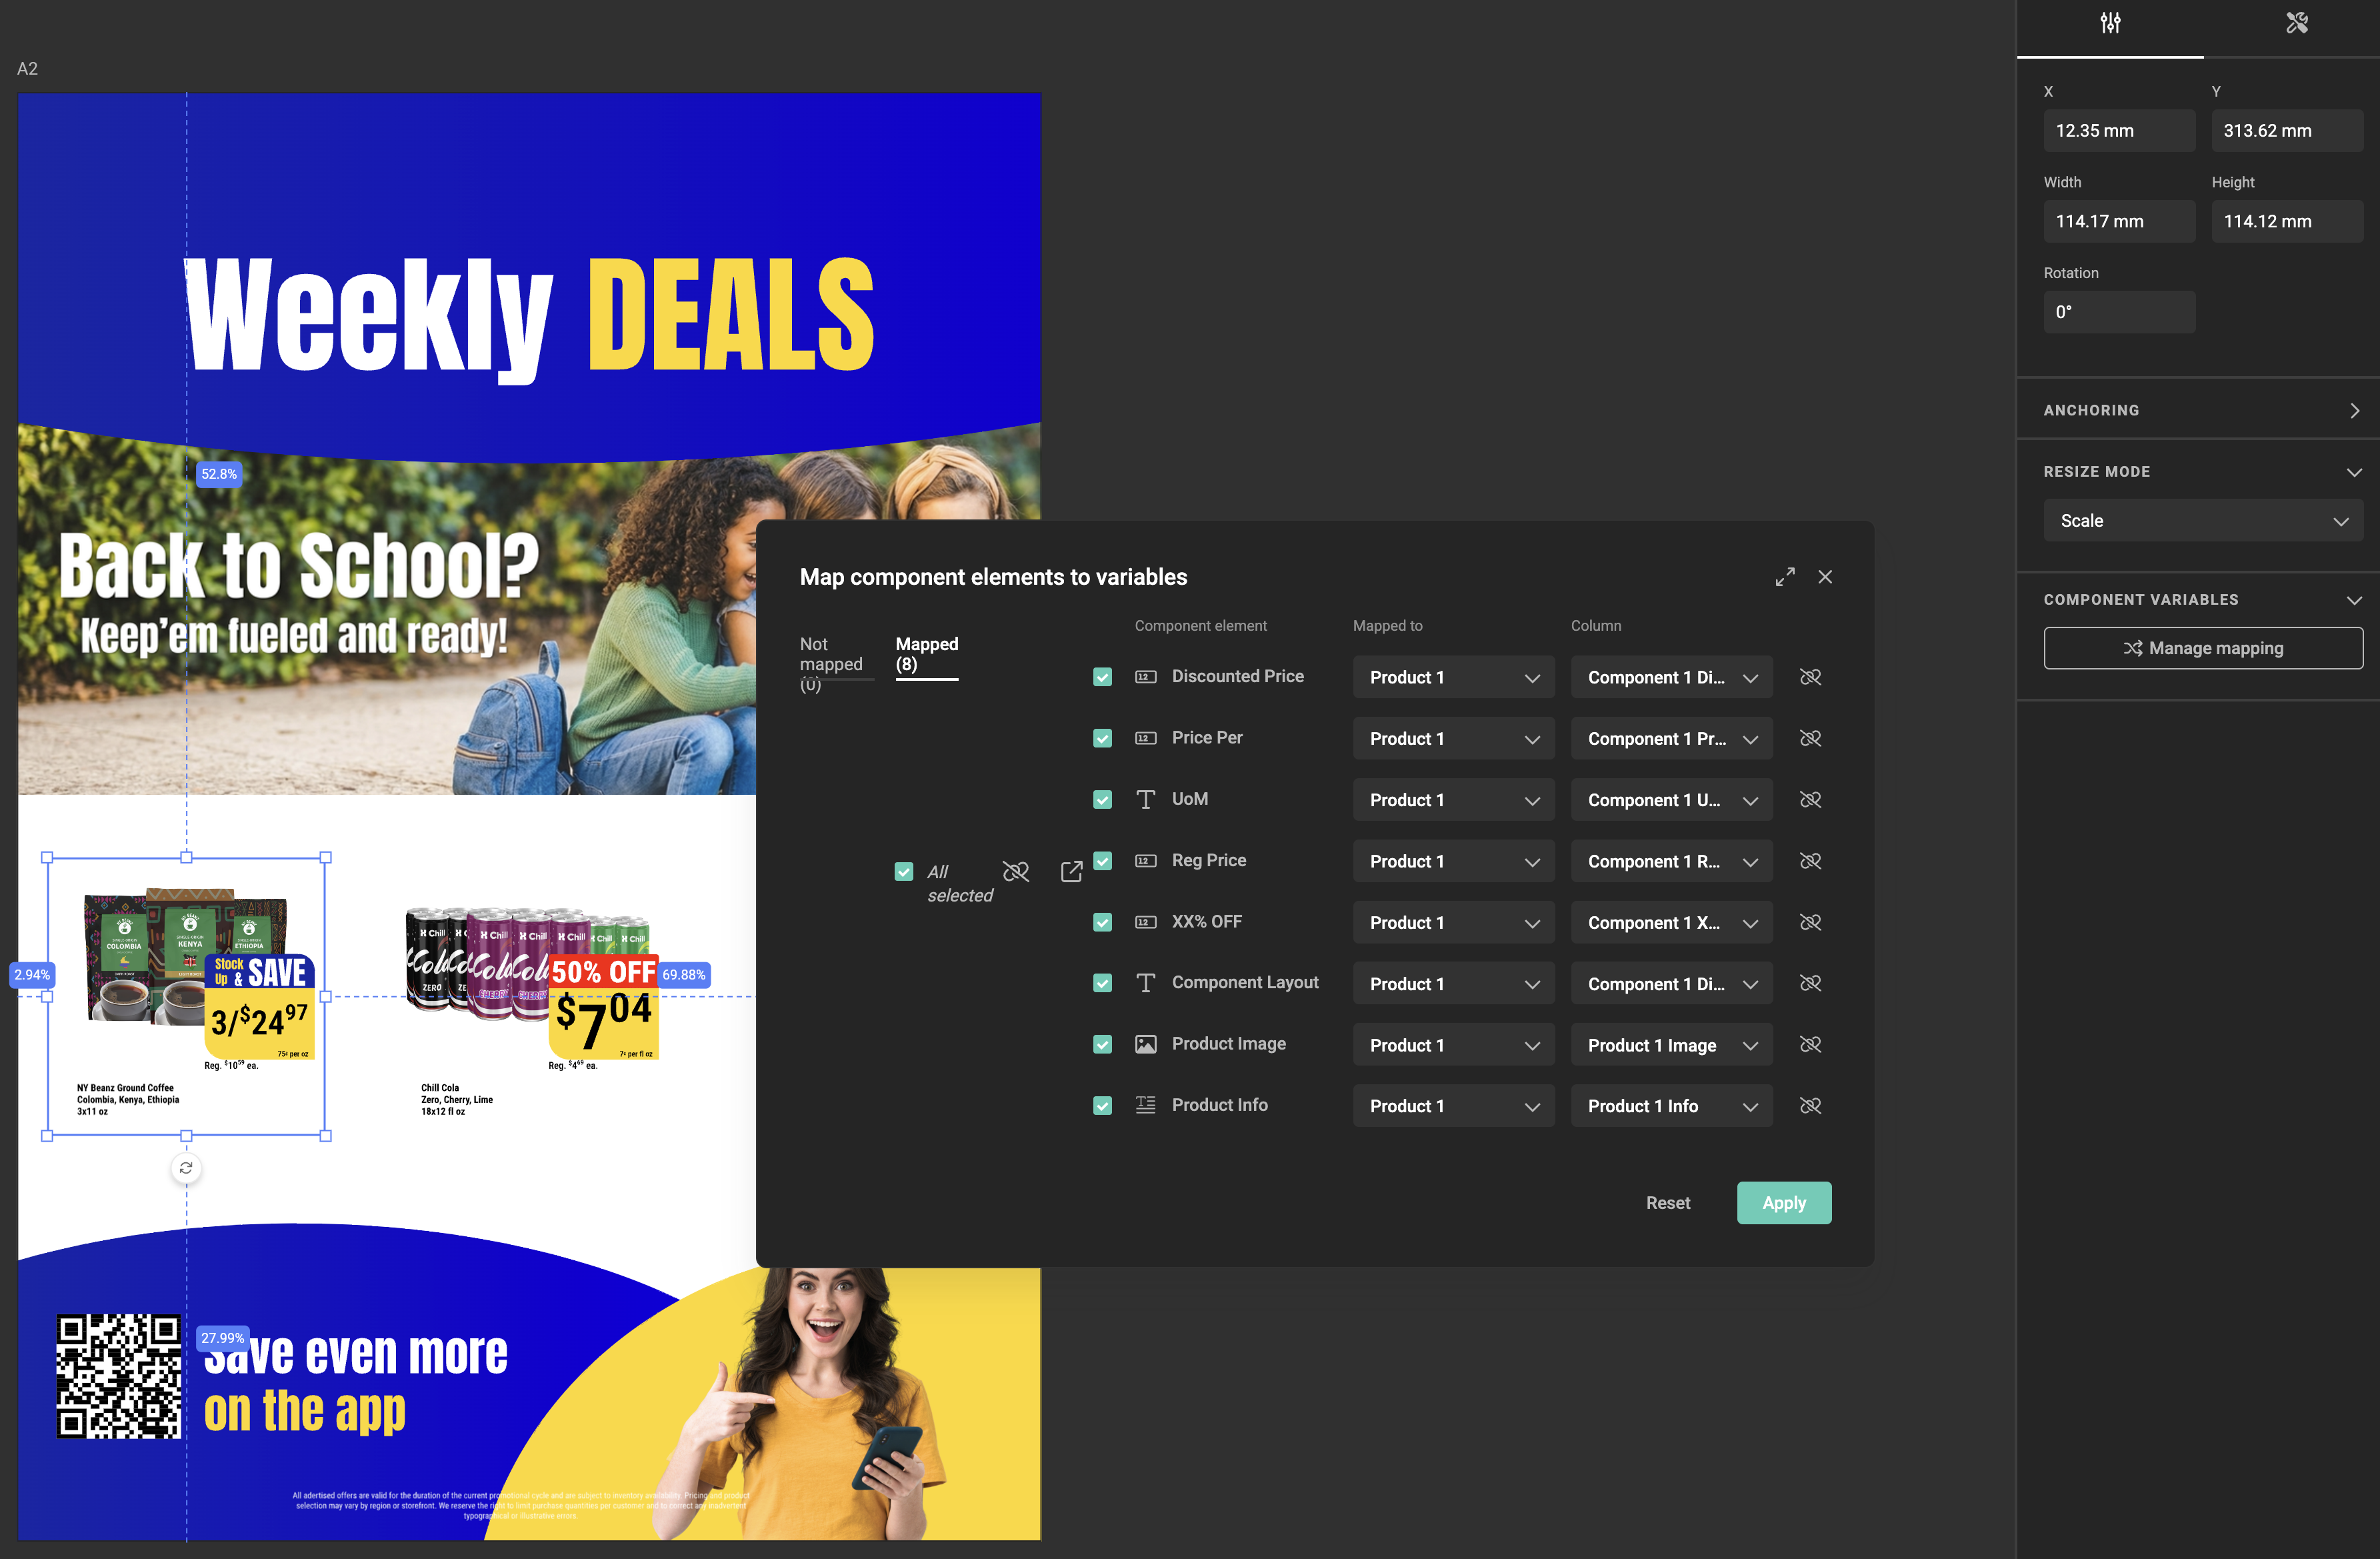
This is how a data source variable actually reaches your design, and it is the only route: a component is filled from one record. A component exposes its own variables; instead of mapping each to a template variable and populating those one by one, you map them straight to the columns of the data source variable. Select one record, and the whole component updates — a product card taking its name, price, and image from the row the end user picked.
Select the component frame, then click Manage mapping in the Component section of the properties panel. The button is disabled — with the tooltip "Select a component to enable mapping." — until a component is selected.
The Map component to variables modal has two tabs, Not mapped and Mapped. For each component variable, choose what it maps to:
- Data source column — pick a data source variable, then one of its columns
- Variable — an existing template variable
- New variable — a template variable created for you
Select the checkbox on the rows you want to change, then click Apply. Reset clears the mappings.
Type compatibility is enforced: a number variable maps only to a numeric column, a date variable only to a date column, and so on. Component image variables can be mapped to a text column, which is how imagery is driven from a record — the column holds the image reference.
Components cannot own a data source variable
Data source is not offered as a variable type inside the component editor. A component receives record data through mapping from the template that places it, which keeps the component reusable across templates that use different data sources.
Keep internal component variables out of the mapping list
Not every variable in a component is meant to be mapped — an intermediate value assembled by an action, or a flag driving a visibility condition, only clutters the mapping list.
In a component variable's general settings, the Available for mapping toggle controls this. It is on by default, so existing components are unaffected. Switch it off and the variable no longer appears in the parent template's mapping list; any mapping configured earlier is no longer applied.
How it behaves
The data is live, not a snapshot
This is the behaviour most likely to surprise people, so it's worth being explicit about.
Data refreshes on every open
A data source variable stores a reference to the selected row, not a copy of its values. The data is refreshed every time the template or project is opened, and again whenever a query parameter or a variable linked to one changes.
So if a price is 0.56 when a project is saved and 0.60 in the source system two days later, reopening that project shows 0.60. There is no snapshot mode. If you need values frozen at a point in time, that has to be handled on the data supply side — by publishing a stable, versioned dataset rather than a live one.
The selected row survives a refresh
Refreshing the data would be disruptive if it reset the user's choice, so GraFx Studio tries to hold onto it. This happens per project as well as in the template, so two projects from the same template keep their own selections.
Behaviour on refresh:
- The selected row is looked up again and stays selected — even if it has moved to a different position in the table.
- If it can no longer be found, the selection falls back to the first row.
- If the source returns no data at all, there is no selected row.
How the row is identified depends on the source. Connectors that expose a stable row ID are matched on that ID. Sources without one fall back to position, which means a refresh that reorders rows can land the user on different data.
When the data fetch fails
The variable shows an error and offers a retry. It does not silently fall back to previously loaded values — an error state is better than a design that looks correct but is showing yesterday's prices.
Empty and invalid values
Values that arrive empty or invalid follow the standard data exception rules, but what you see depends on where the data is applied.
In the Studio UI, the template stays usable:
- Text, list, image and date variables are cleared. An invalid value also shows a toast message.
- Number and boolean variables fall back to their default value, with a toast message.
In output, there is no fallback: if one or more errors occur while applying a record, the entire record fails, and the reason appears in the error report on the output task page.
See Handling data exceptions for the full rules.
In output
A data source variable does not turn one document into a batch. One selected row produces one output, rendering exactly what was on screen. For batch production across many rows, use an output data source.
If a required data source variable has no selection at output time, the output fails and the reason appears in the error report on the output task page. See Output tasks.
Example: cascading selection
Three dropdowns, each backed by its own data source variable in List mode.
The first lists regions. Its selected row feeds a query parameter on the second variable, which lists the stores in that region. The second feeds the third, which lists the products stocked by that store. Each selection narrows the next, because the query parameter on each variable is linked to the one before it rather than set statically.
This works precisely because data refreshes when a linked variable changes — the second and third lists re-query themselves rather than going stale.
Related
- Data connectors — how data reaches a template, and the output data source
- Defining template variables — all variable types and their settings
- Use components in a template — placing components and mapping their variables
- Data Connector Fundamentals — Data Source Variable use case — the developer side
- Build a Data Connector — Data Source Variable use case — adding the capability to an existing connector